GuideMac · From Terminal
Set up Naytto on a Mac from Terminal
For a Mac you set up from Terminal, at the Mac itself or over SSH, even a Mac with no display. One command installs Naytto and starts adding the Mac. You approve the Mac in a browser, type yes in Terminal, allow two macOS permissions, then connect from a browser on another device. It takes about 15 minutes.
Before you start
- A Mac with Apple silicon running macOS 15 or later, and an administrator account on it, with its account name and password. The install command asks for that password once.
- Someone signed in at the Mac as you. Naytto runs in the desktop of the person signed in at the Mac’s screen, so you run the command as that person. On a Mac with no display, set up automatic login in System Settings › Users & Groups. Automatic login needs FileVault off: with FileVault on, someone has to sign in at the Mac after every restart before Naytto can run.
- A terminal on the Mac: Terminal at the Mac, or SSH from another computer, which needs Remote Login on in System Settings › General › Sharing.
- For a Mac with no display, Screen Sharing already on in System Settings › General › Sharing, switched on there by someone at the Mac. It lets you allow Naytto’s two permissions from your browser. Without it, you plug in a display, keyboard and mouse for the two minutes that step takes.
- An email address. If you don’t have a Naytto account yet, your first sign-in creates one and starts your free 14-day trial.
- A passkey or an authenticator app for your account. If you have neither, your browser offers to save a passkey when you approve the Mac.
- Another device with a browser, such as a laptop, tablet or phone, to approve the Mac and to connect from.
The same command is on the download page. Sitting at the Mac and rather not use Terminal? Follow Set up Naytto on a Mac instead.
Install Naytto
One command downloads Naytto, puts it in Applications, sets it to open at login, then starts adding the Mac to your account.
01Open a terminal on the Mac
At the Mac, open Terminal from Applications › Utilities.
From another computer, connect over SSH as the person signed in at the Mac, with your account name and the Mac’s name:
ssh sam@Sams-Mac-mini.local
The first time, ssh asks whether you want to continue connecting: type yes. Then type the Mac’s password when it asks. Once you see the Mac’s prompt, everything that follows runs on the Mac.
02Run the install command
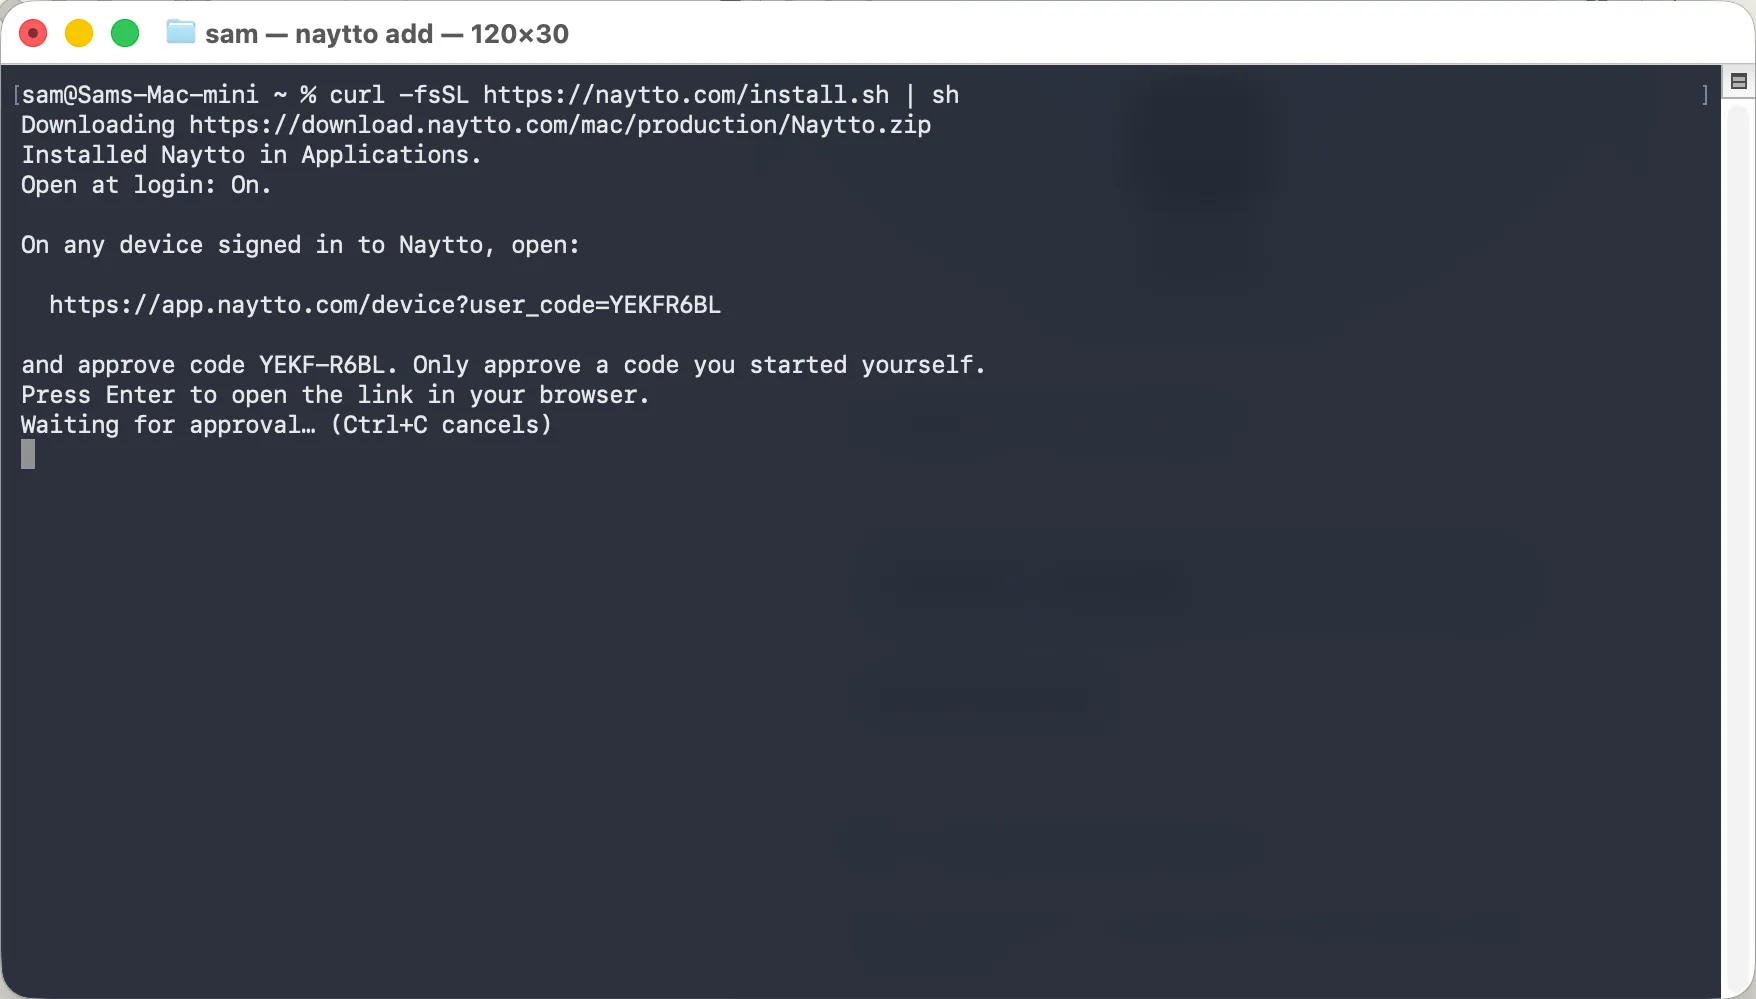
Paste this line and press Return:
curl -fsSL https://naytto.com/install.sh | sh
It downloads Naytto and puts it in Applications. Terminal then asks for the Mac’s password, shown as Password:, to install the naytto command. Type it and press Return; nothing shows as you type.
Next it switches on Open at login, so Naytto opens whenever you log in. Then it prints a link and a code and waits for you to approve them:
  https://app.naytto.com/device?user_code=YEKFR6BL

and approve code YEKF-R6BL. Only approve a code you started yourself.
Leave Terminal open: it asks one more question once you approve.
03Open the address it shows
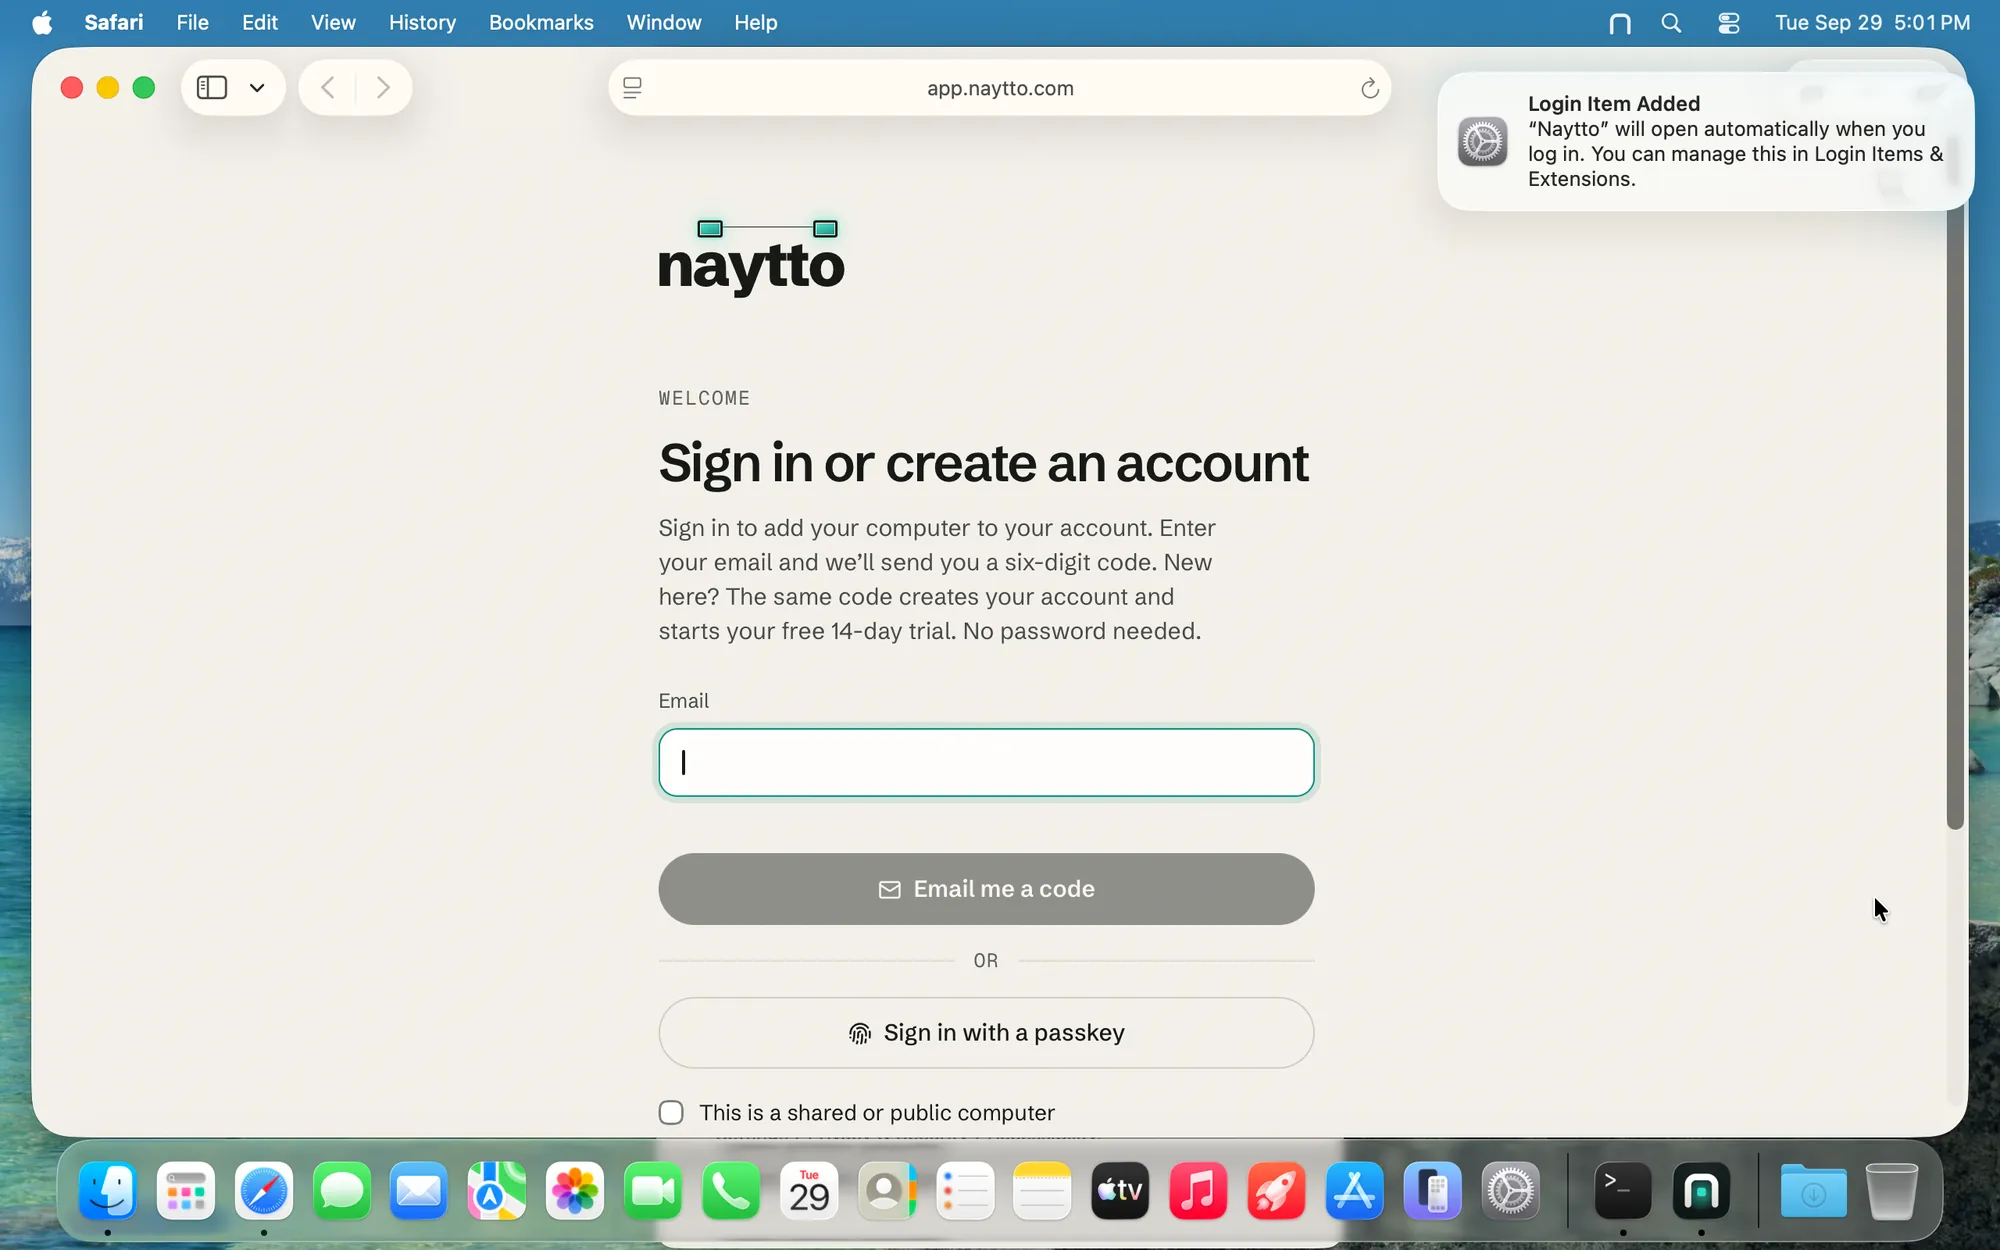
At the Mac, Naytto opens the link in your browser by itself, and the Naytto window shows the same code under Approve in your browser. If the browser doesn’t open, press Return in Terminal. macOS also says Naytto will open automatically when you log in.
Over SSH, the command can’t open a browser, and the line under the code reads ⌘-click or Ctrl-click the link to open it. Open the link in a browser on any device, such as your phone or the laptop you’re typing on.
Add it to your account
The installer carries straight on: you approve a code in a browser, then allow your account in Terminal.
04Sign in with your email
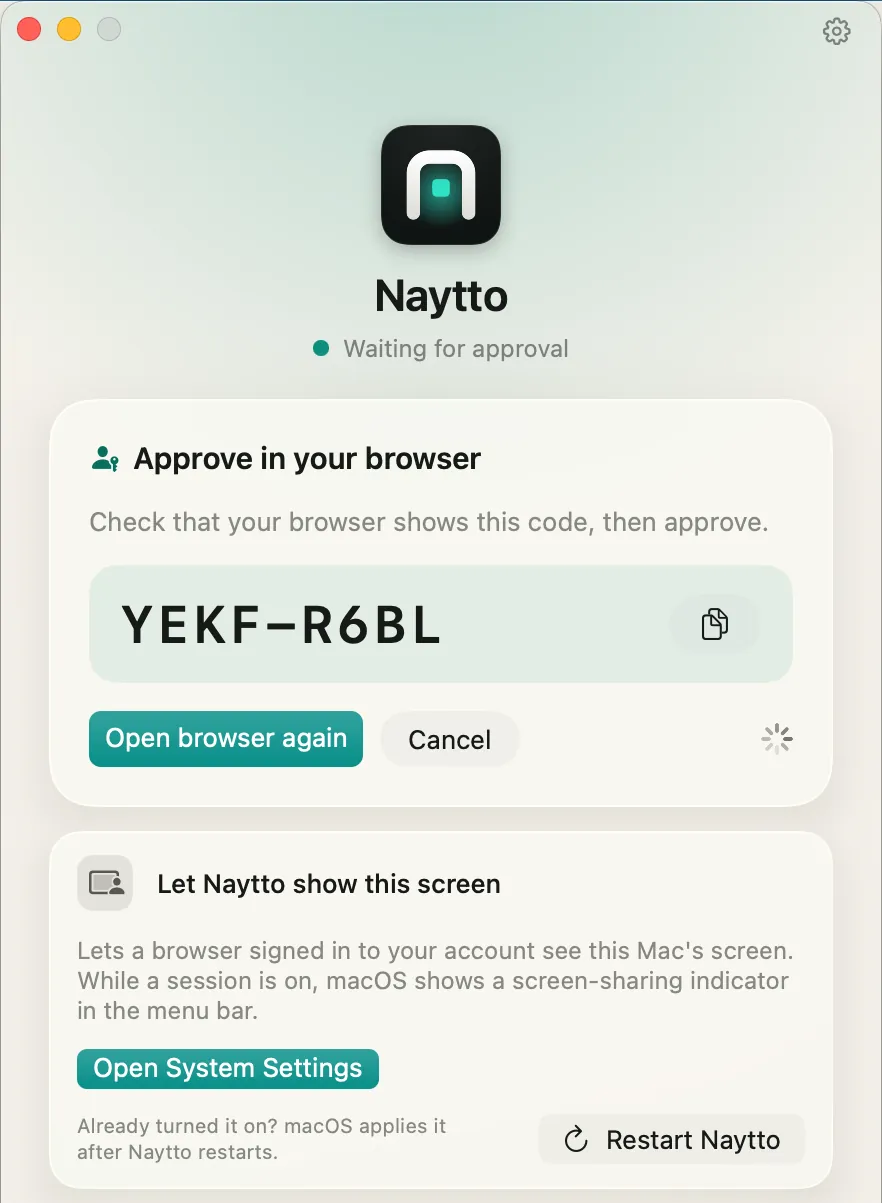
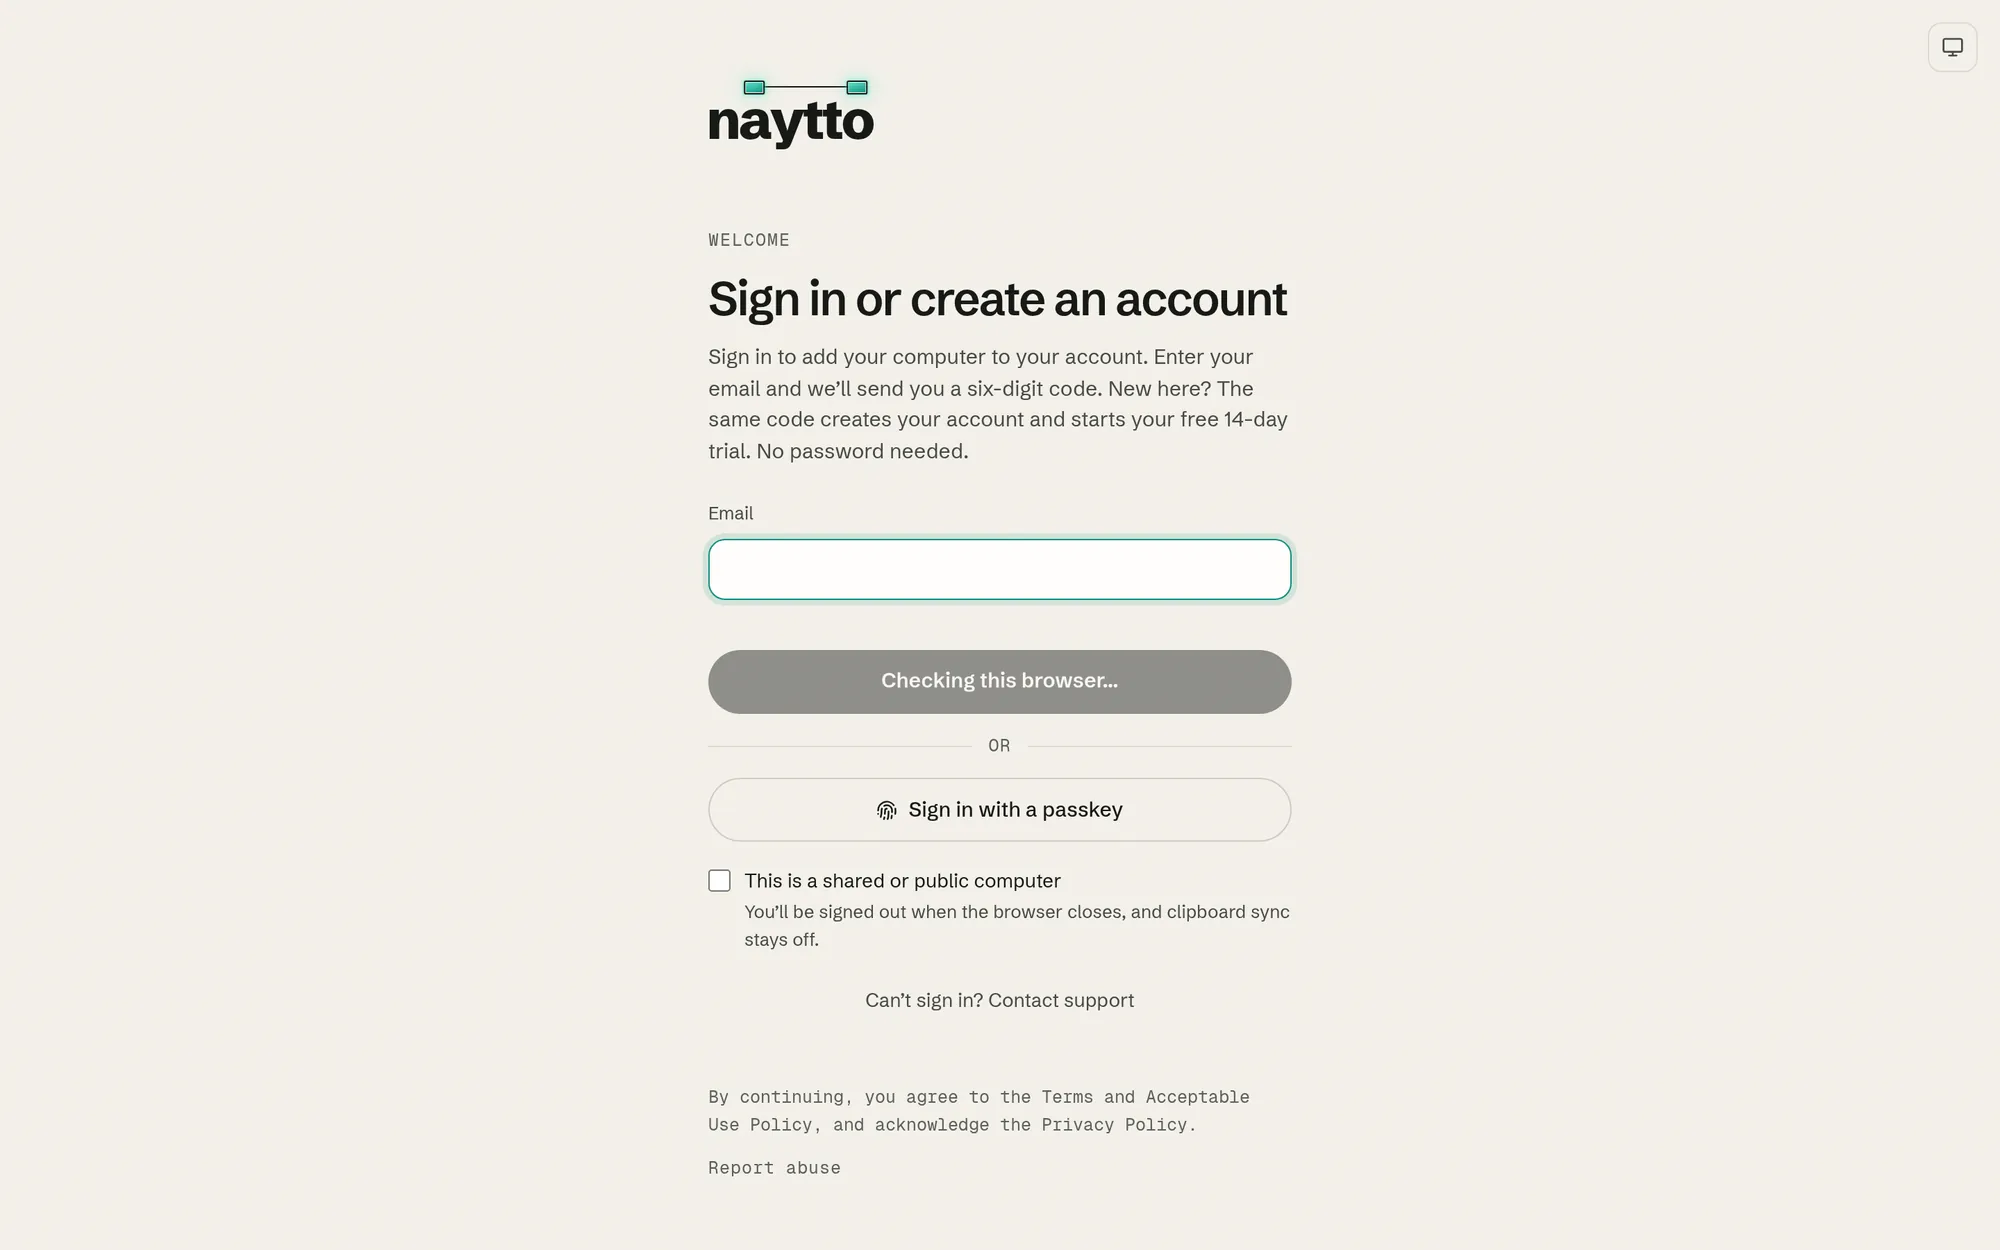
If that browser isn’t signed in to Naytto, it asks you to. Type your email address and choose Email me a code. The button reads Checking this browser… for a moment first; if a Verify you are human box appears, tick it. New to Naytto? The same code creates your account and starts your free 14-day trial. A browser that’s already signed in goes straight to step 06.
05Enter the code from the email
Naytto emails you a six-digit code; the subject line starts with it. Type it in Sign-in code and choose Sign in. The code expires in 10 minutes. If you don’t see the email, check your spam folder.
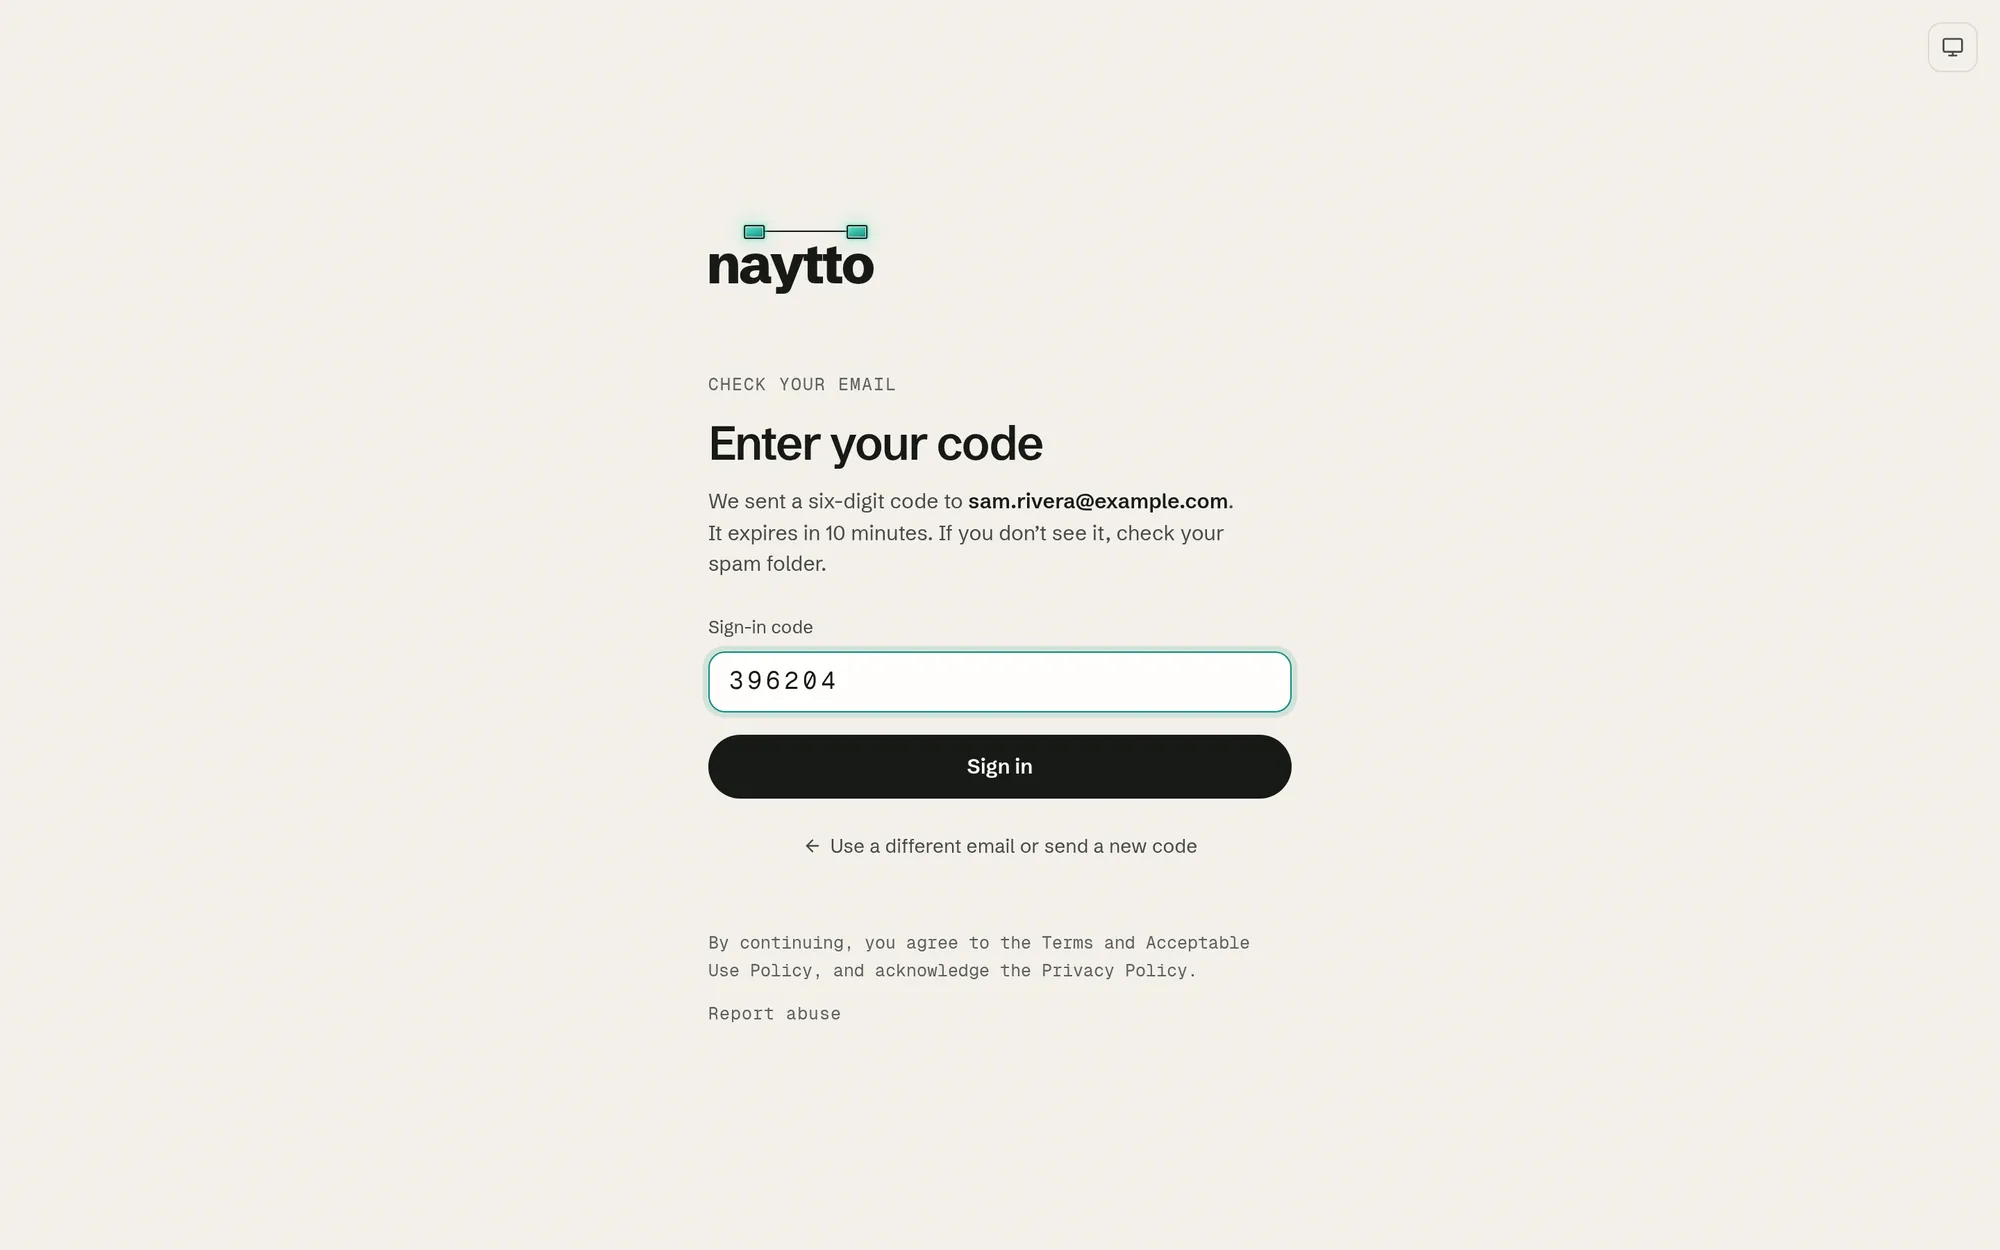
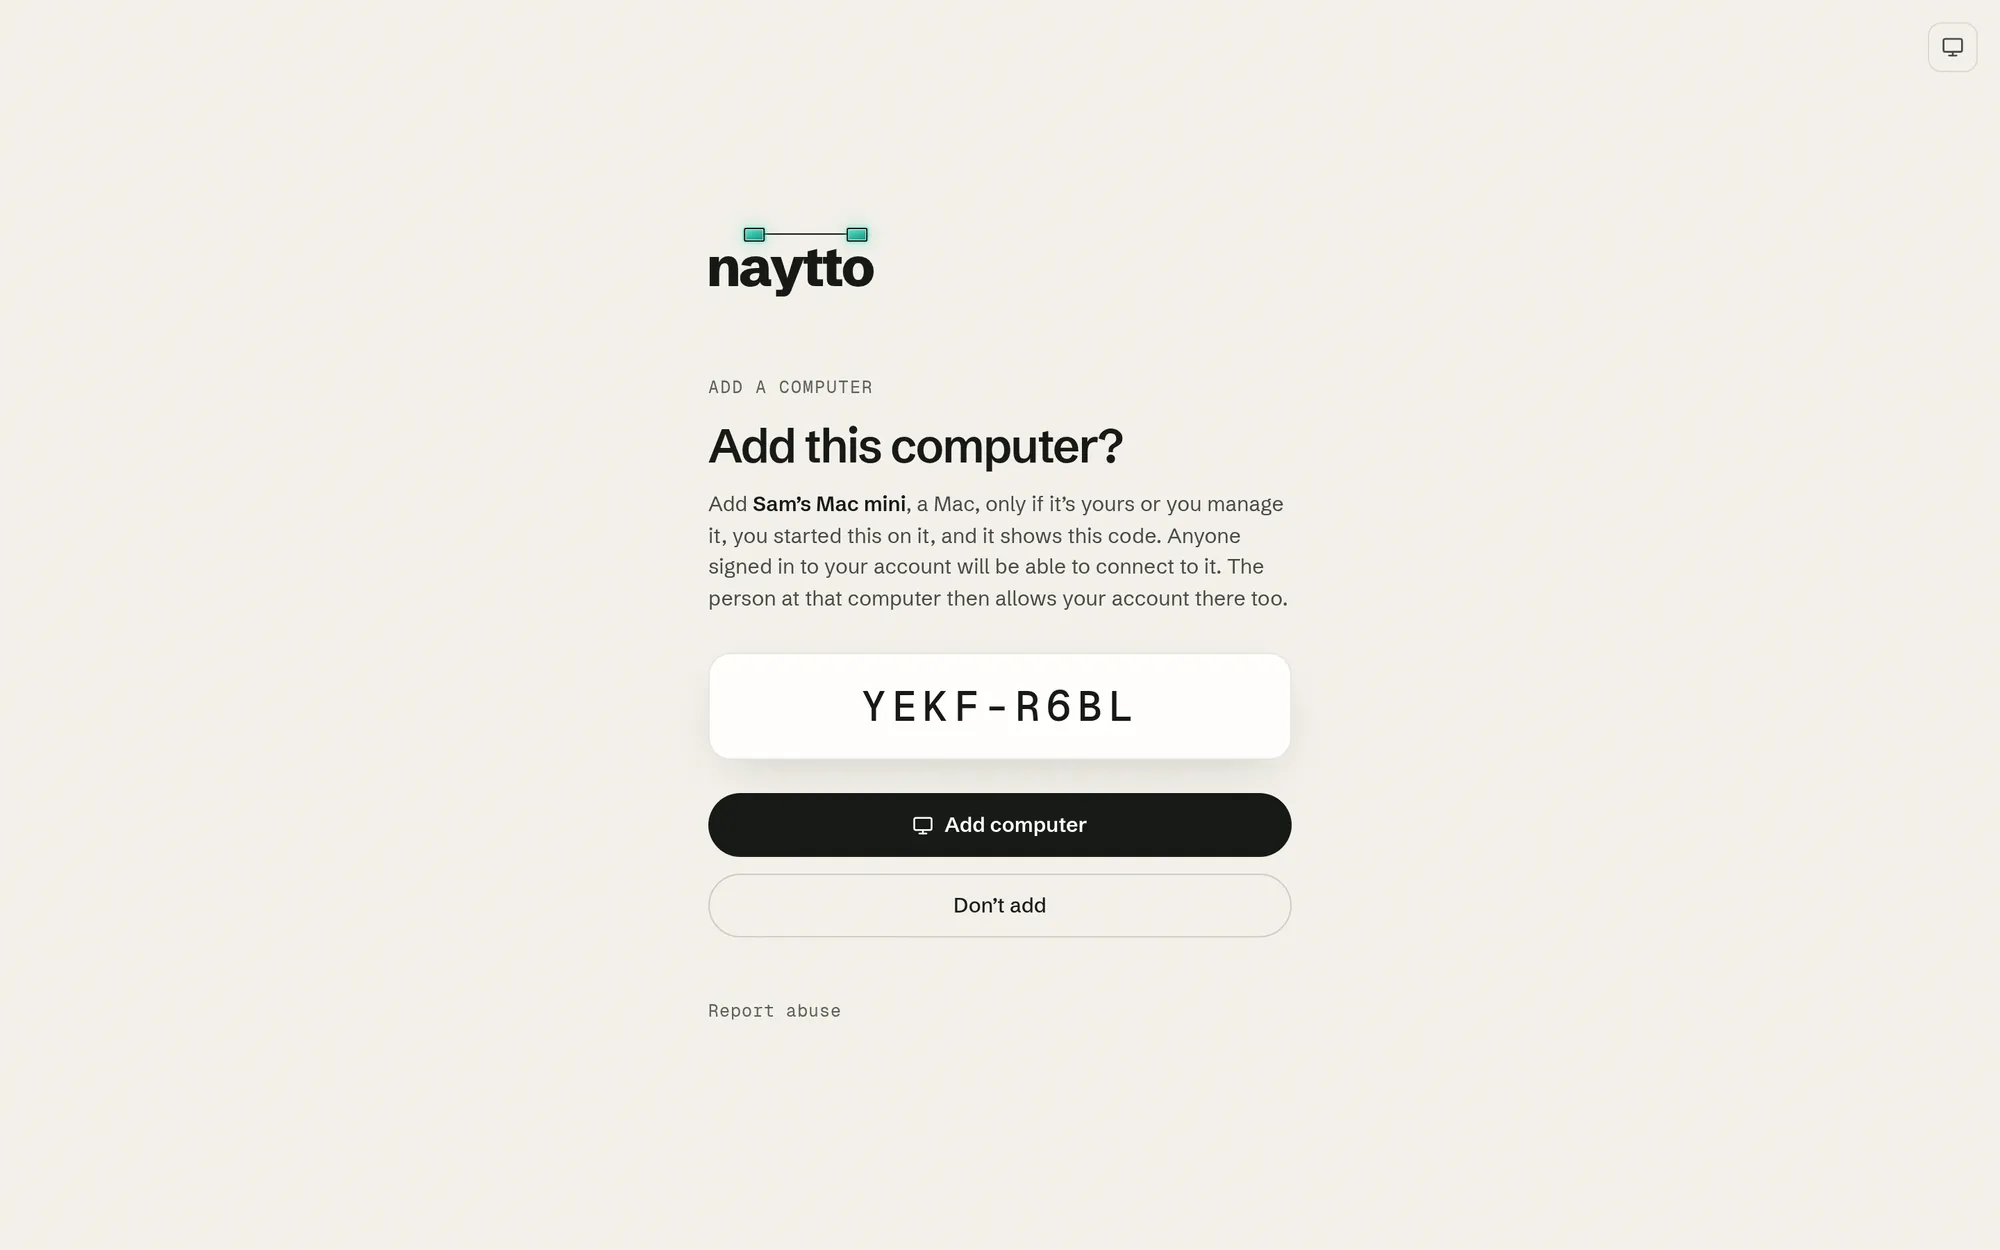
06Check the code and add the Mac
The page asks Add this computer? and names the Mac, here Sam’s Mac mini. Check that its code matches the one in Terminal, then choose Add computer. Only approve a code you started yourself.
07Confirm it’s you
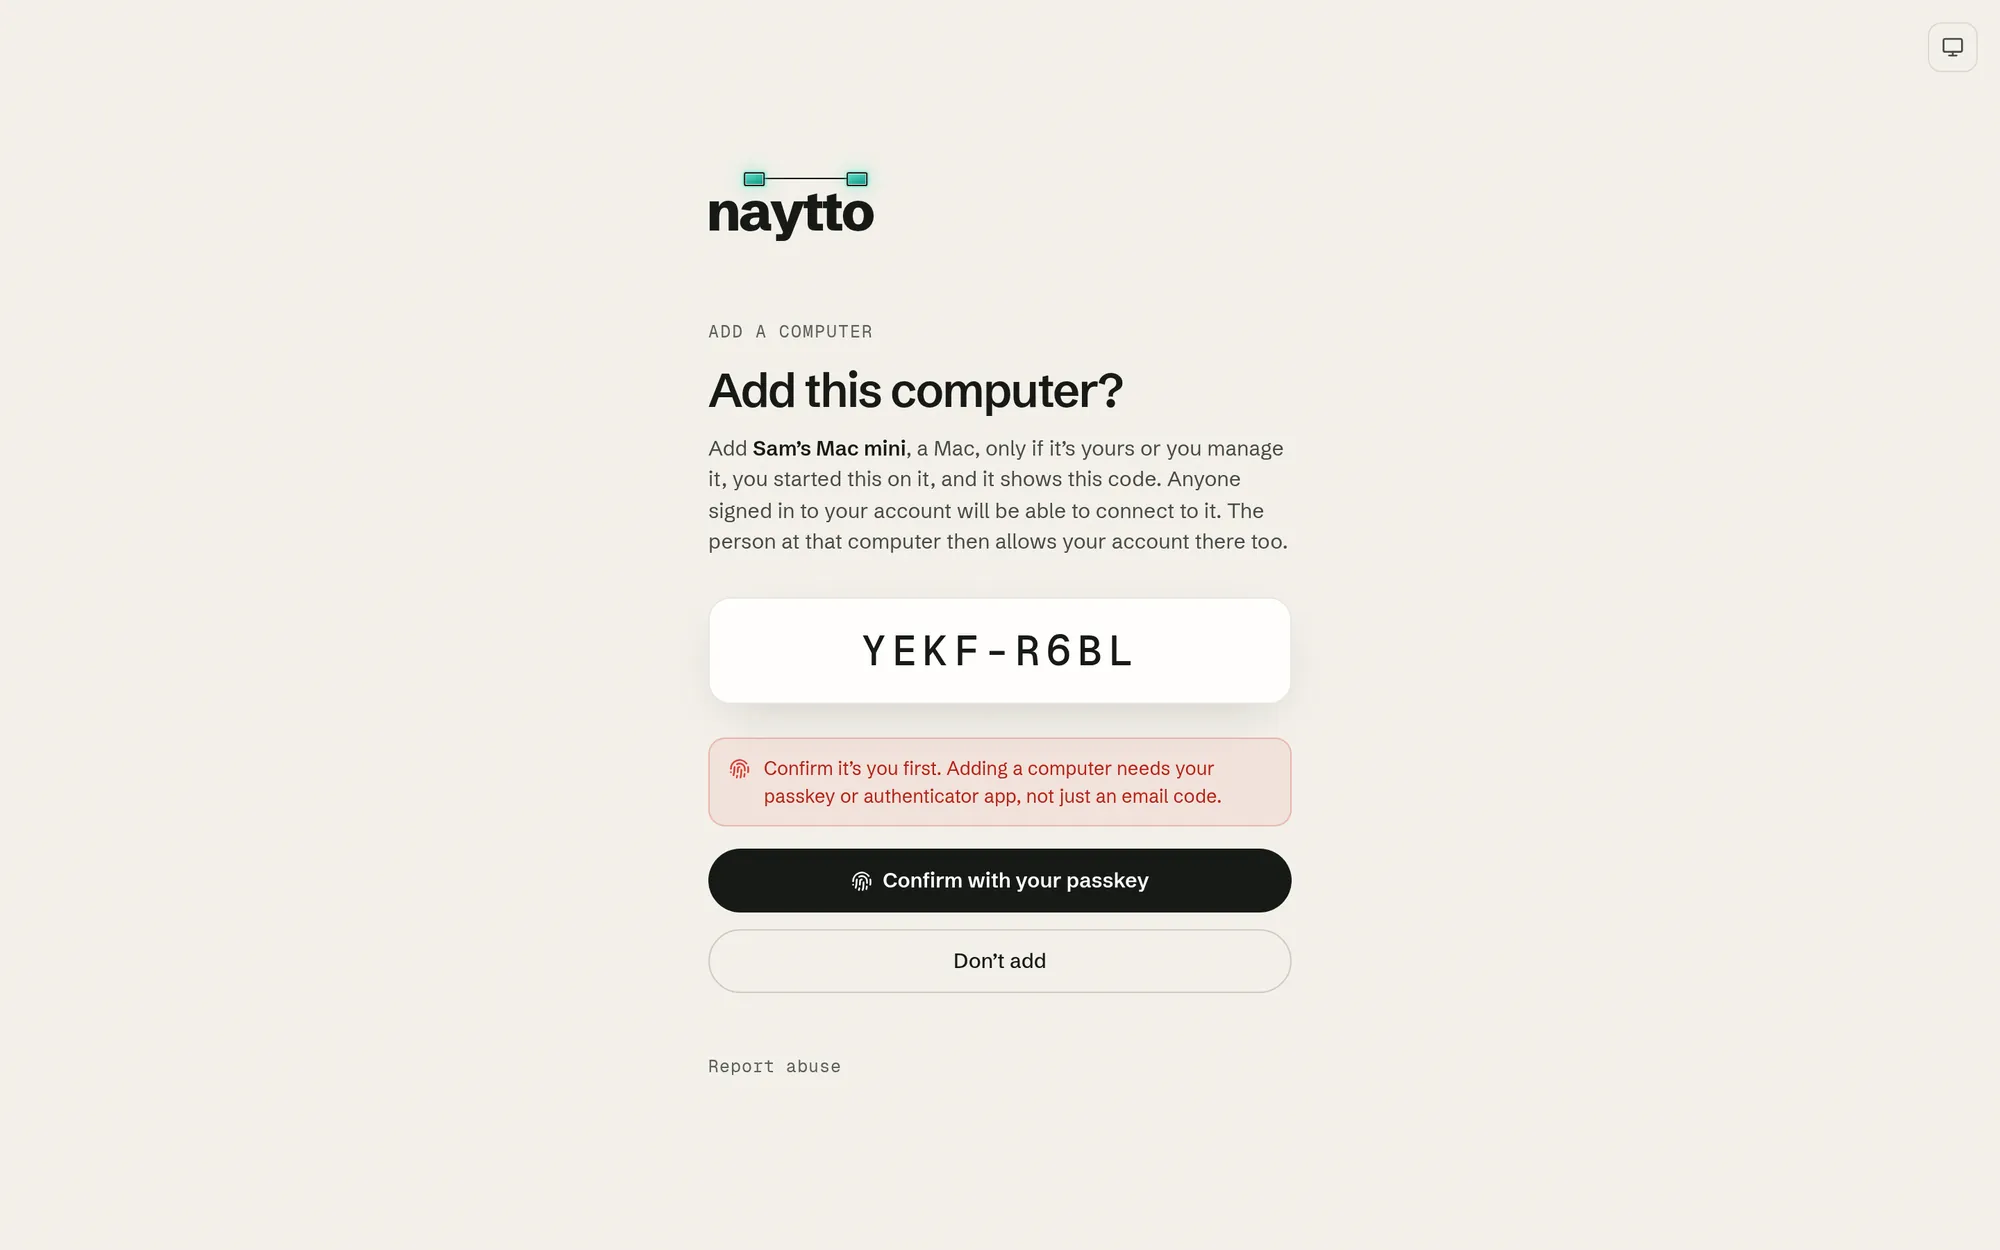
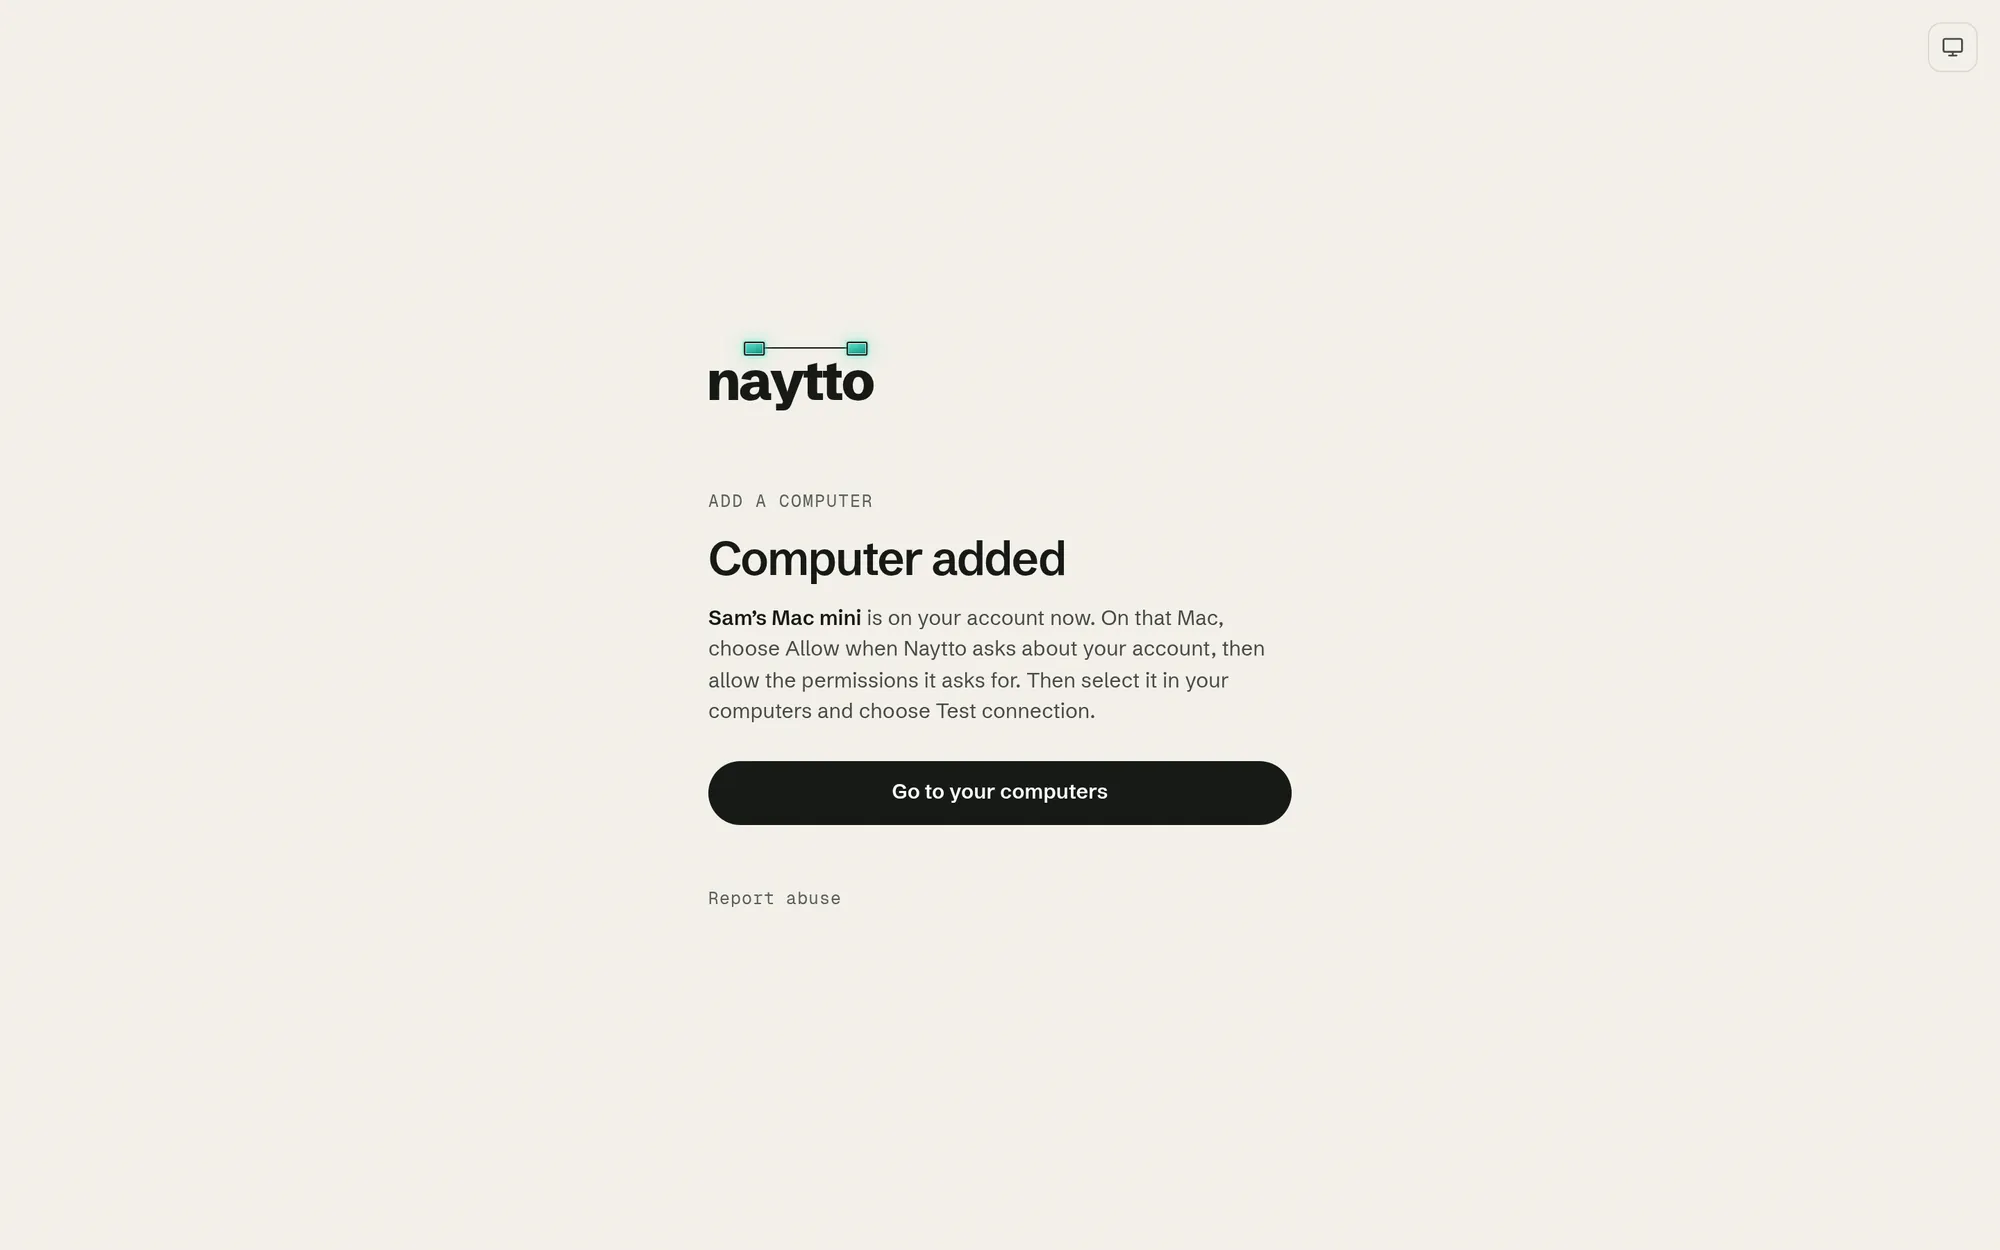
Unless you signed in with your passkey or authenticator app in the last 10 minutes, the page then asks you to confirm it’s you. Choose Add a passkey to confirm: your browser asks to save a passkey, then to use it. Accept both, and the page says Computer added.
Already have a passkey? The button reads Confirm with your passkey, and your browser only asks you to use it. With an authenticator app, you can choose Sign in again with your authenticator app instead.
08Type yes in Terminal
Back in Terminal, Naytto says who approved the Mac and asks Allow this account to control this Mac? Check that the email address is yours, then type yes and press Return. For a new account, Naytto waits a few seconds before it asks, so you read the warning.
sam.rivera@example.com approved adding this Mac.

Allow this account to control this Mac?
Allow? Type yes, no, or report: yes
At the Mac, the Naytto window asks the same question; answering in either place is enough.
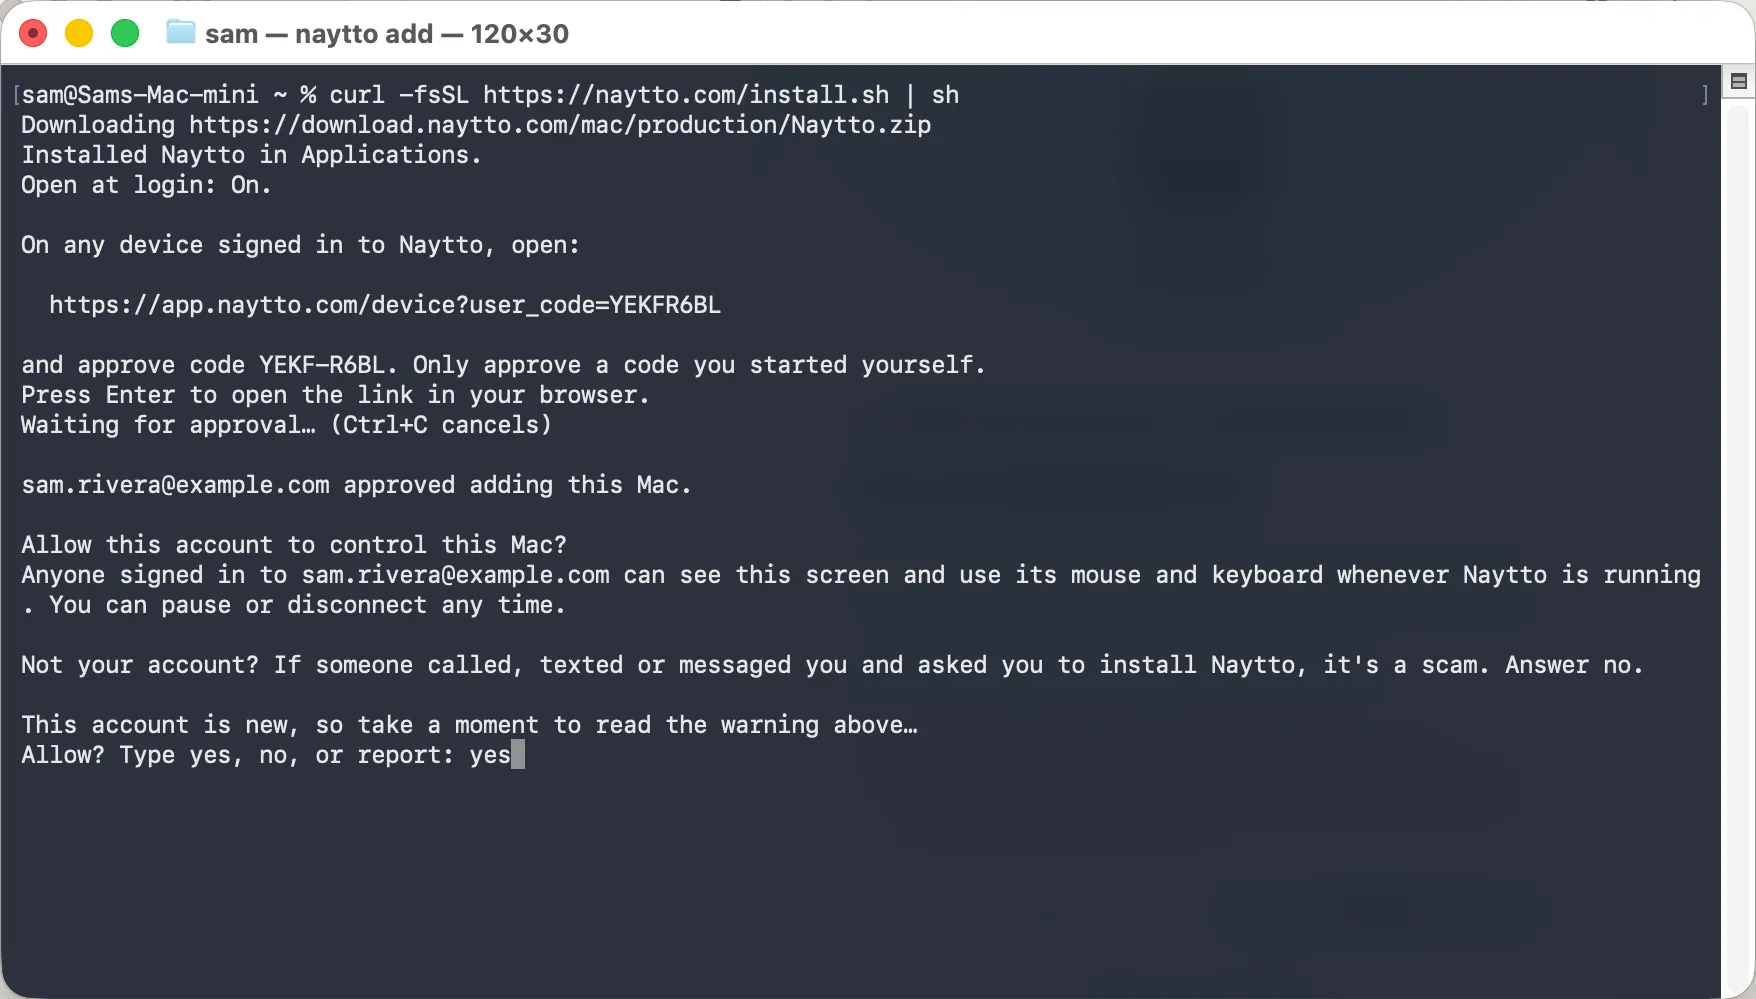
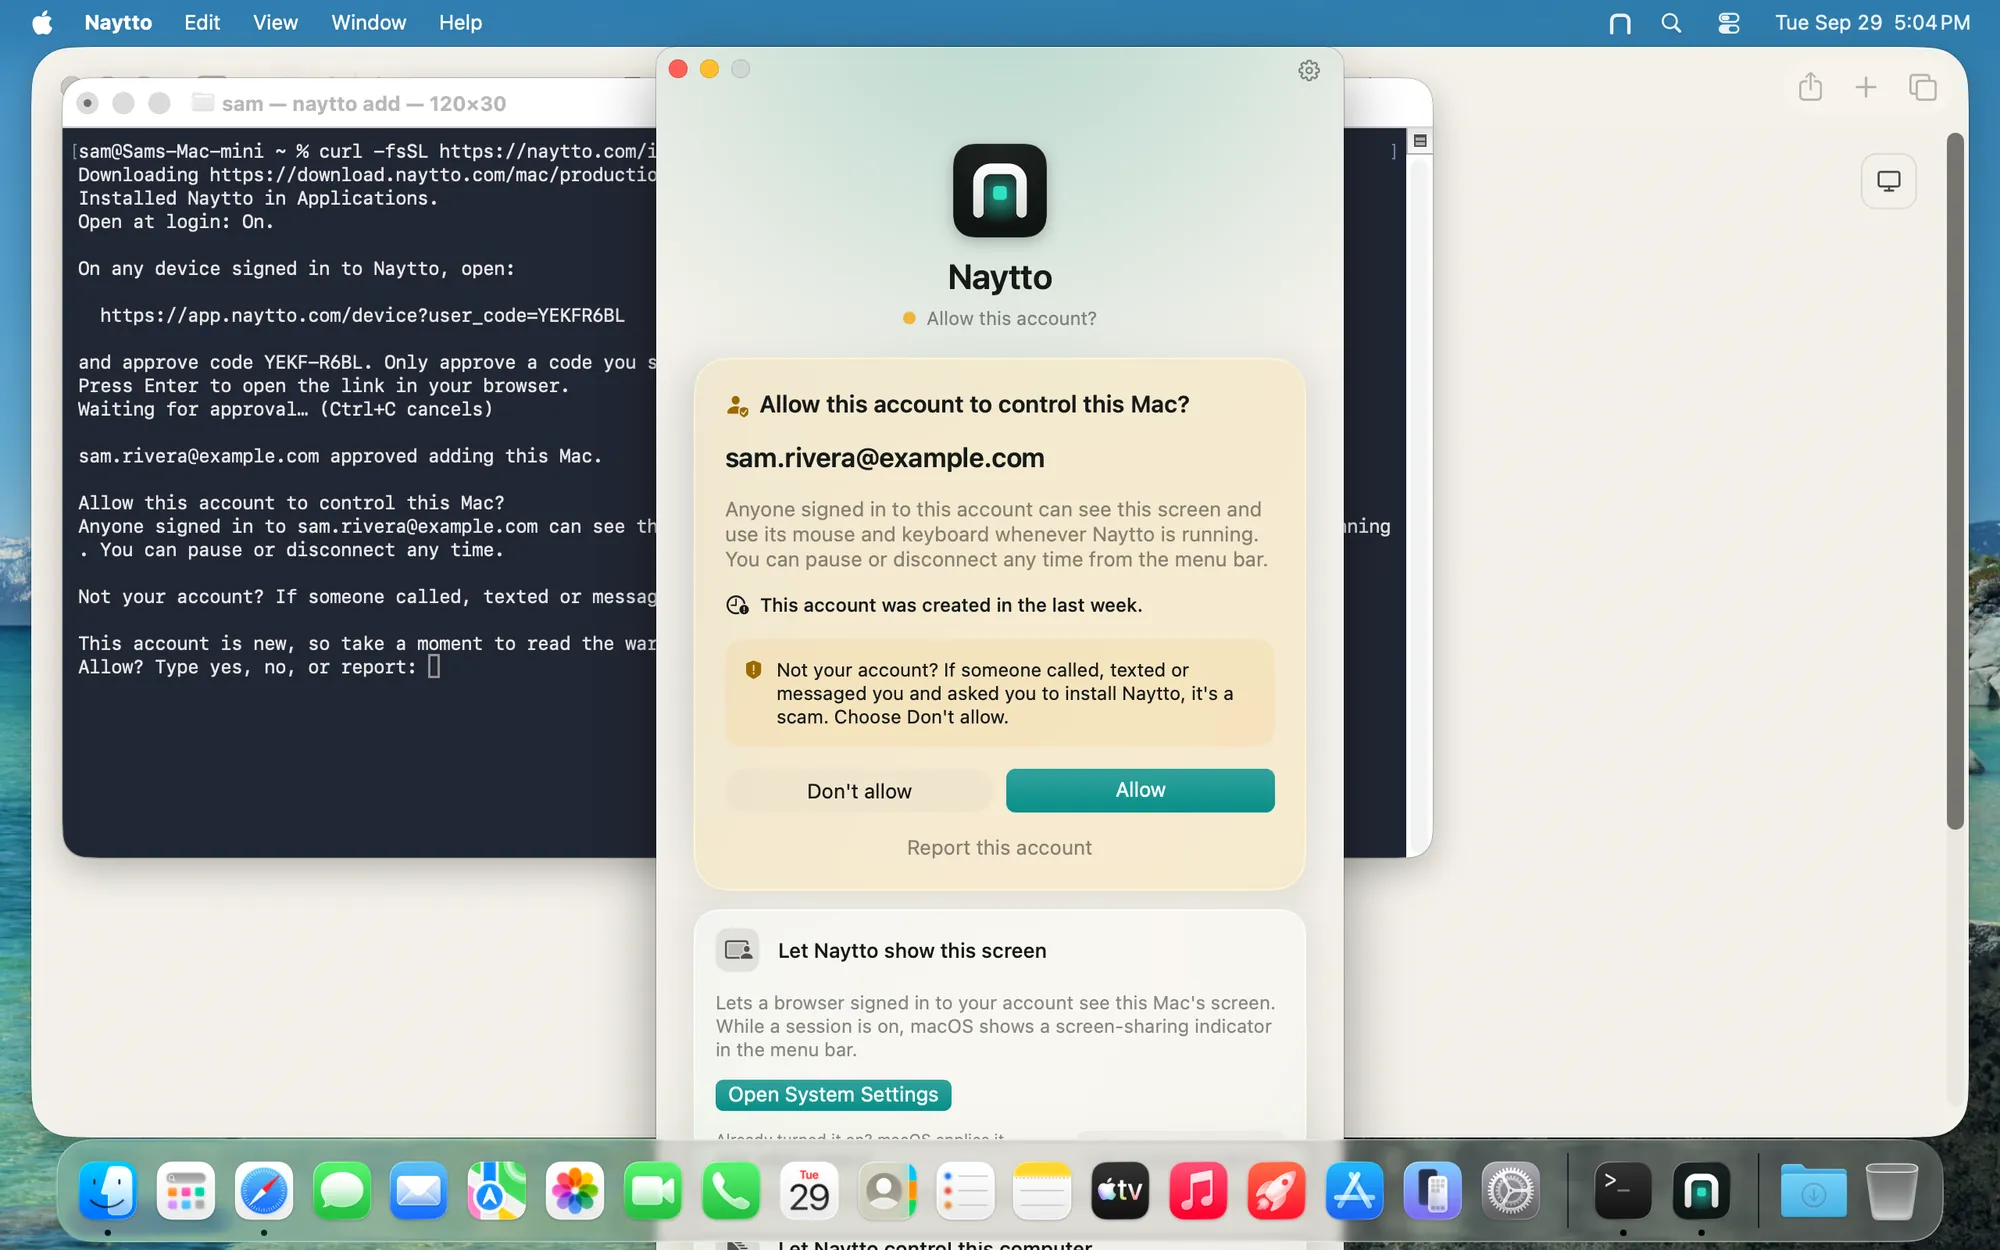
Only add your own Mac. If the email address isn’t yours, or someone called, texted or messaged you and asked you to install Naytto, it’s a scam: type no, or report to have Naytto review the account.
Allow the two permissions
Browsers can’t connect until macOS lets Naytto show the screen (Screen Recording) and use the mouse and keyboard (Accessibility). macOS lets only someone looking at the Mac’s screen switch them on, so nothing can do it from Terminal. At the Mac, follow steps 09 and 10. For a Mac with no display, follow steps 11 to 19 from your browser instead.
09Allow them at the Mac
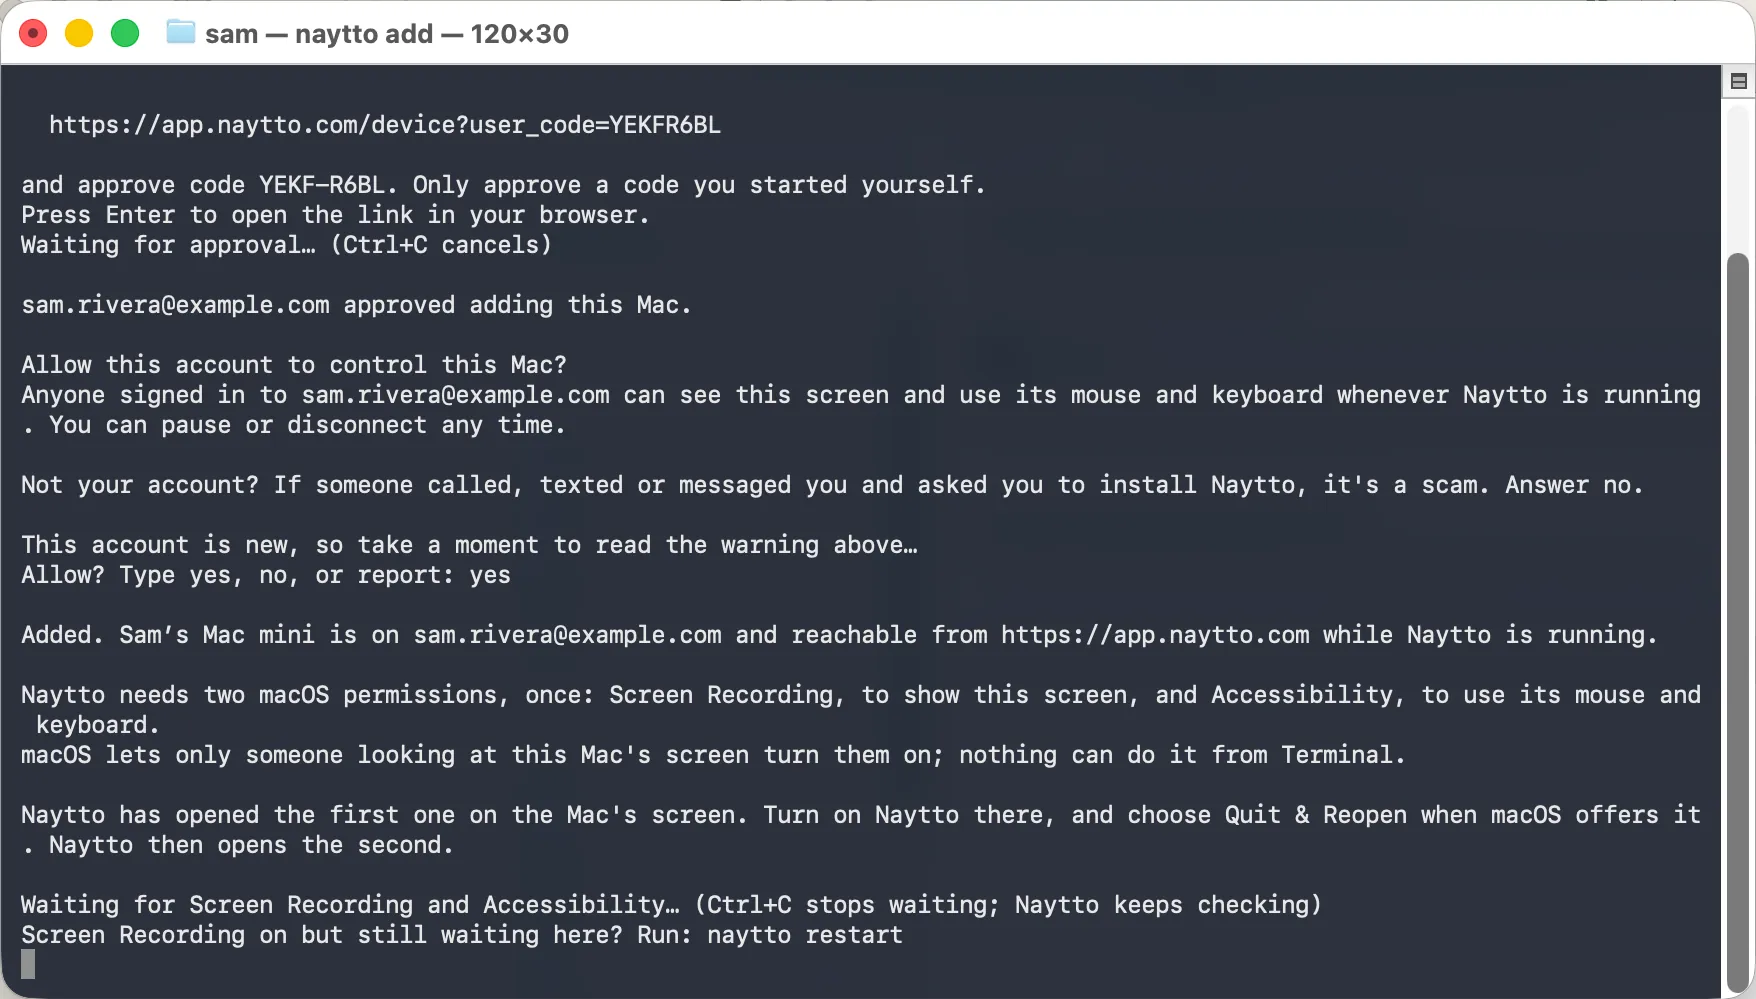
After yes, Terminal says the Mac is added, explains the two permissions and waits:
Added. Sam’s Mac mini is on sam.rivera@example.com and reachable from https://app.naytto.com while Naytto is running.

Naytto needs two macOS permissions, once: Screen Recording, to show this screen, and Accessibility, to use its mouse and keyboard.
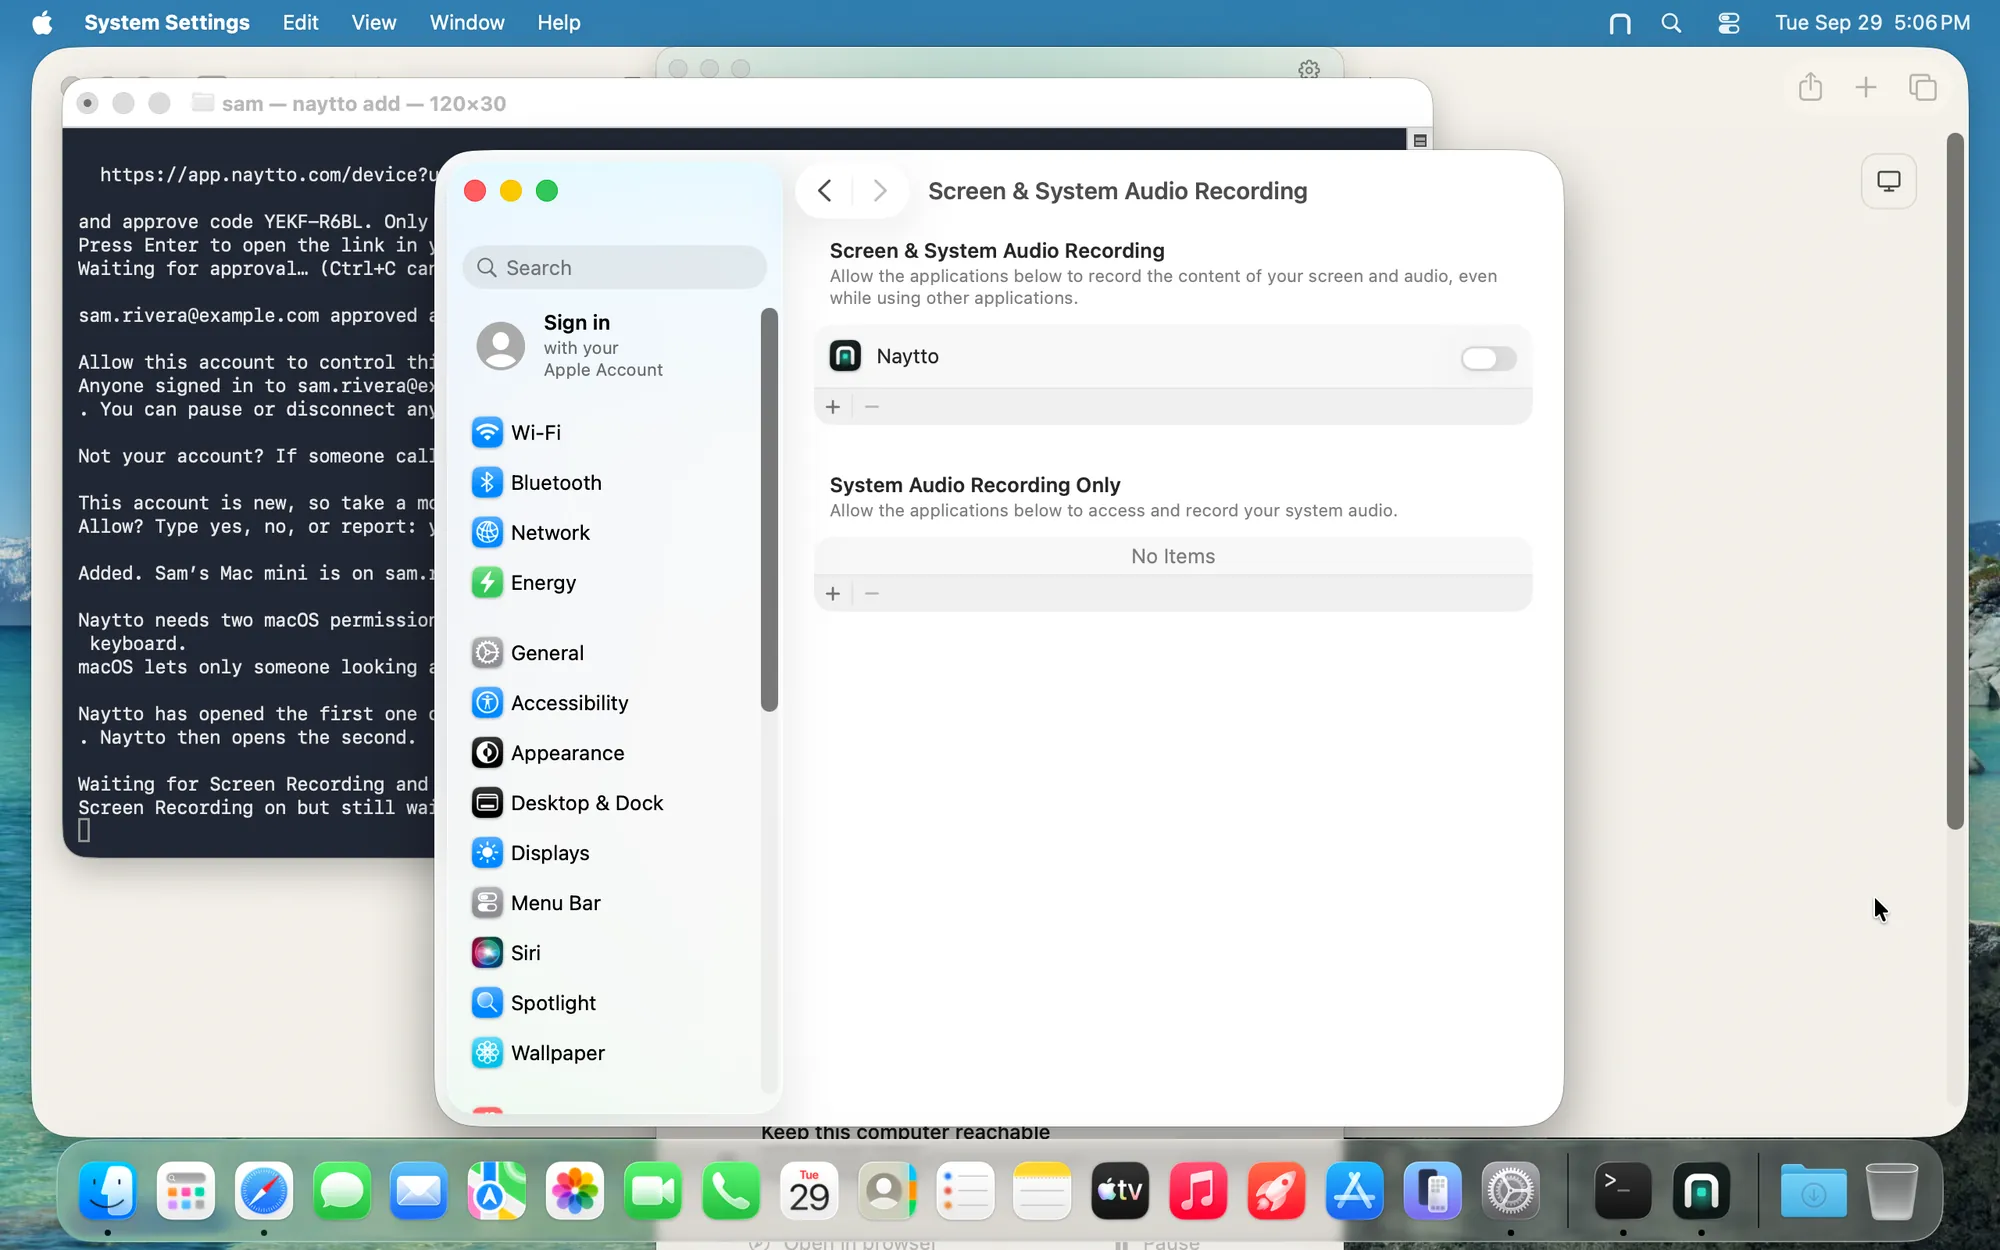
On the Mac’s screen, System Settings opens at Screen & System Audio Recording with Naytto listed. Turn on Naytto there, then in Accessibility, which Naytto opens next. The app guide shows each click.
Once both are on, Terminal stops waiting and the Naytto window reads Ready.
10Open them again with naytto permissions
Closed System Settings, or pressed Ctrl+C while Terminal waited? The Mac stays on your account. Run this, and Naytto opens the settings on the Mac’s screen again and waits:
naytto permissions
If Screen Recording is on and Terminal is still waiting, run naytto restart.
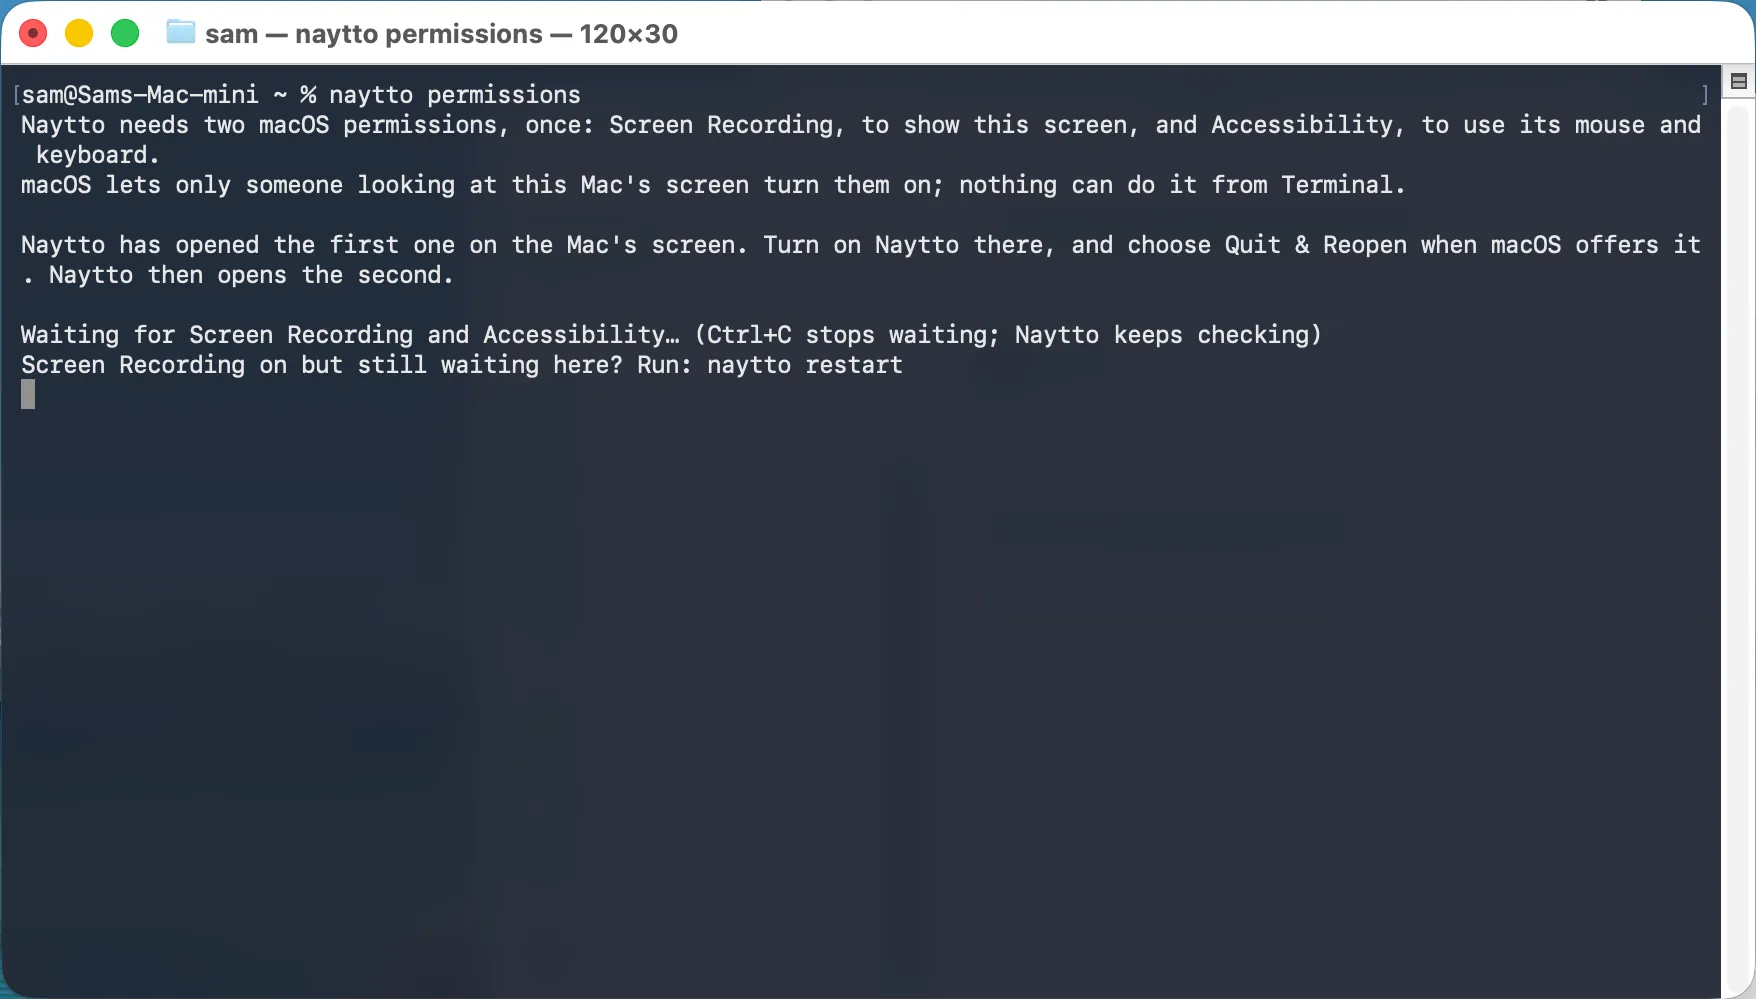
11No display? Check that Screen Sharing is on
Finish setup lets you allow both permissions from any browser, through the Mac’s own Screen Sharing. It works only if Screen Sharing is already on in System Settings › General › Sharing, switched on there by someone at the Mac. Naytto never switches it on or off. If it’s off, plug in a display, keyboard and mouse and follow steps 09 and 10.
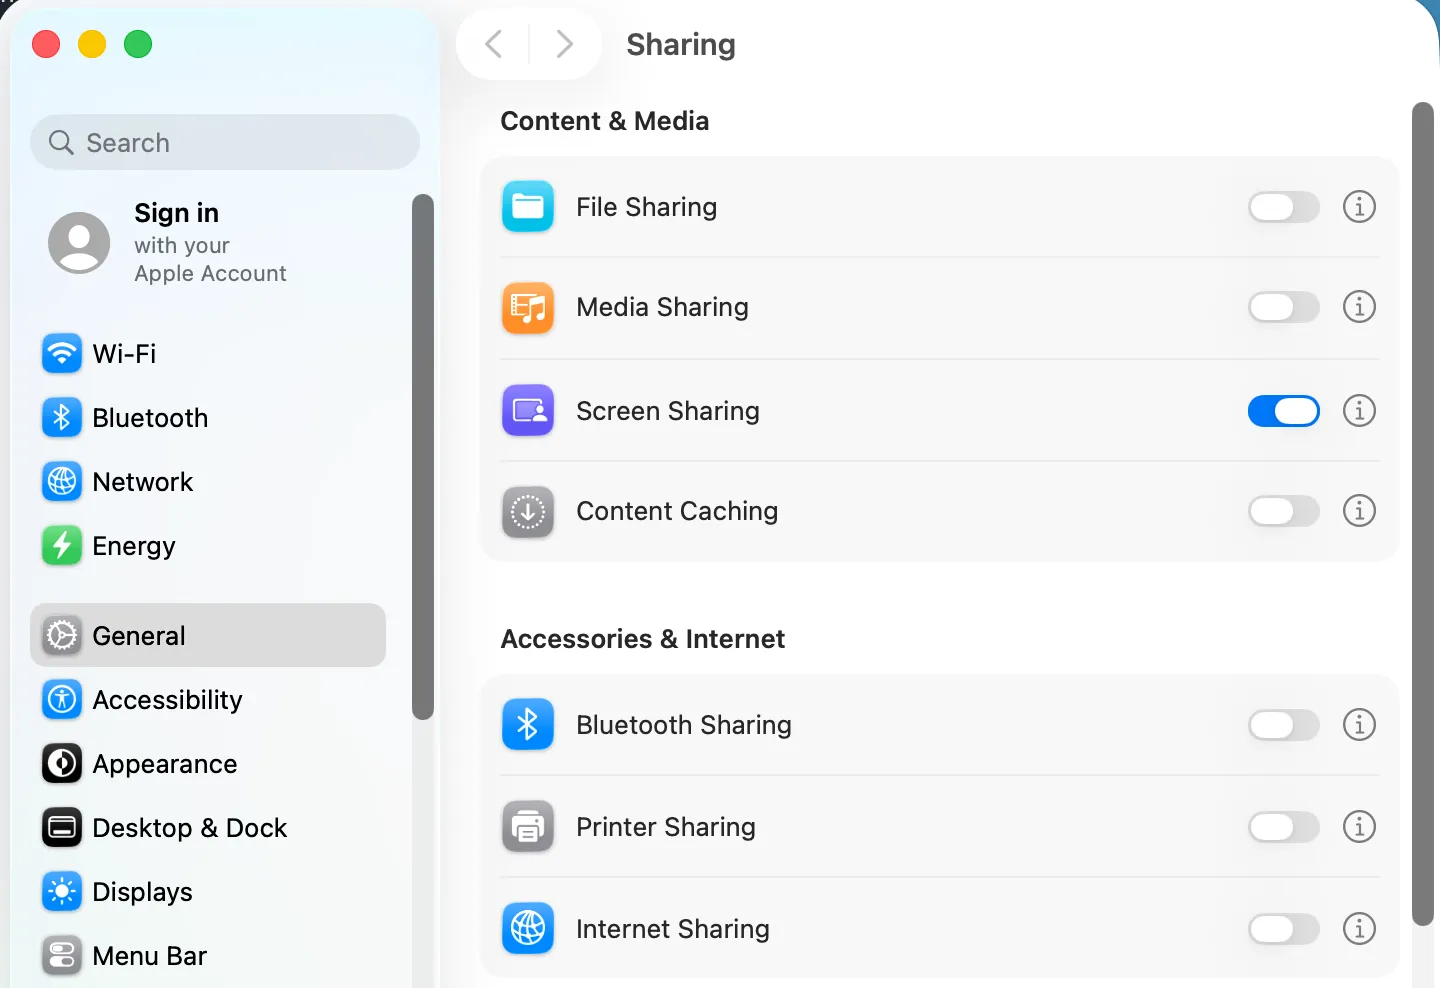
12Run naytto permissions over SSH
Over SSH, with Screen Sharing on, the permissions text in Terminal ends with a paragraph for a Mac with no display. Run this to see it again:
naytto permissions
No display on this Mac? Screen Sharing is on here, so do it from any browser: open https://app.naytto.com and choose Finish setup on Sam’s Mac mini.
If that paragraph says Plug one in instead, Naytto didn’t find Screen Sharing on: see If something isn’t right.
13Choose Finish setup
On any device, sign in at app.naytto.com. Your computers lists the Mac as Setup not finished, and the panel says Naytto on that Mac still needs Screen Recording and Accessibility, and that its Screen Sharing is on. Choose Finish setup.
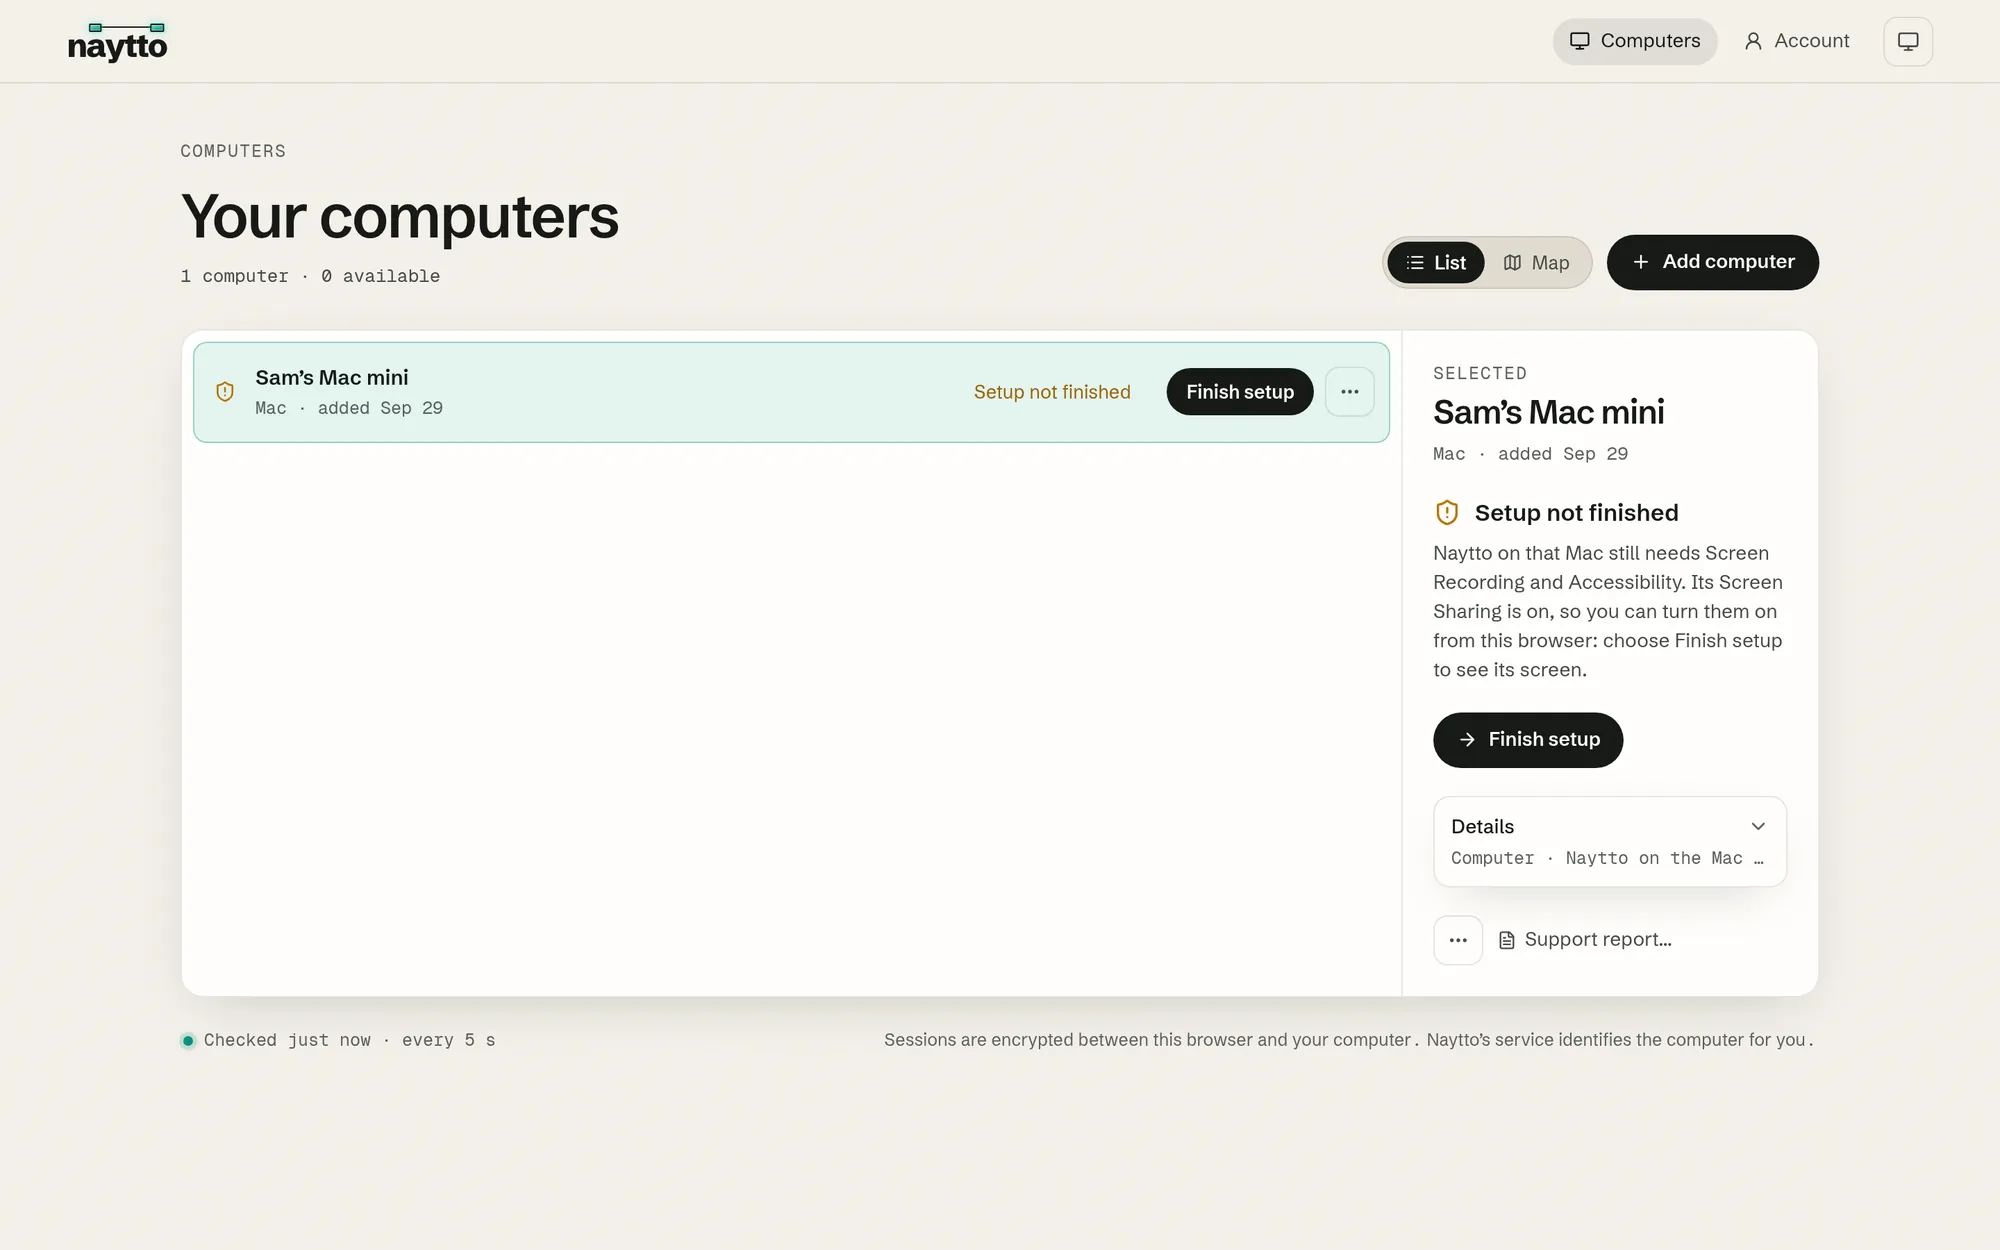
14Sign in to the Mac
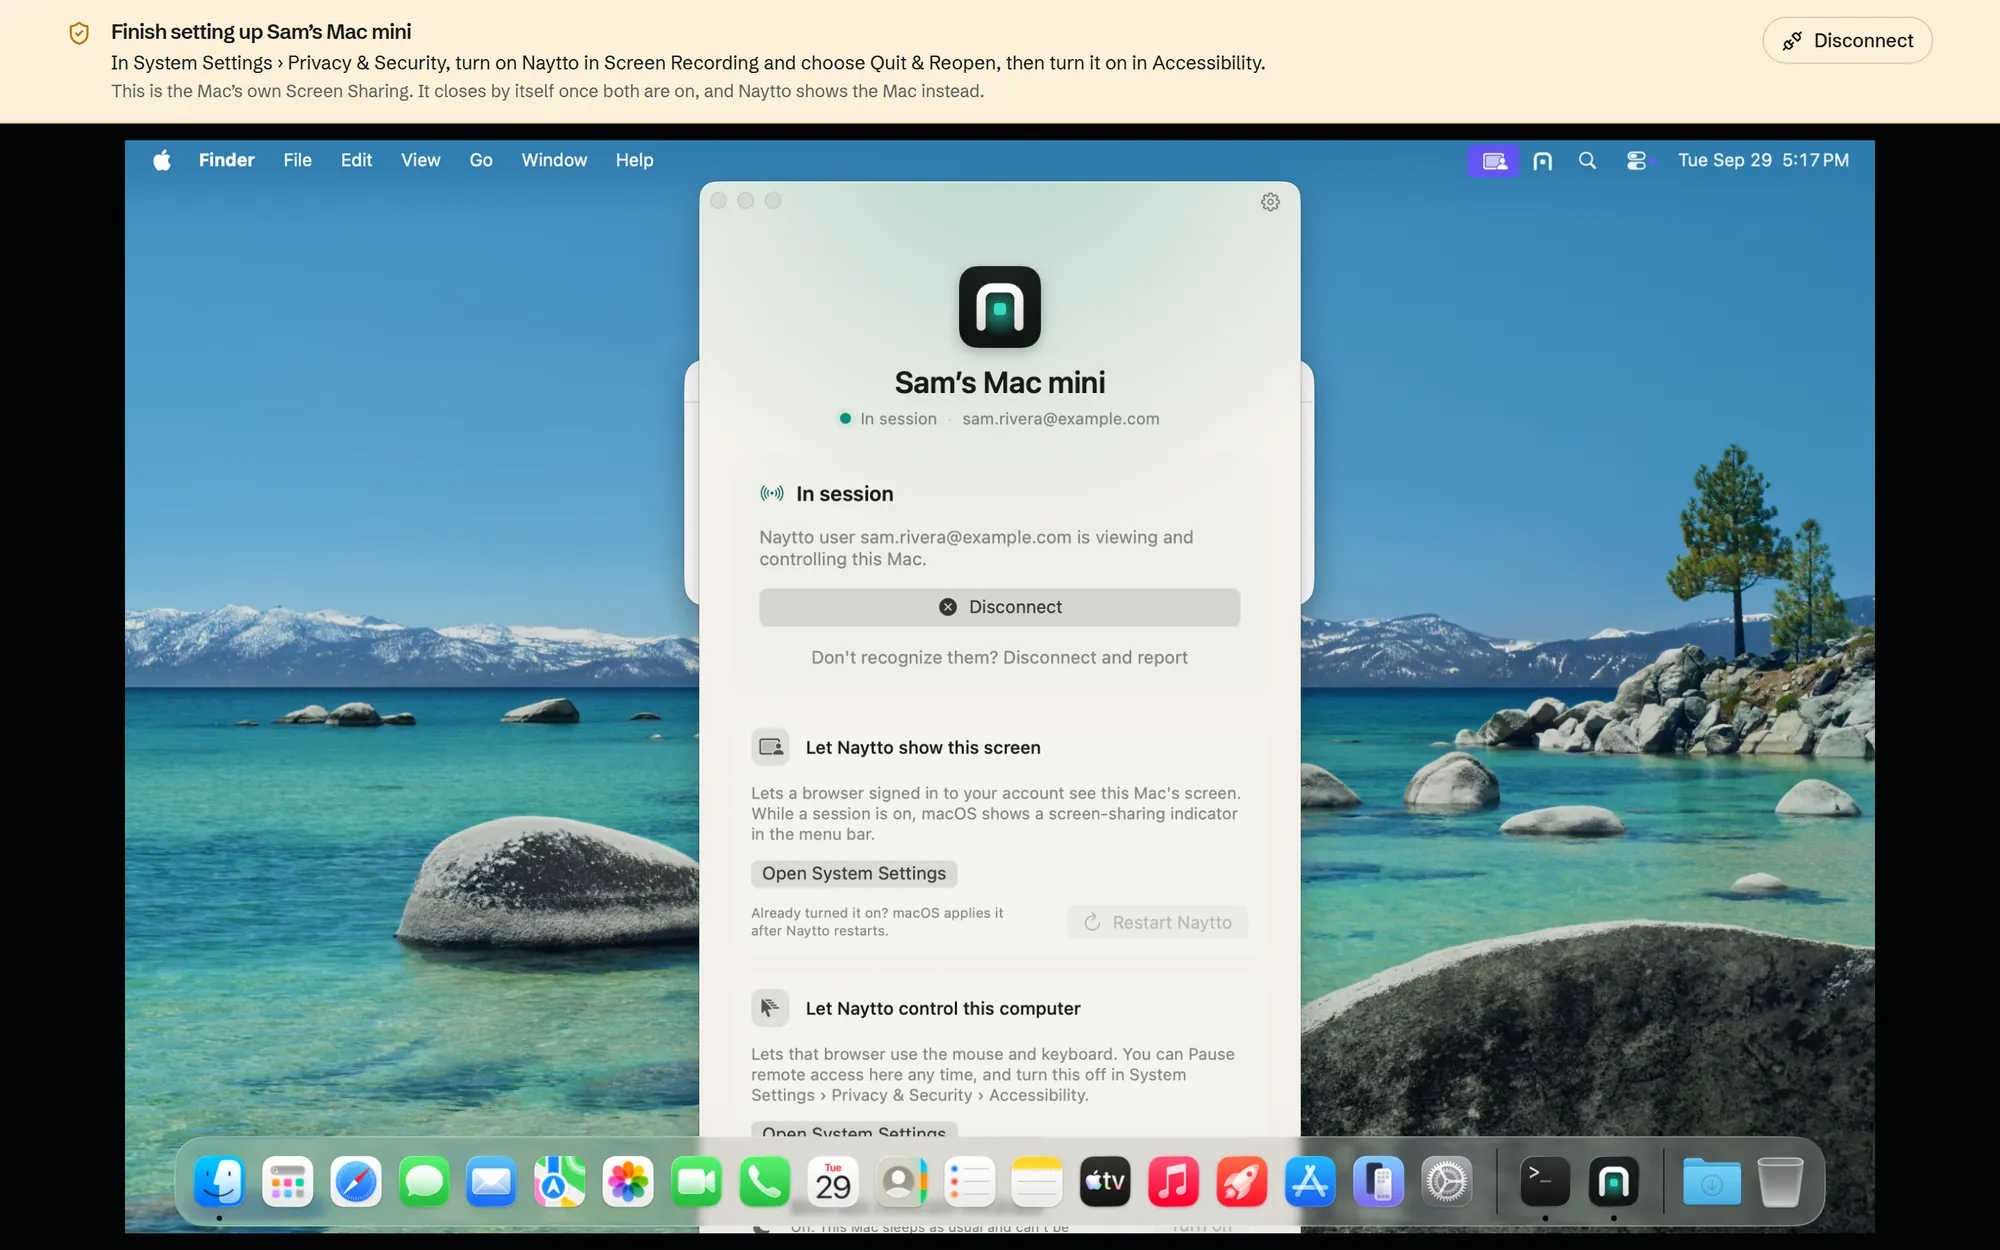
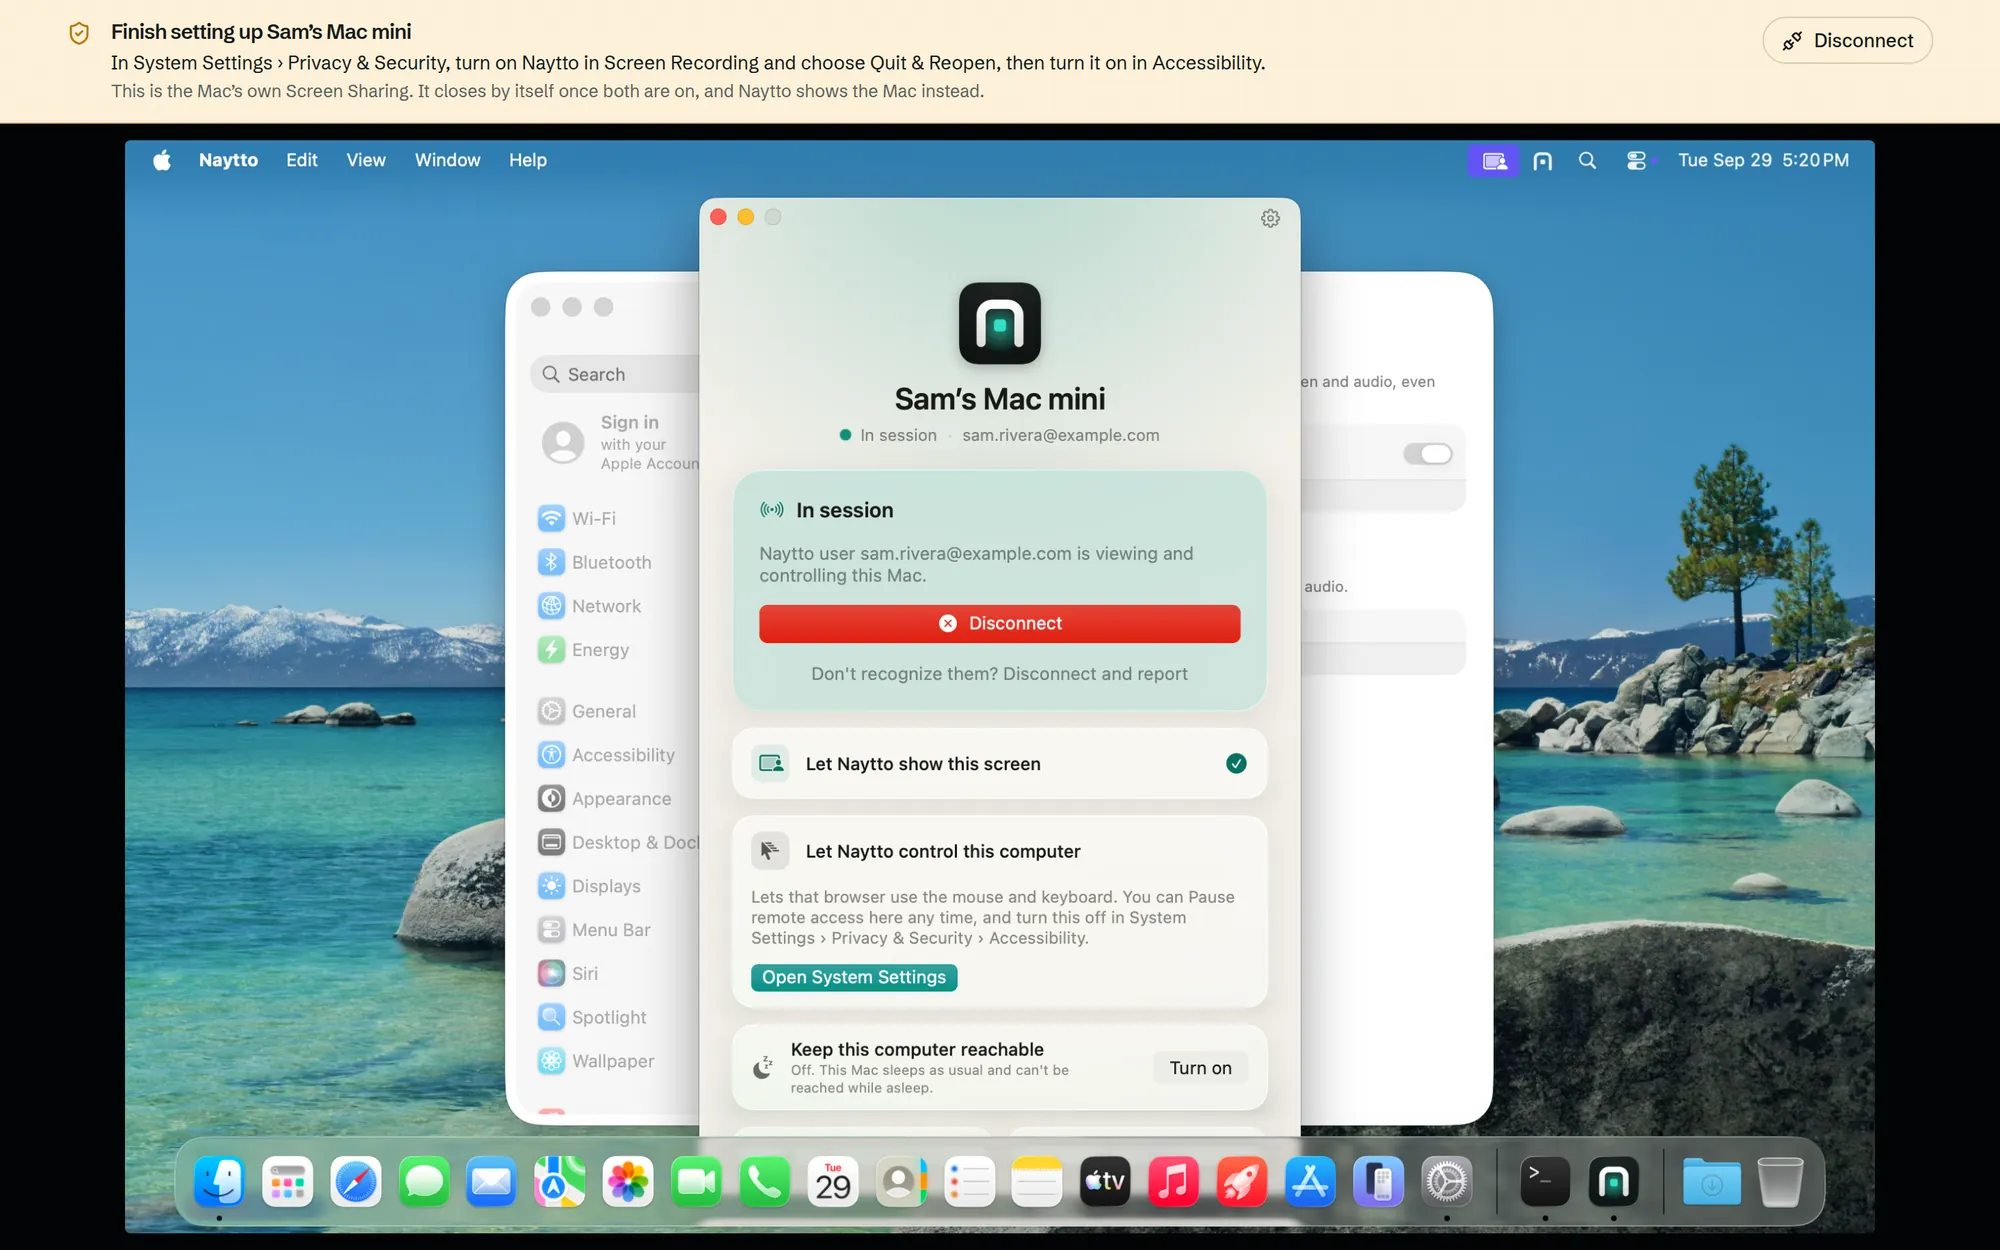
An amber bar reads Finish setting up Sam’s Mac mini and lists what to do. This is the Mac’s own Screen Sharing, and it closes by itself once both permissions are on.
Under Sign in to this Mac, enter the account name and password you sign in to the Mac with, such as sam, and choose Sign in. The page keeps them only until you close it, to sign in again while Naytto reopens.
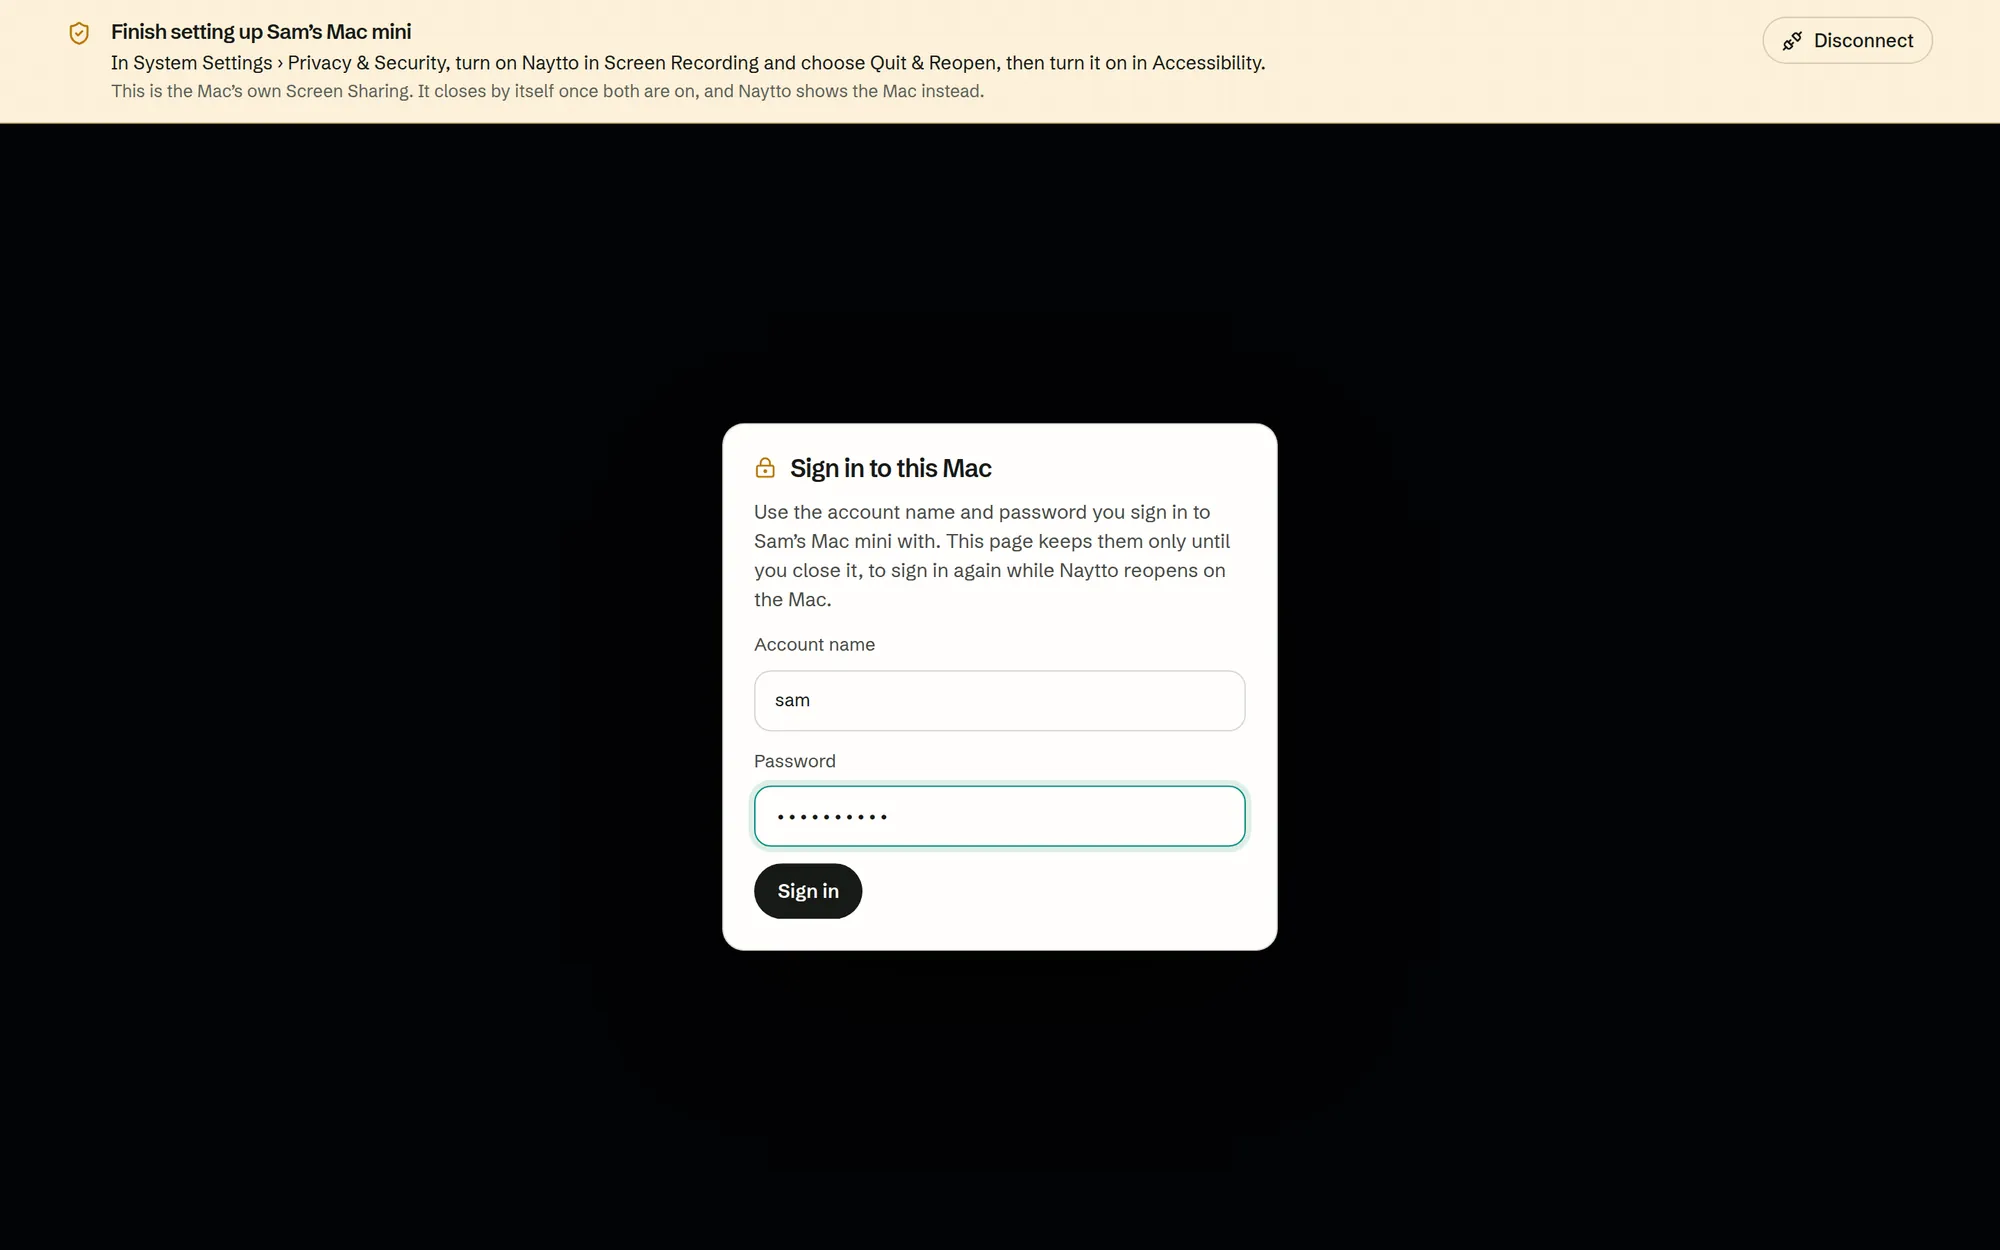
15Open System Settings from the Naytto window
The Mac’s screen appears under the amber bar, with the Naytto window open on it. Under Let Naytto show this screen, click Open System Settings. If the Naytto window isn’t there, click Naytto’s icon in the menu bar and choose Open Naytto.
16Allow Screen Recording
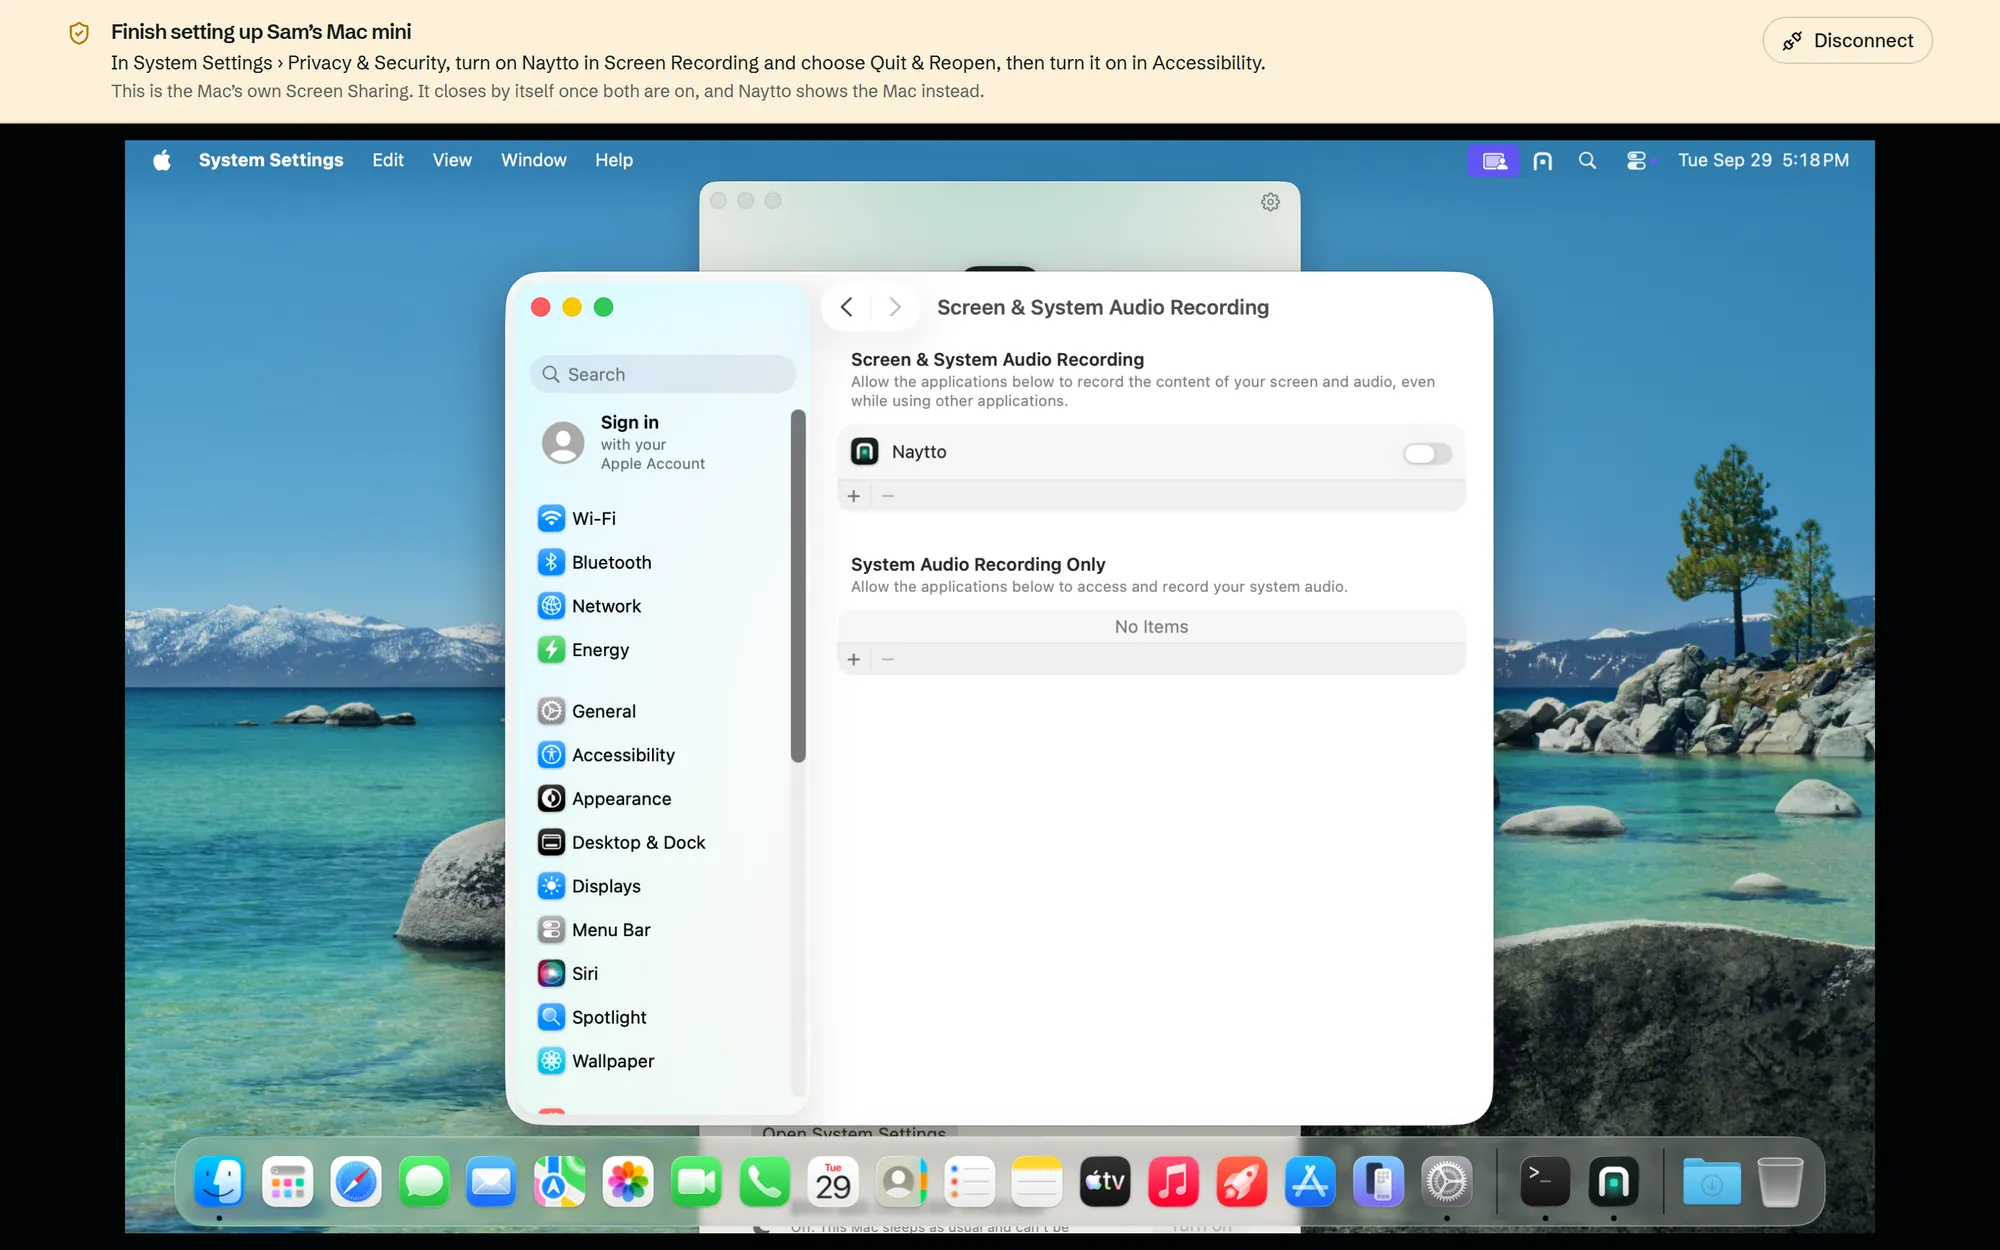
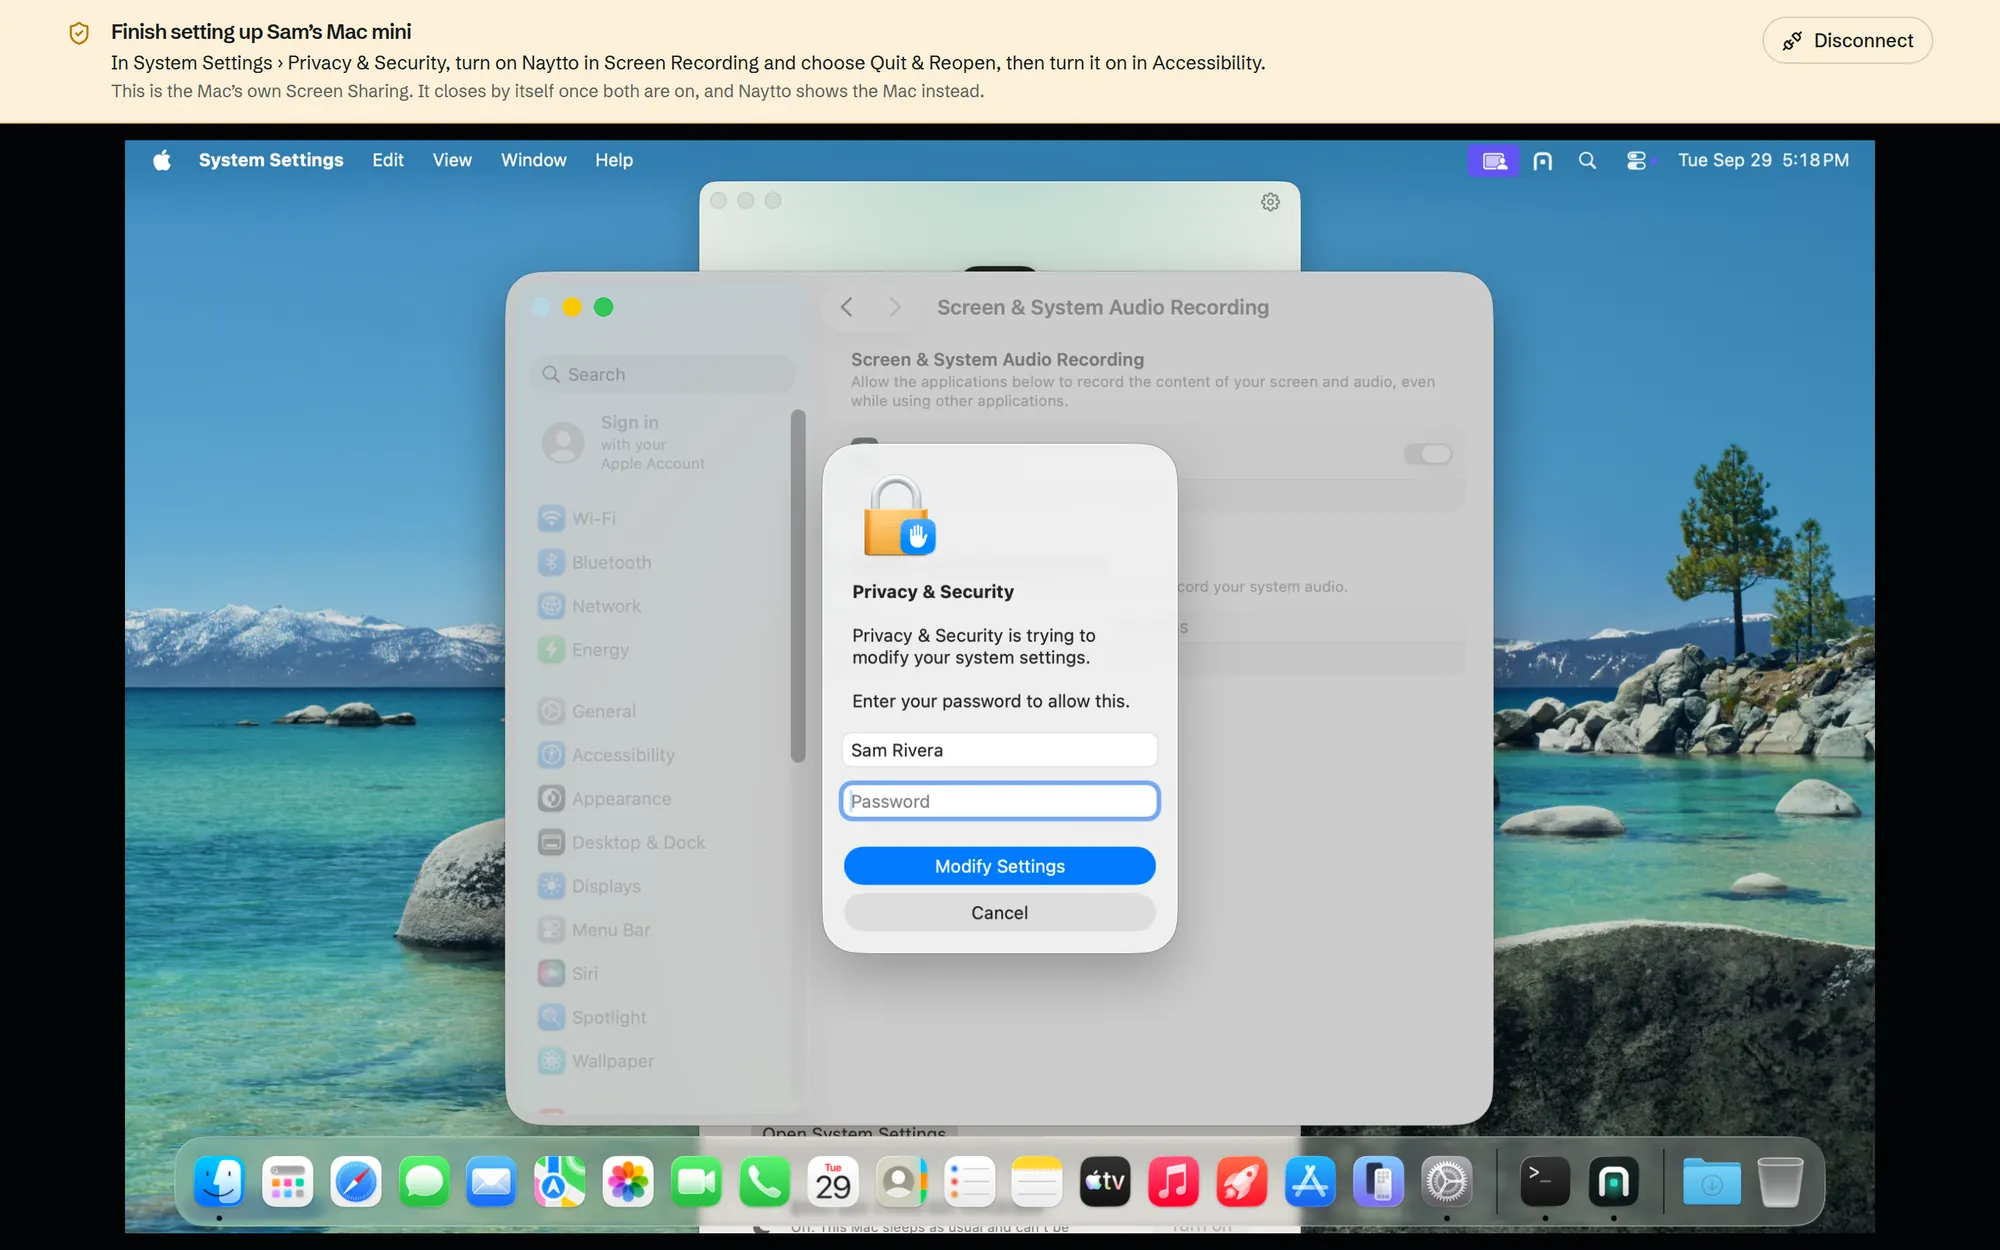
System Settings opens at Screen & System Audio Recording, with Naytto listed and its switch off. Click the switch. macOS asks for the Mac’s password: type it and click Modify Settings.
17Choose Quit & Reopen, then wait
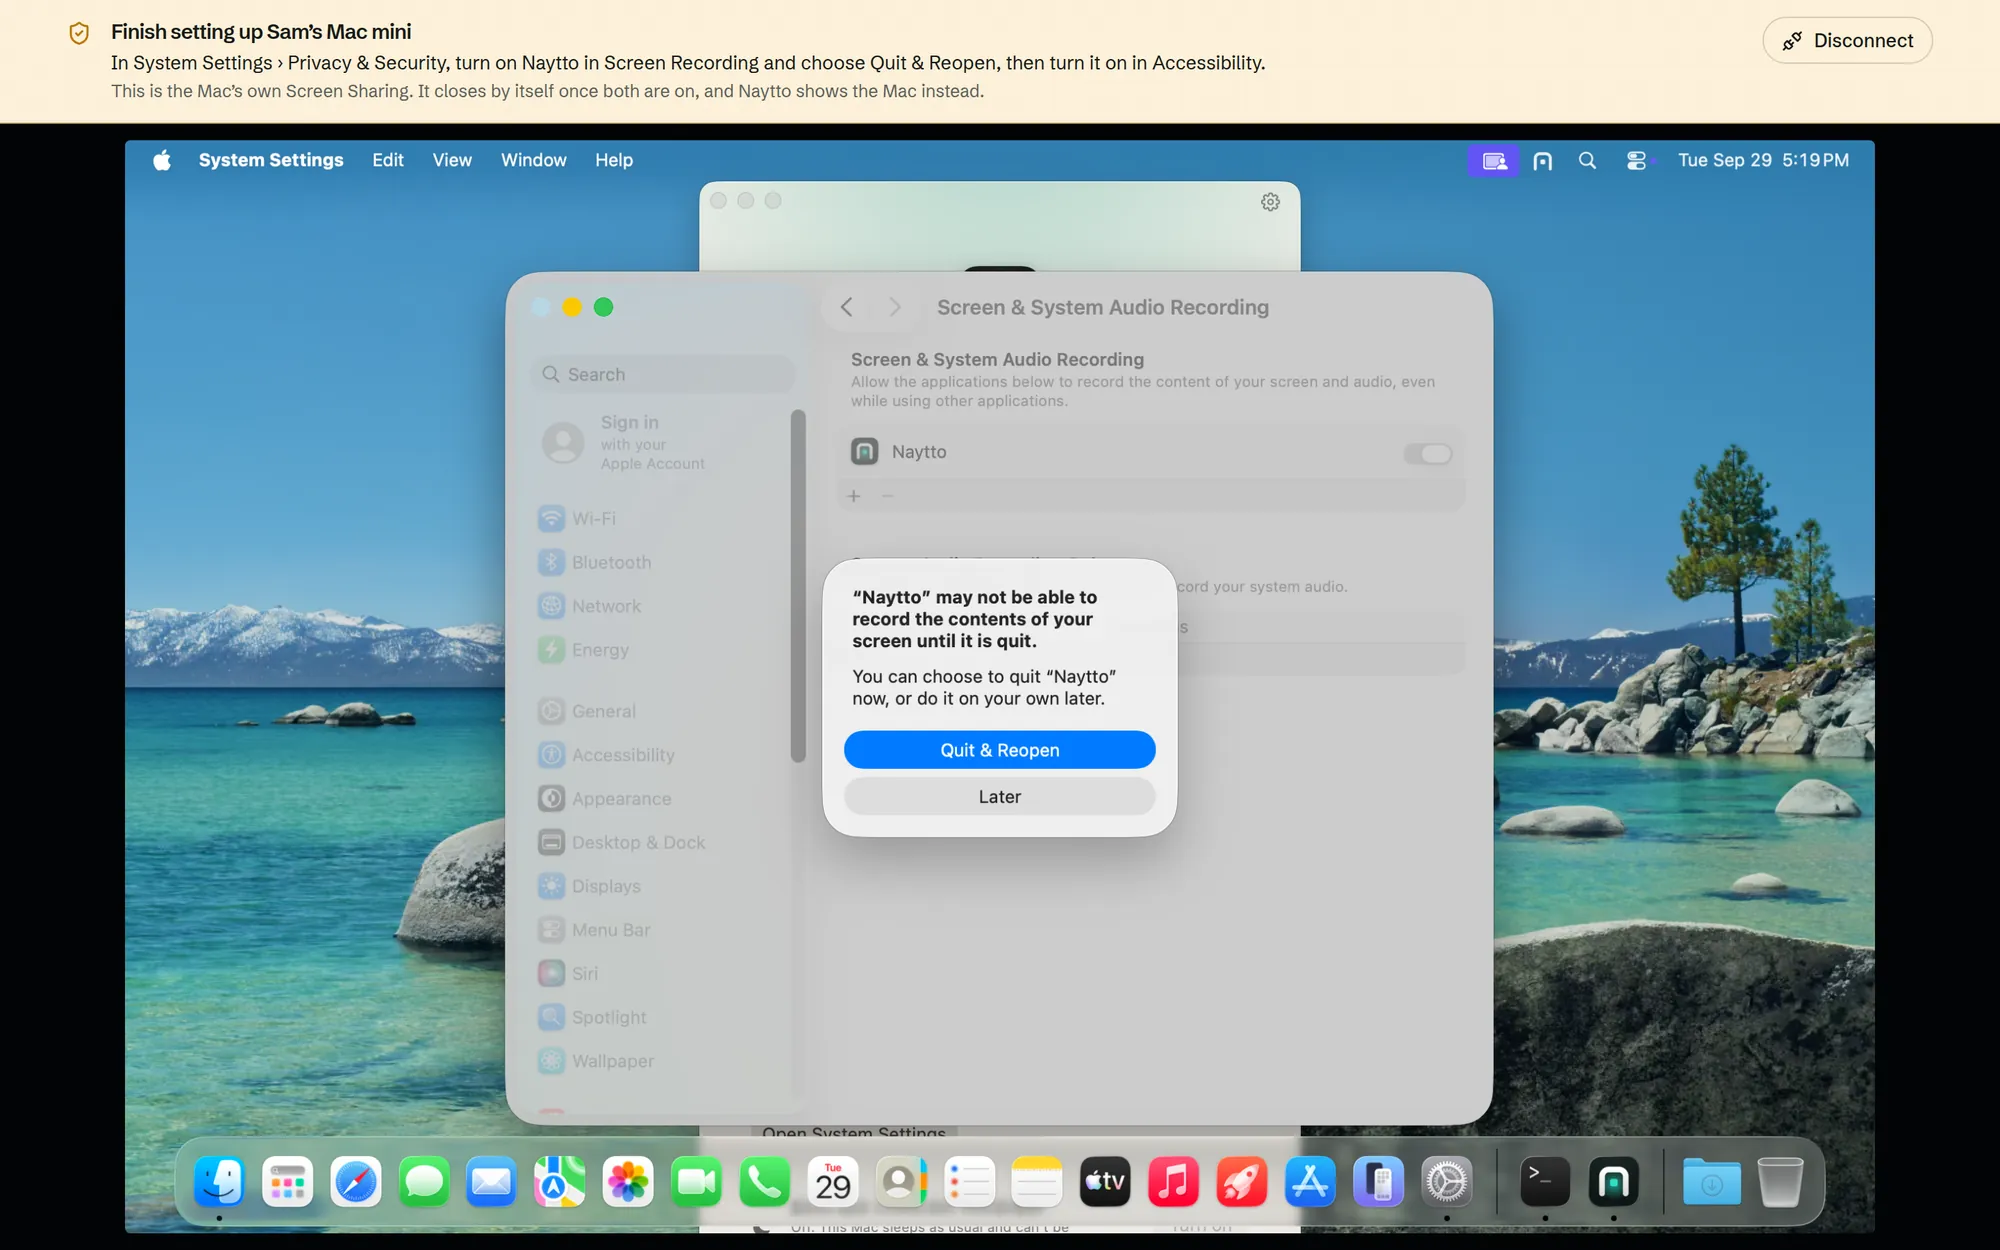
macOS says Naytto may not be able to record the contents of your screen until it is quit. Click Quit & Reopen.
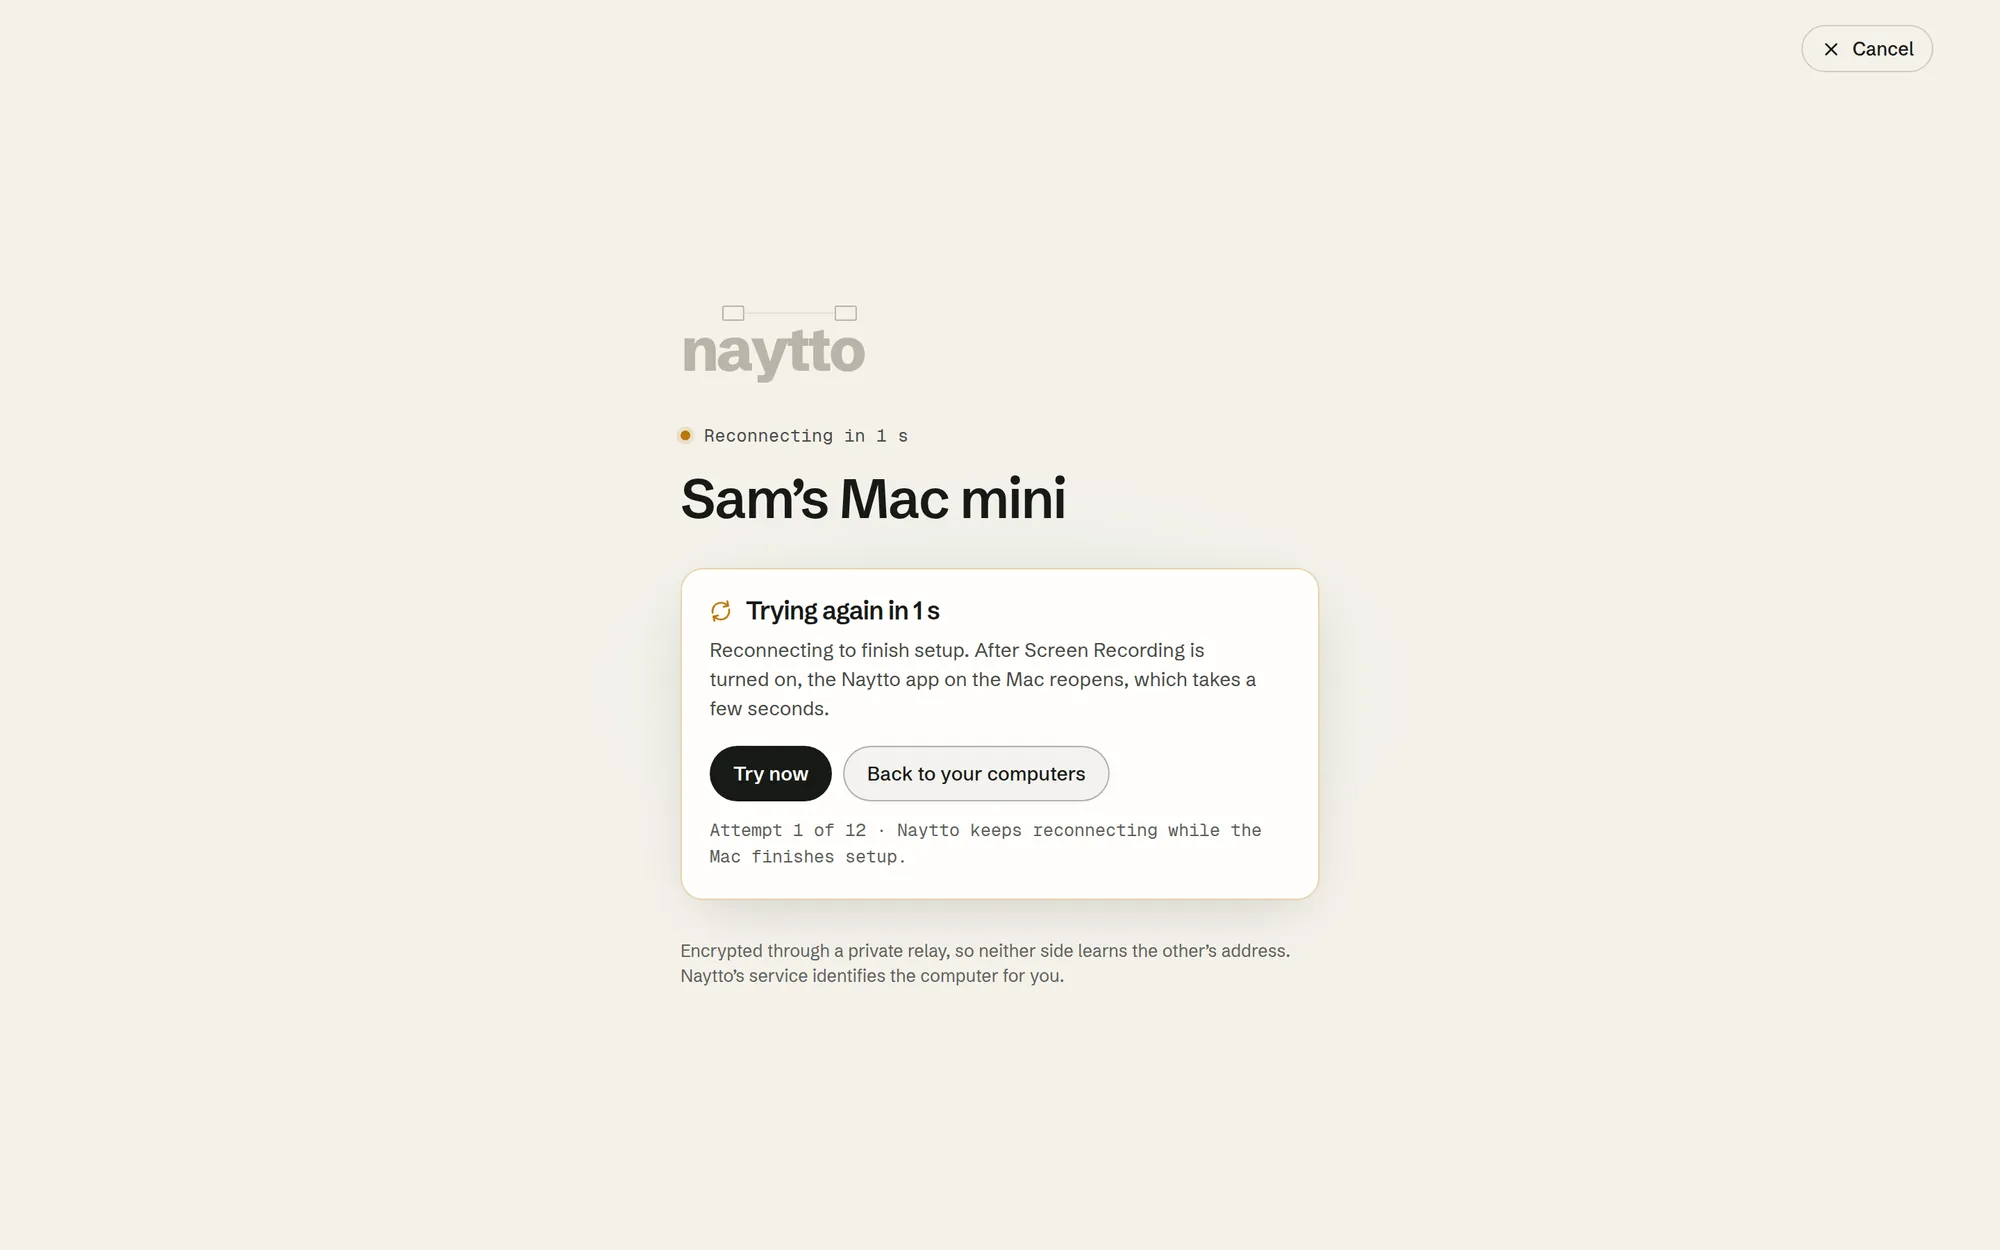
While Naytto restarts on the Mac, the page reads Reconnecting to finish setup and counts its attempts. Wait: within a few seconds it’s back on the Mac’s screen by itself, without asking for the password again.
18Allow Accessibility
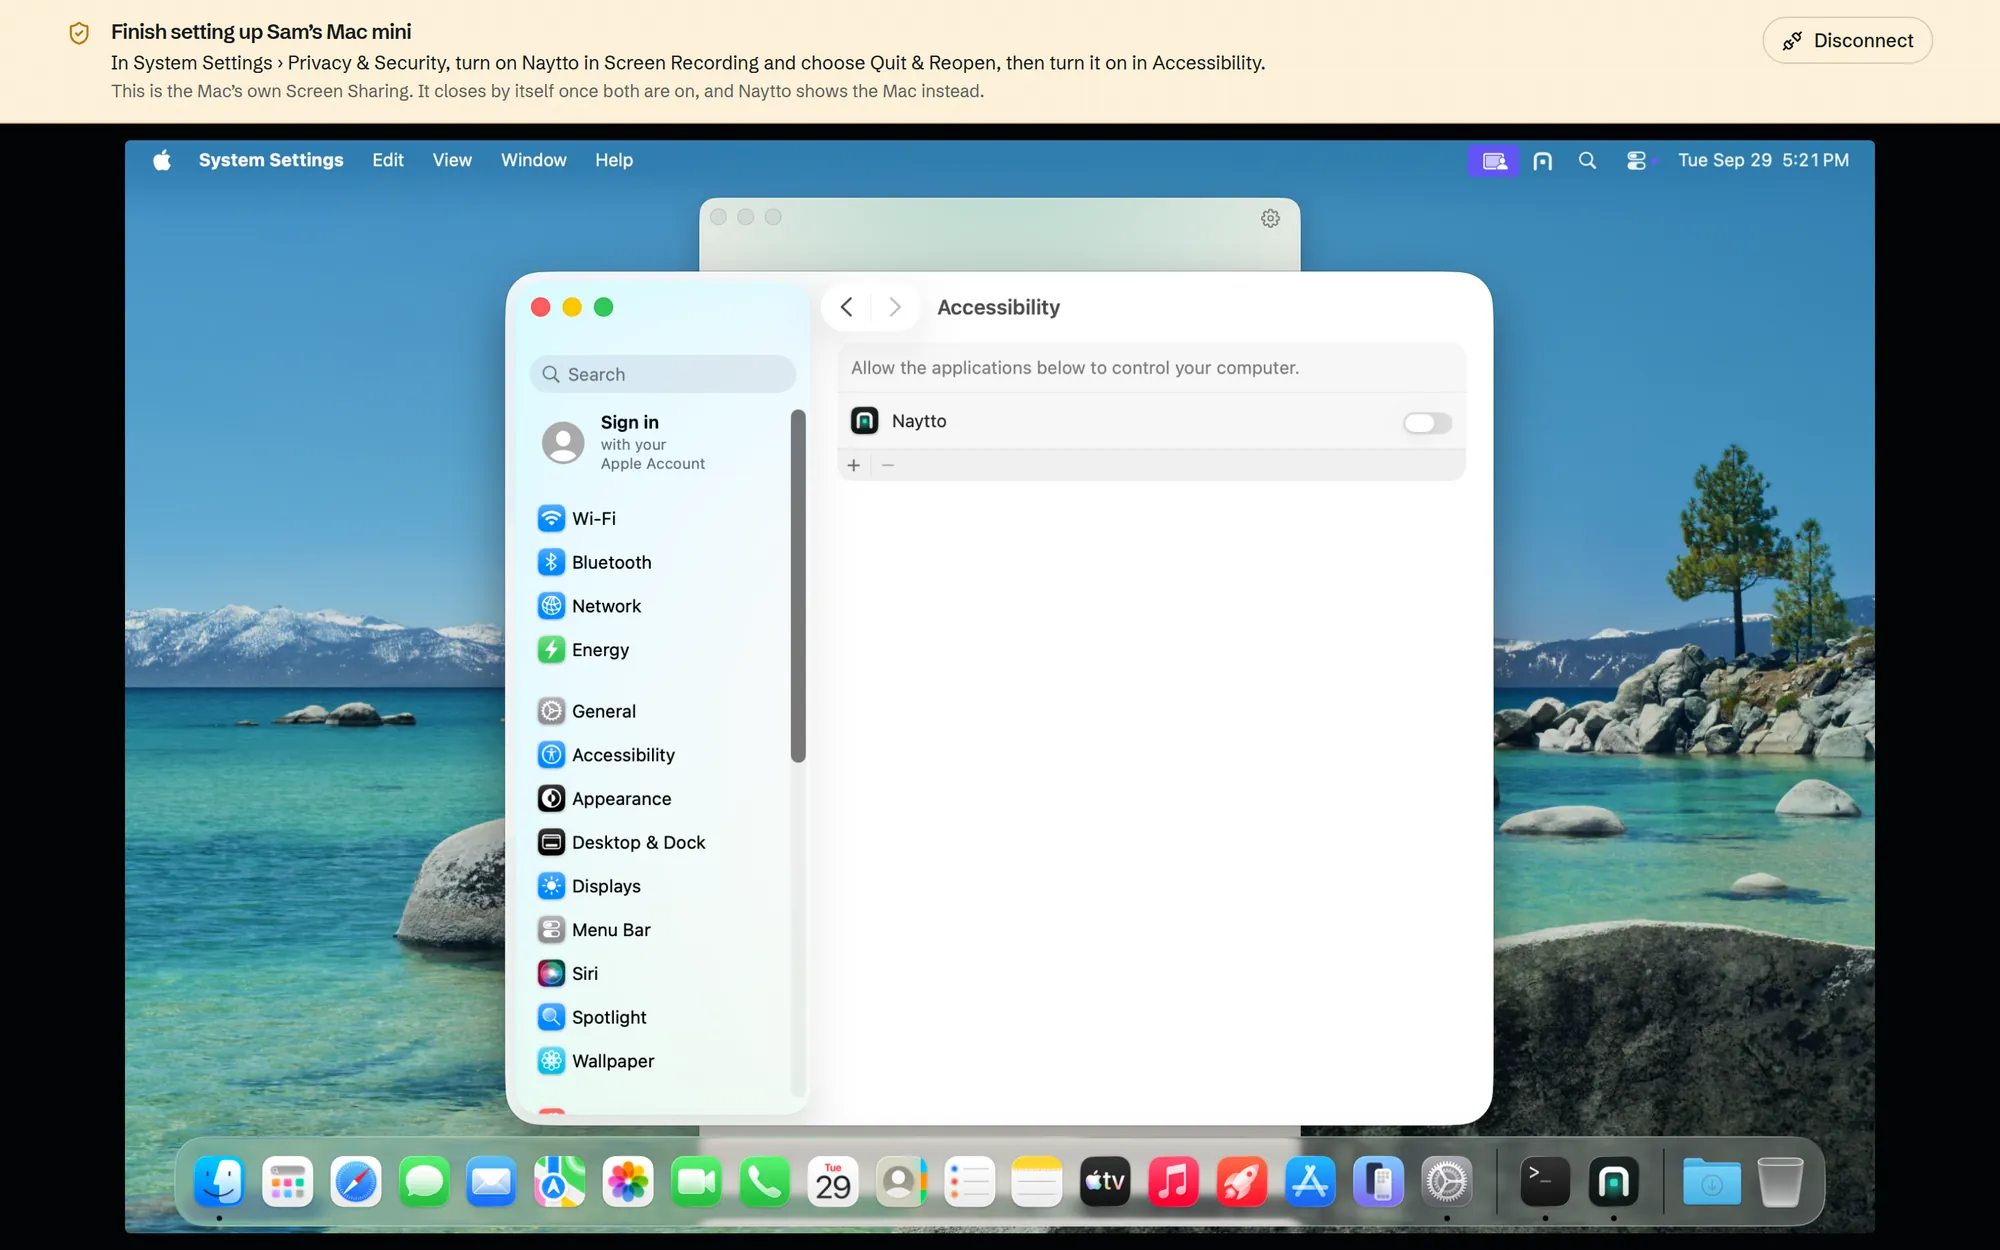
The reopened Naytto window has a check next to Let Naytto show this screen. Under Let Naytto control this computer, click Open System Settings, then click the switch next to Naytto in Accessibility. If macOS asks for the password again, type it and click Modify Settings. This one needs no restart.
19Let Naytto take over
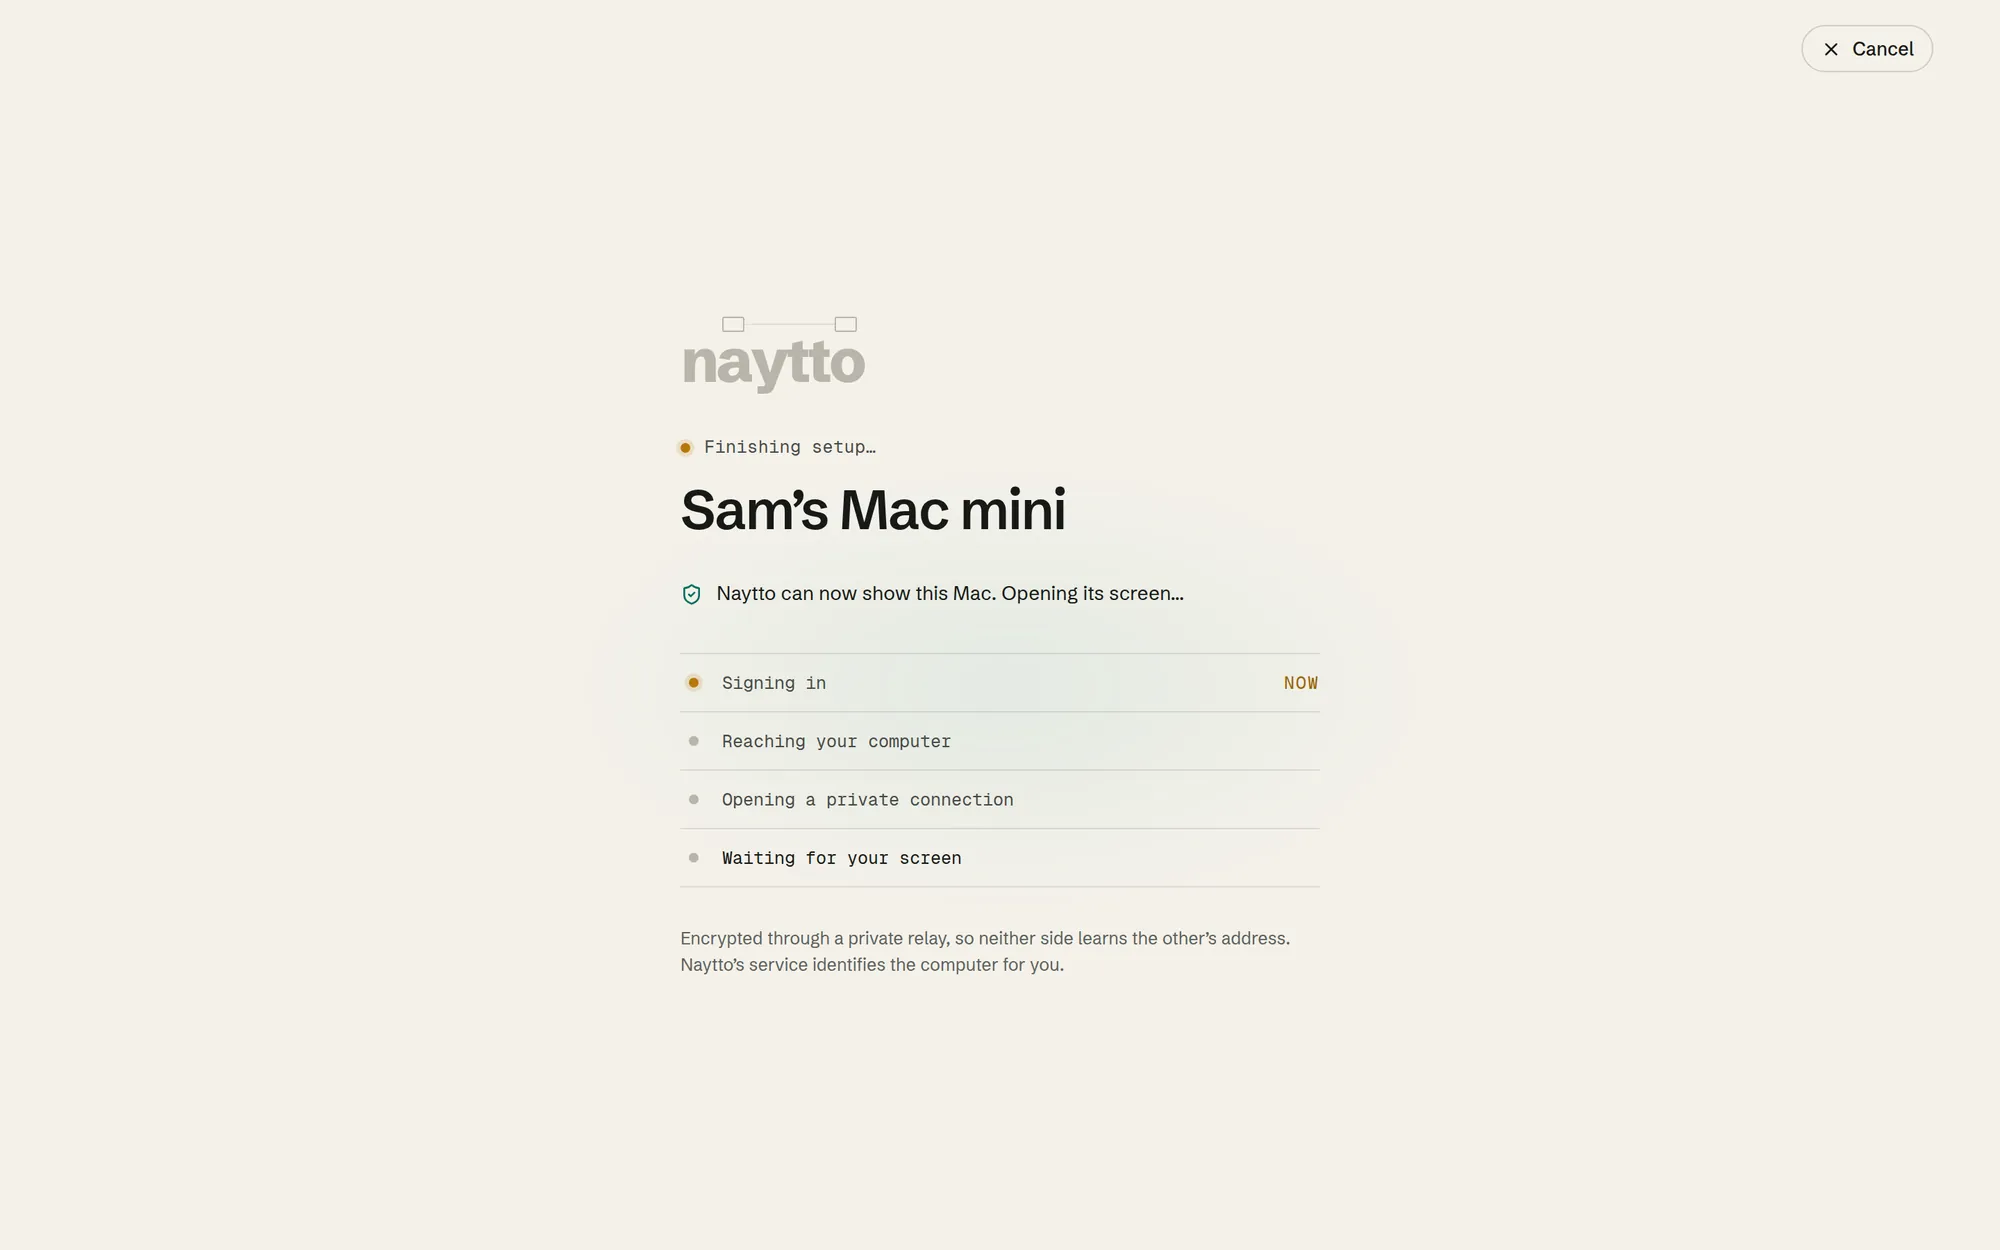
As soon as the switch is on, the Screen Sharing view closes. The page reads Finishing setup… and Naytto can now show this Mac, then opens a normal Naytto session on the Mac’s desktop. Setup is finished, and you won’t need Finish setup again.
In that session, macOS asks one more question on the Mac and may show two leftover alerts. Answer them before you type anything else, as steps 21 and 22 show.
Connect from your browser
From here on, all you need is a browser. The first session brings up one more macOS prompt, and sometimes two leftover alerts, which you can answer from the session.
20Choose Connect
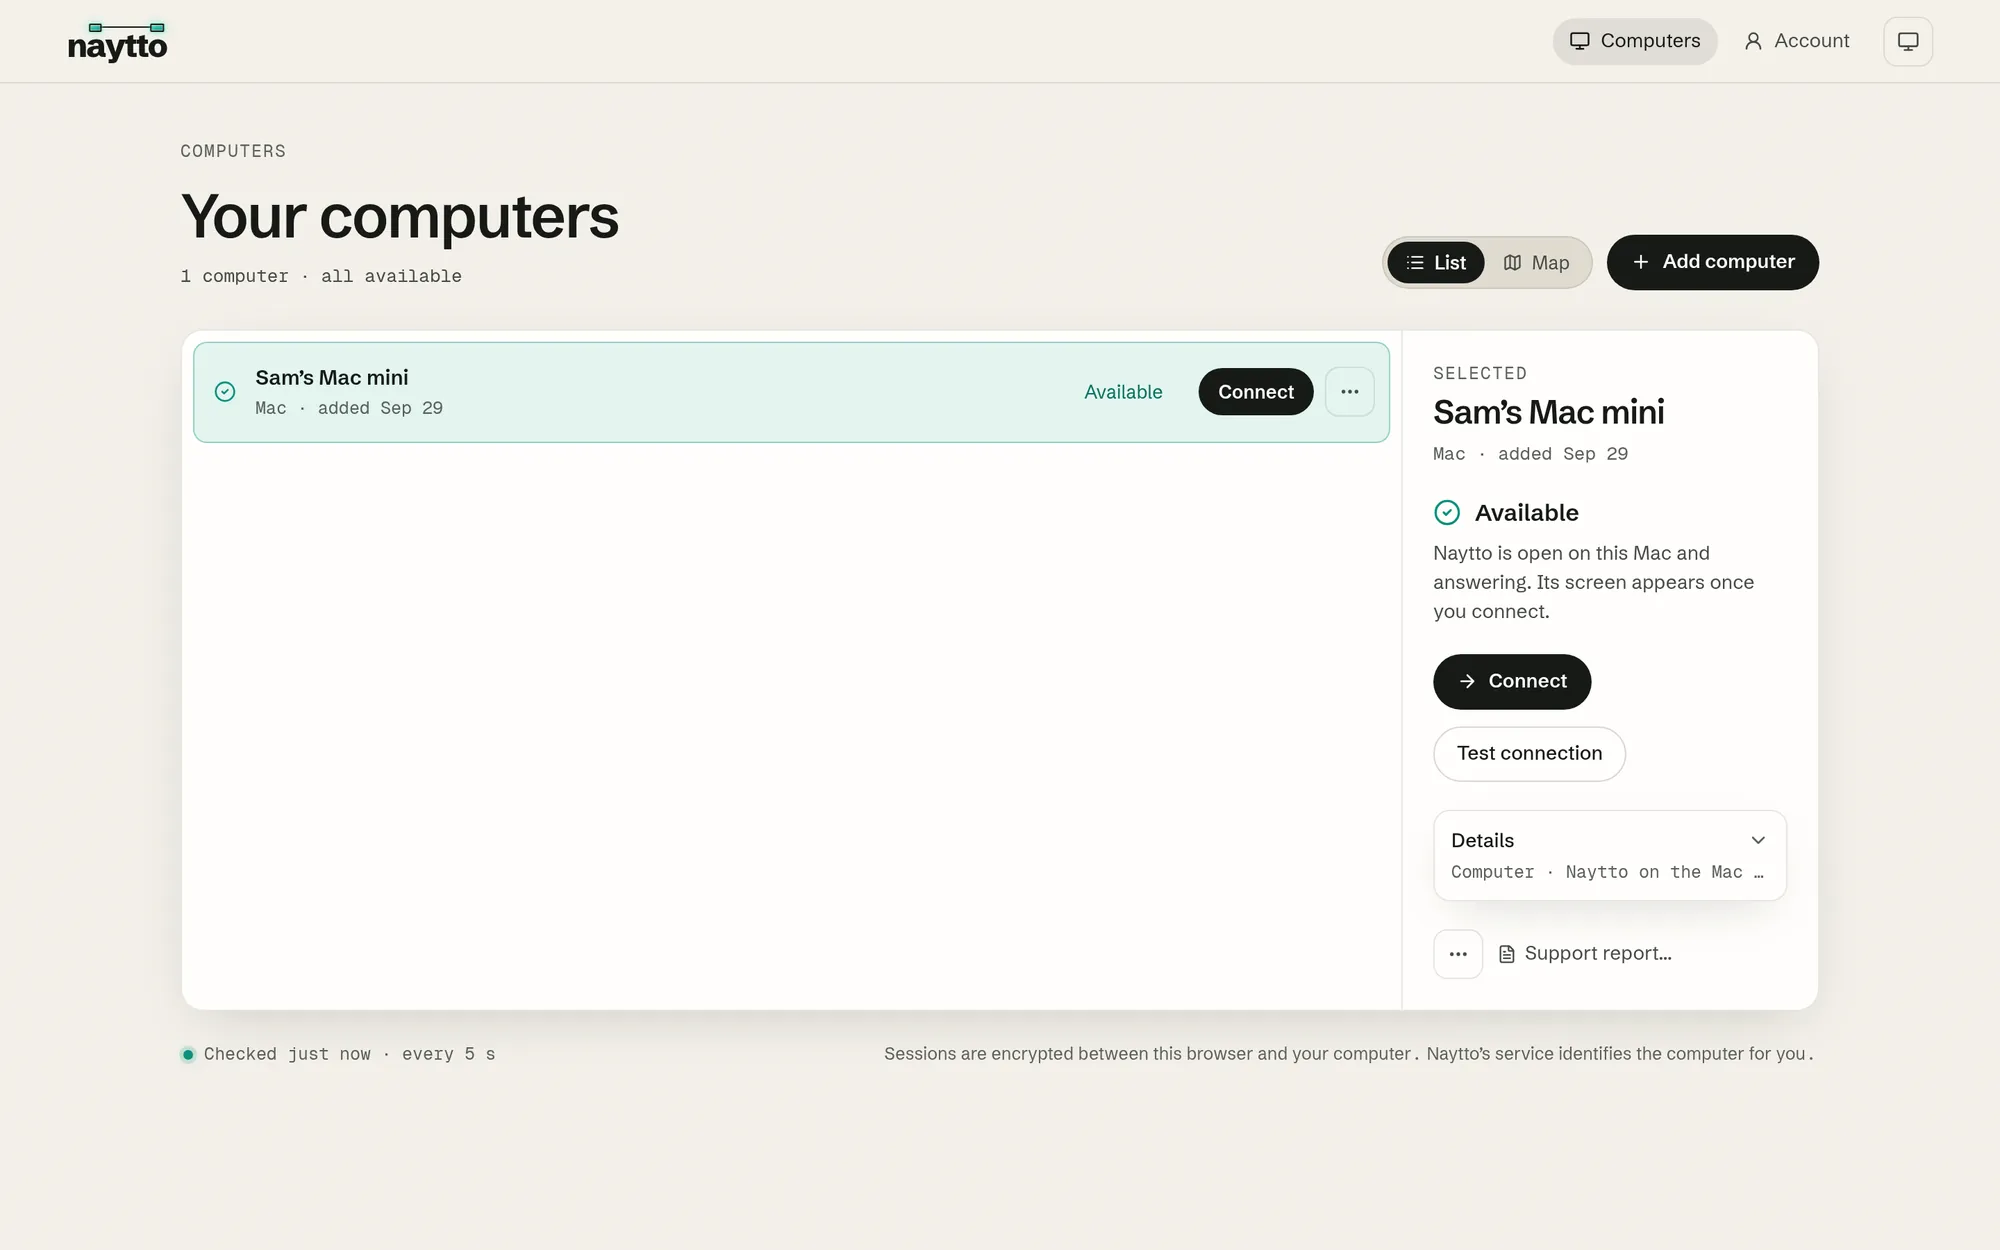
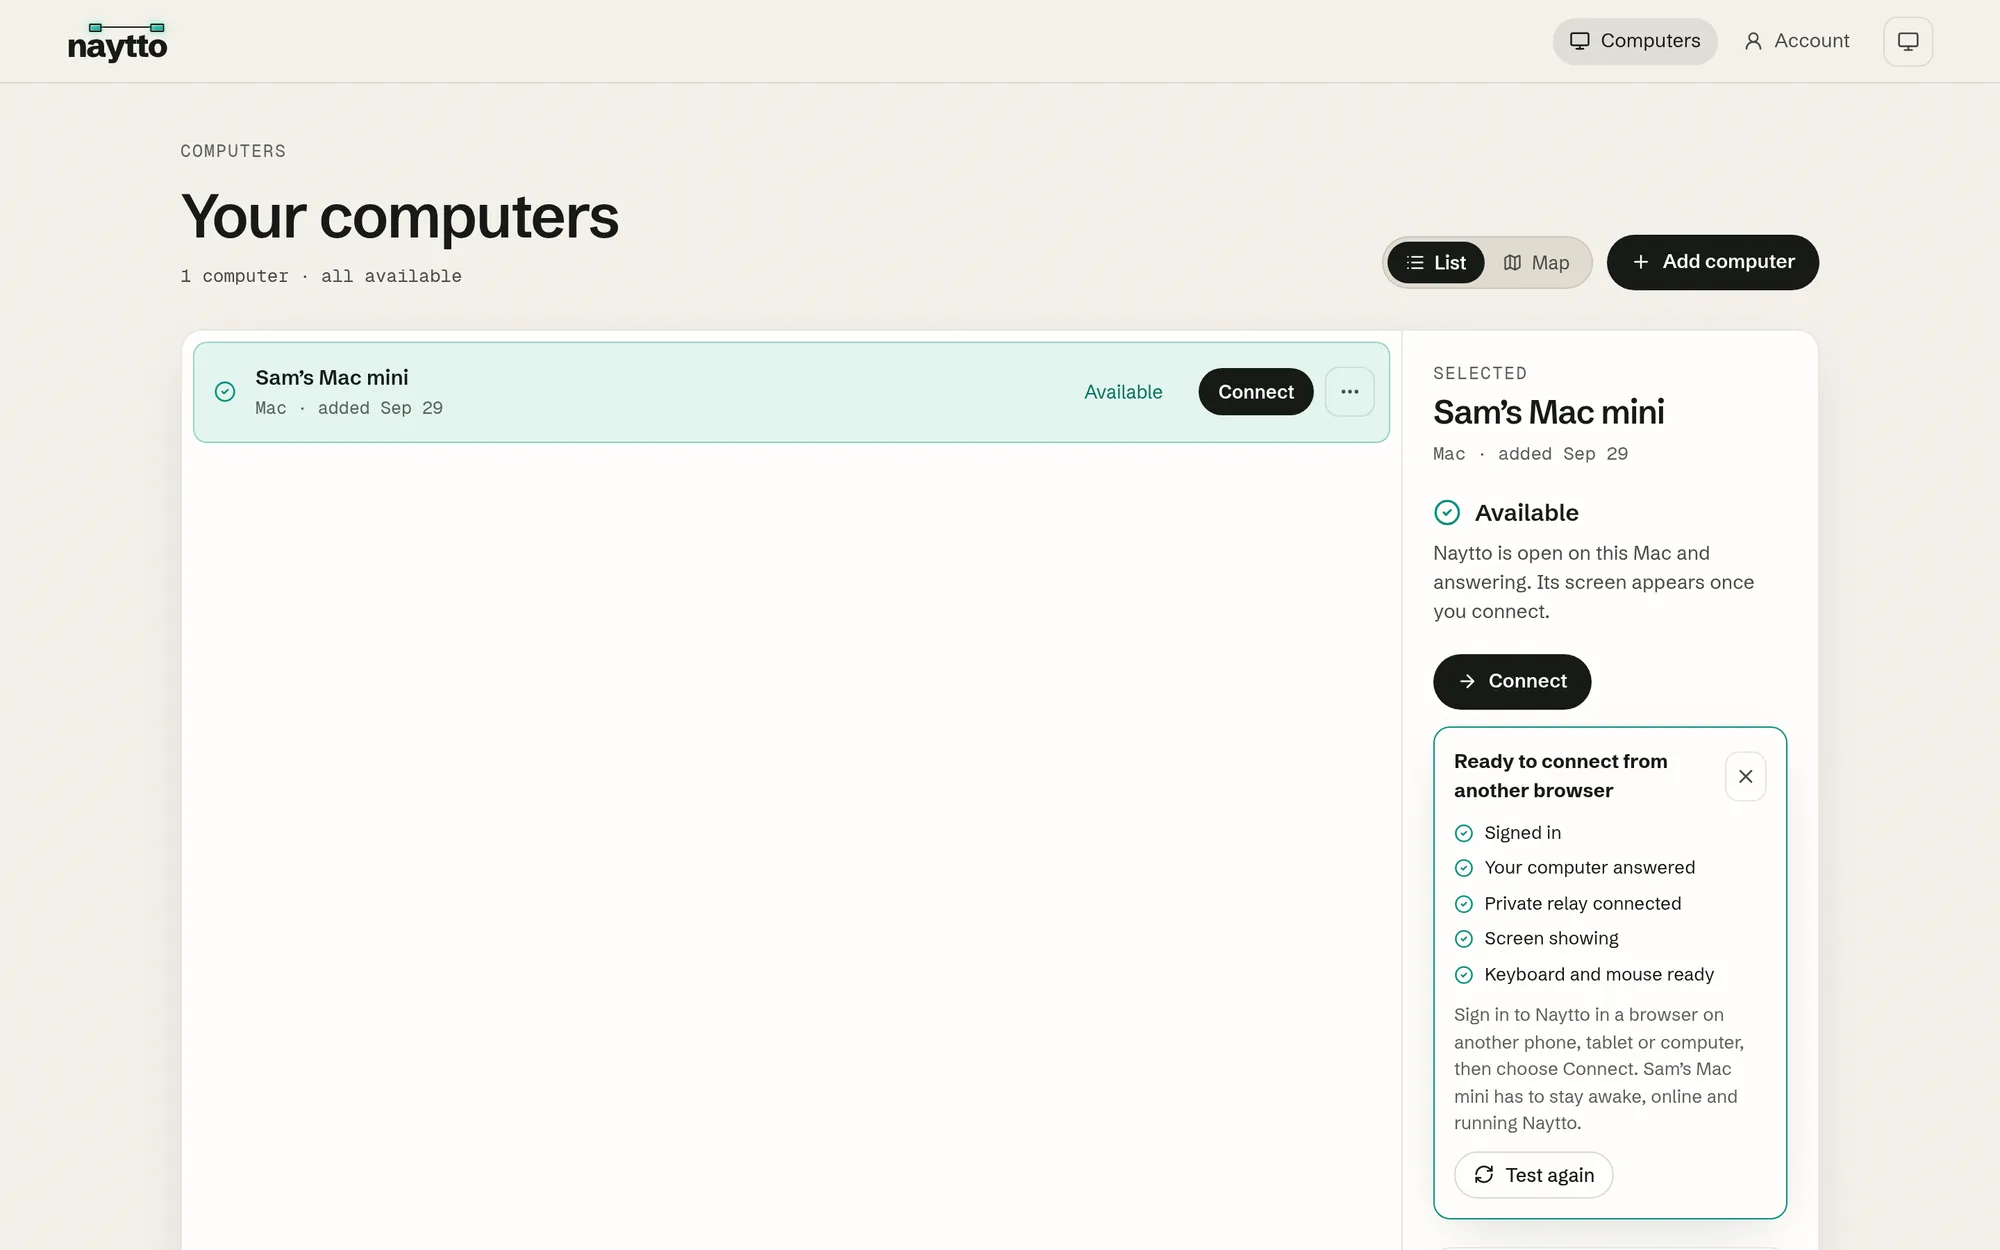
On another device, sign in at app.naytto.com, or choose Go to your computers on the page you’re on. Your computers lists the Mac as Available: Naytto is open on it and answering. Choose Connect.
21Allow the prompt on the Mac
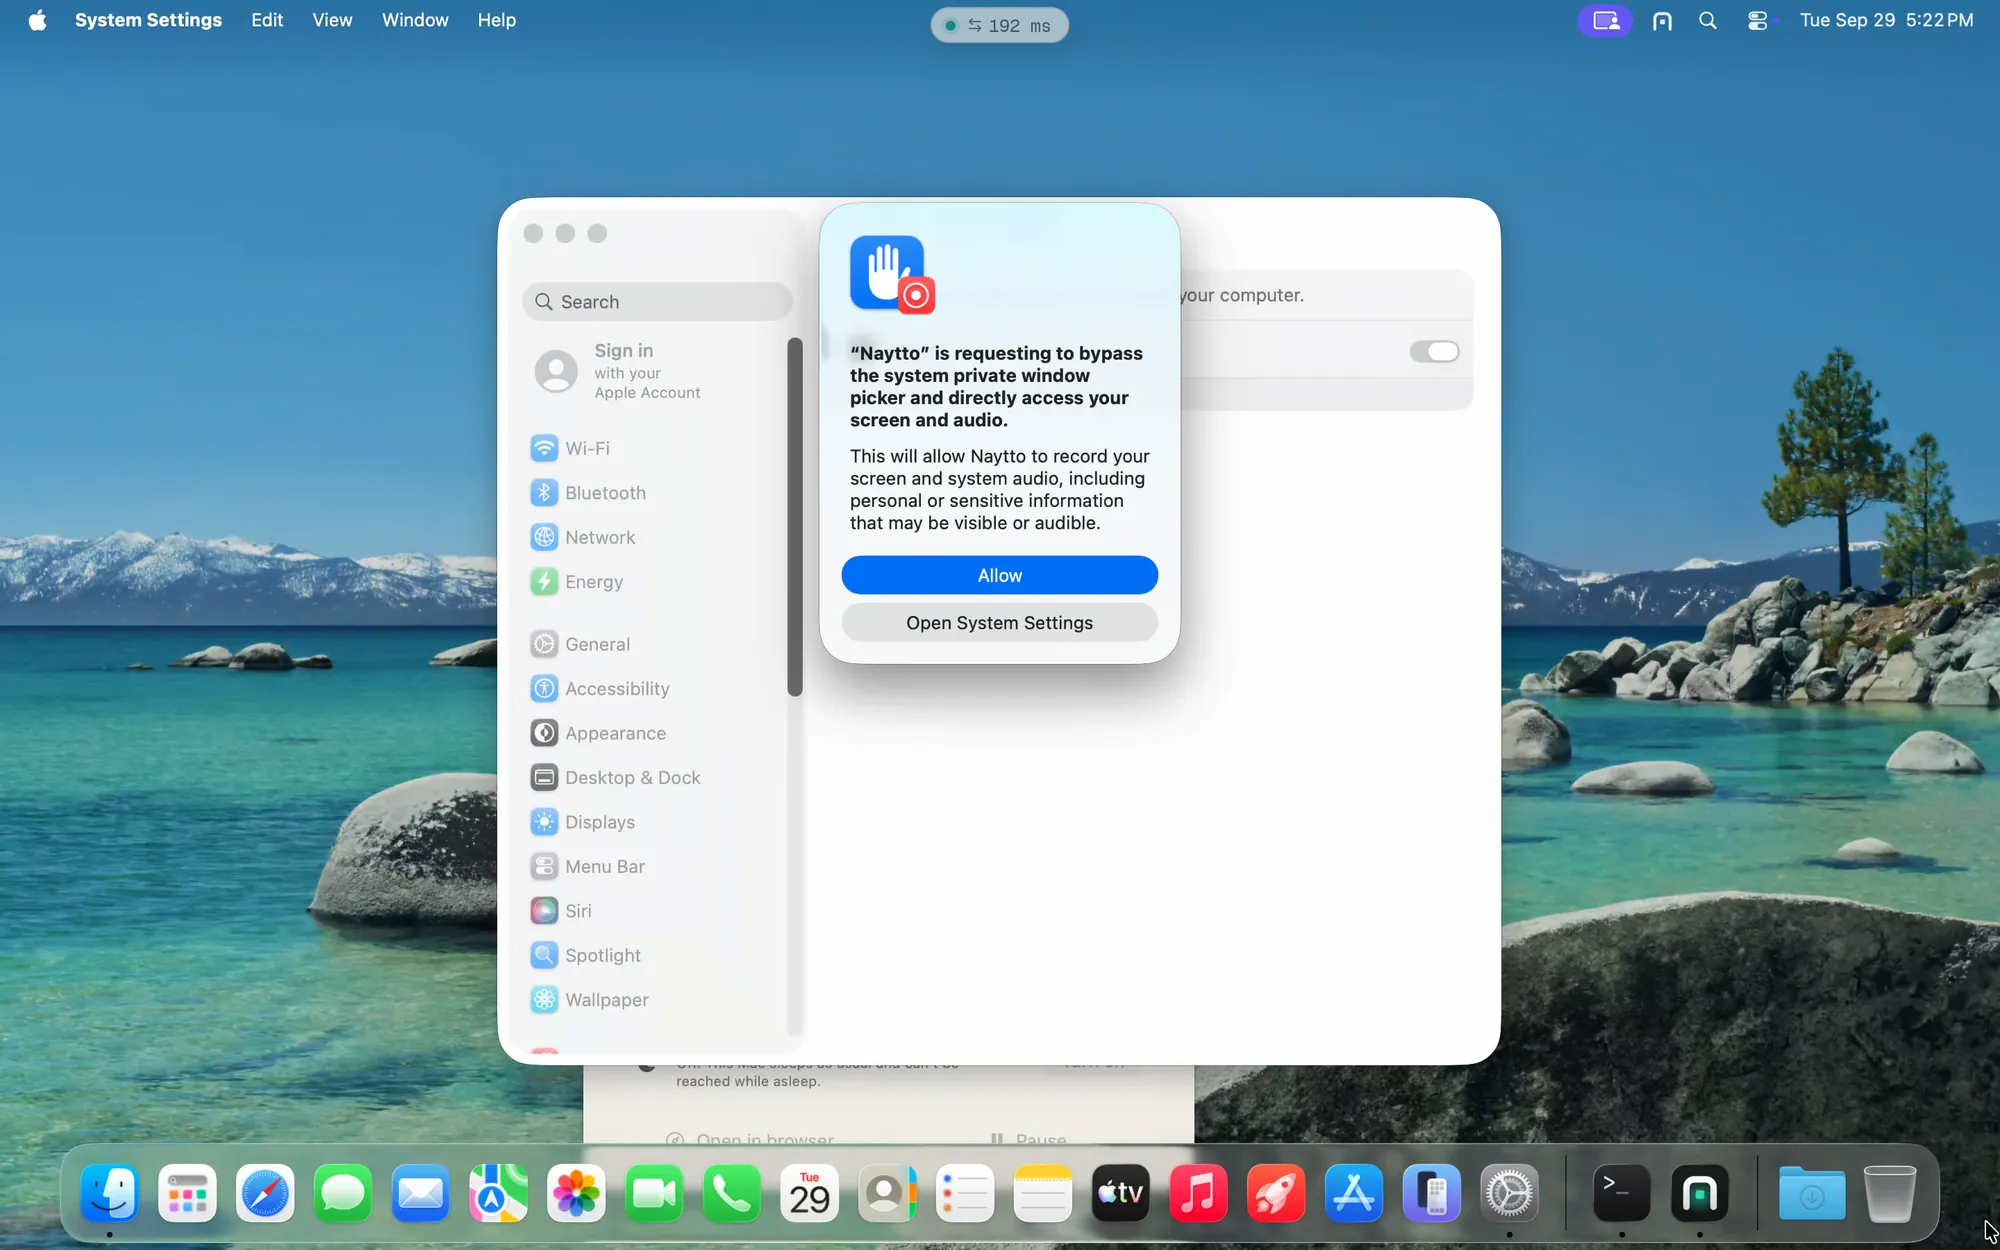
In the first session, the one right after Finish setup or your first Connect, macOS asks whether Naytto may bypass the system private window picker and directly access your screen and audio. Click Allow, at the Mac or in the session from your browser. macOS may ask again later: click Allow again.
22If macOS asks again, choose Open System Settings
A Screen Recording alert and an Accessibility Access alert can still appear, left over from when Naytto first asked, even though both switches are on. On each one, click Open System Settings, never Deny. Check that the switch next to Naytto is still on, then close System Settings.
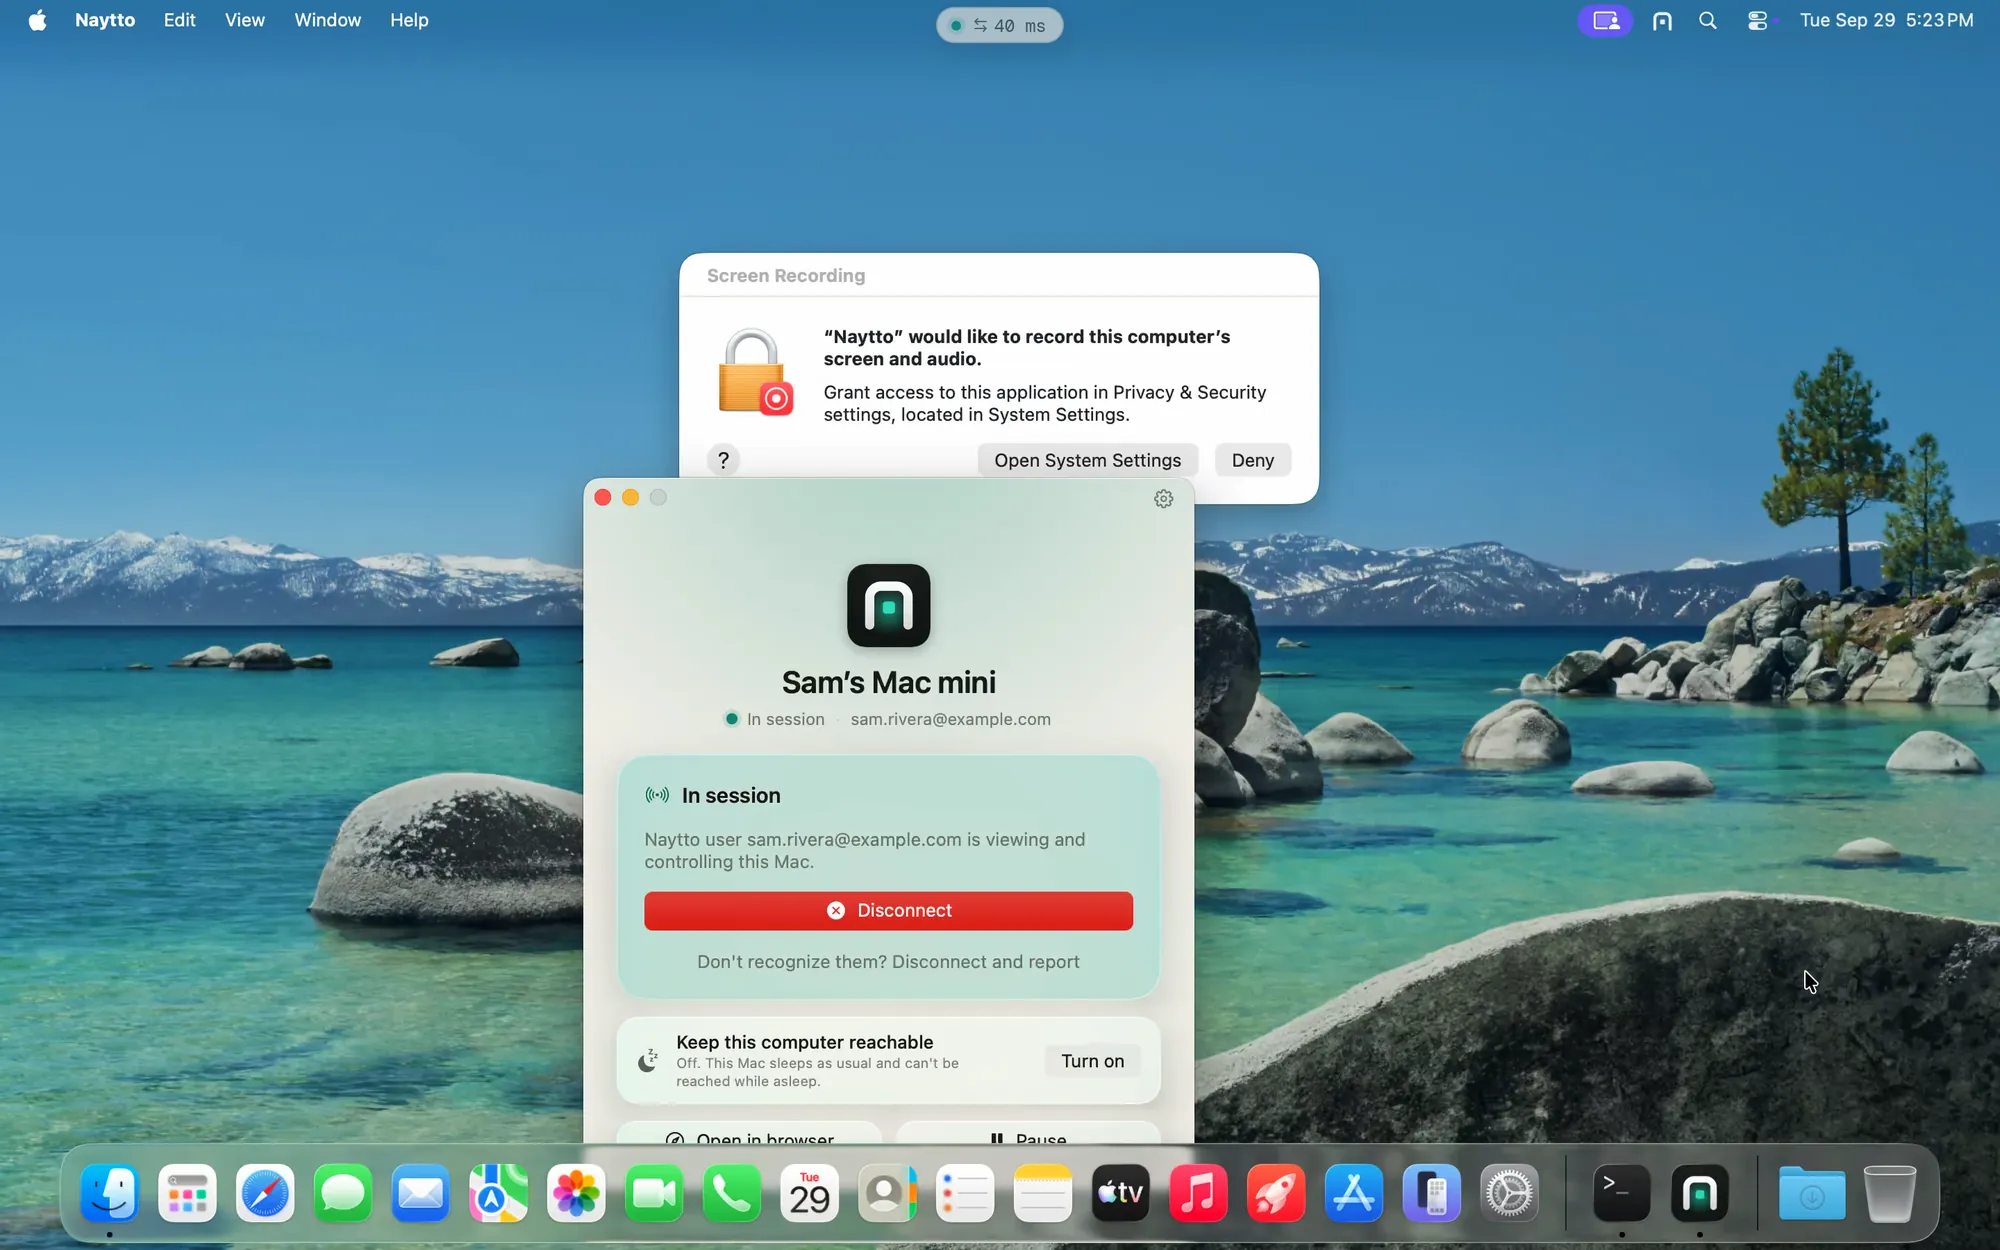
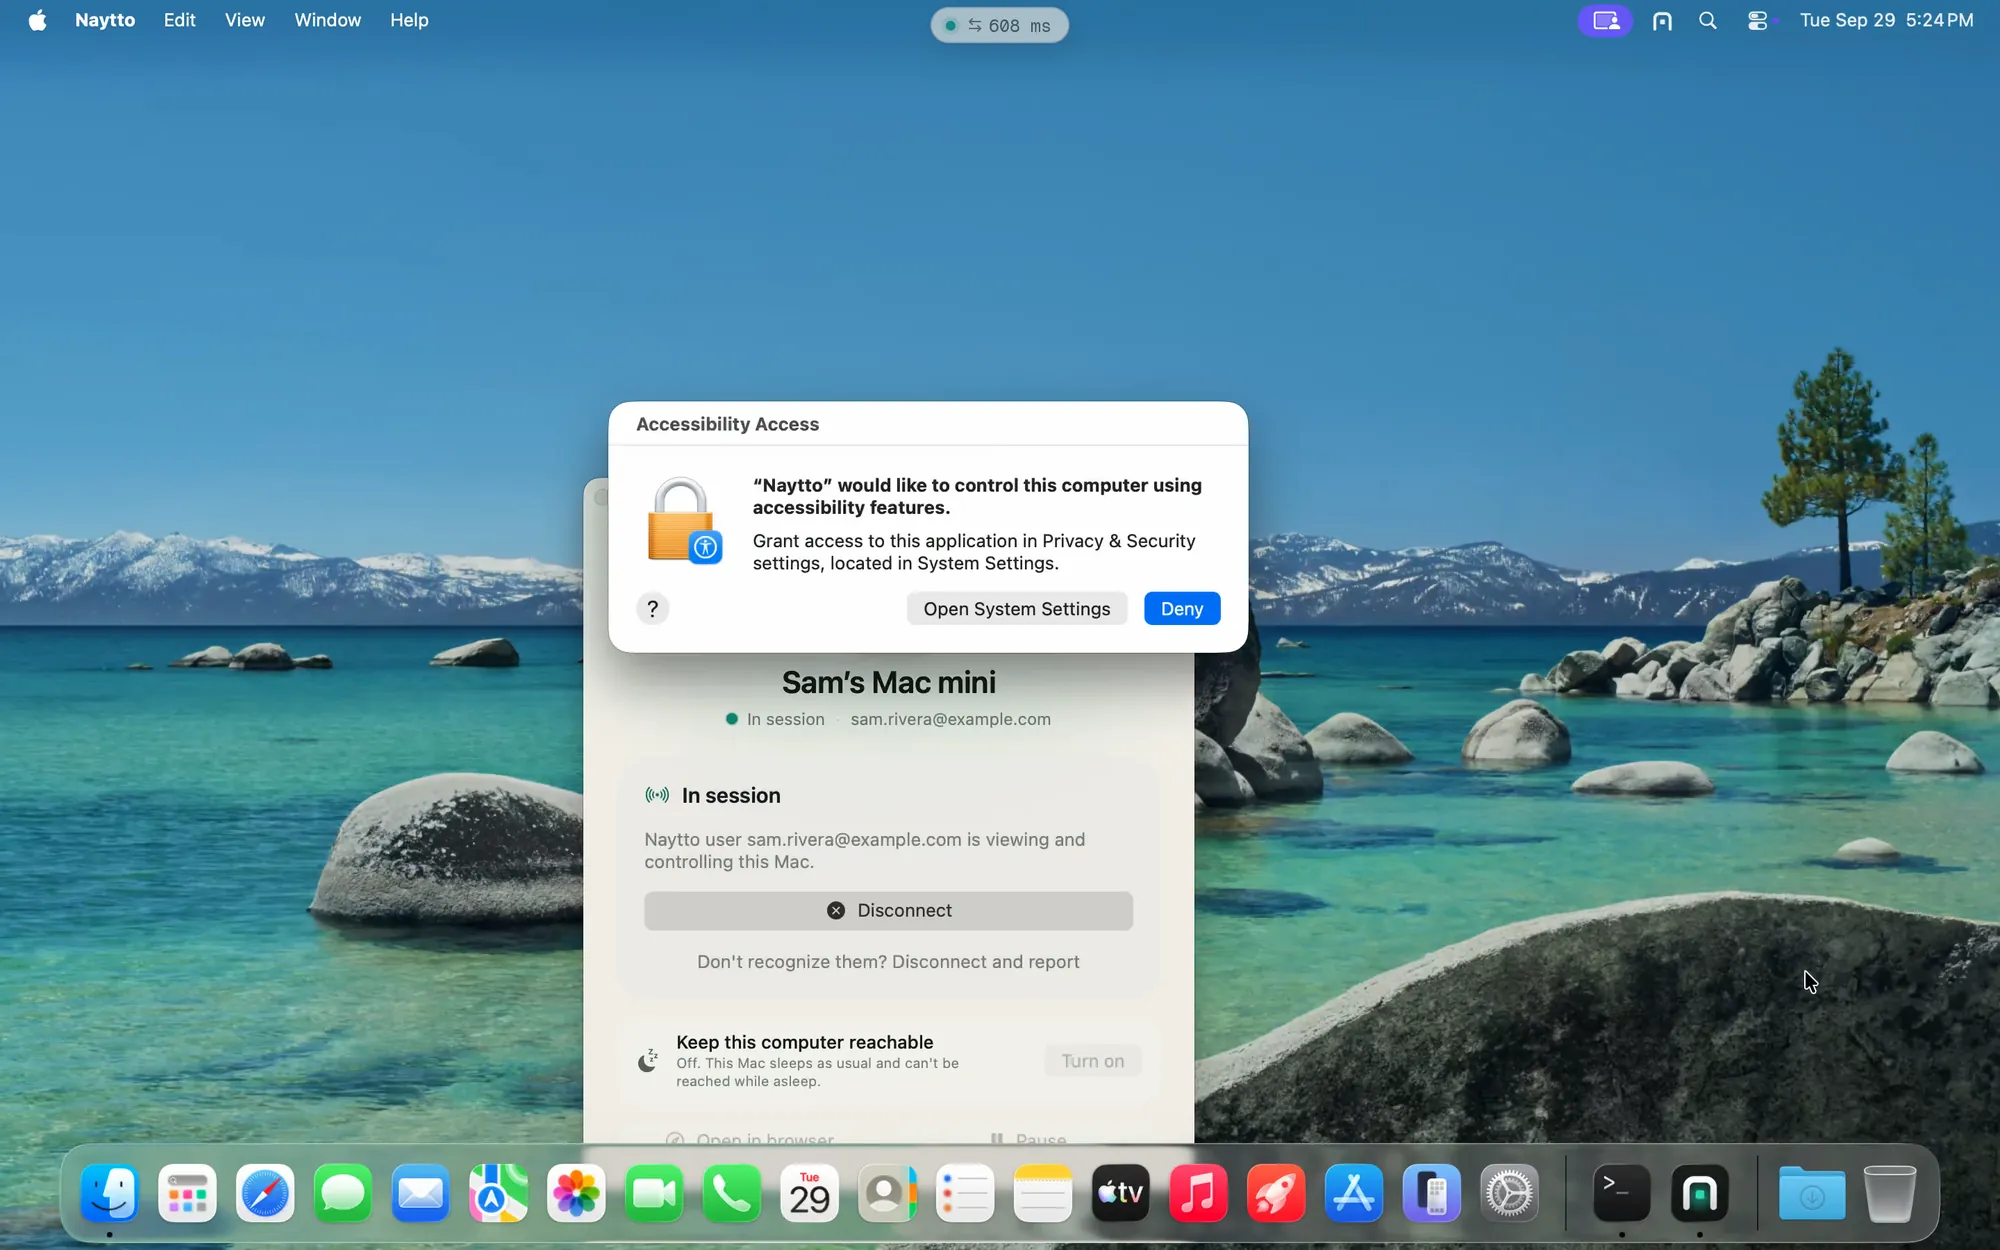
Don’t press Return on these. On Accessibility Access, Deny is the default button, so Return chooses it. Click Open System Settings instead.
23Use its desktop
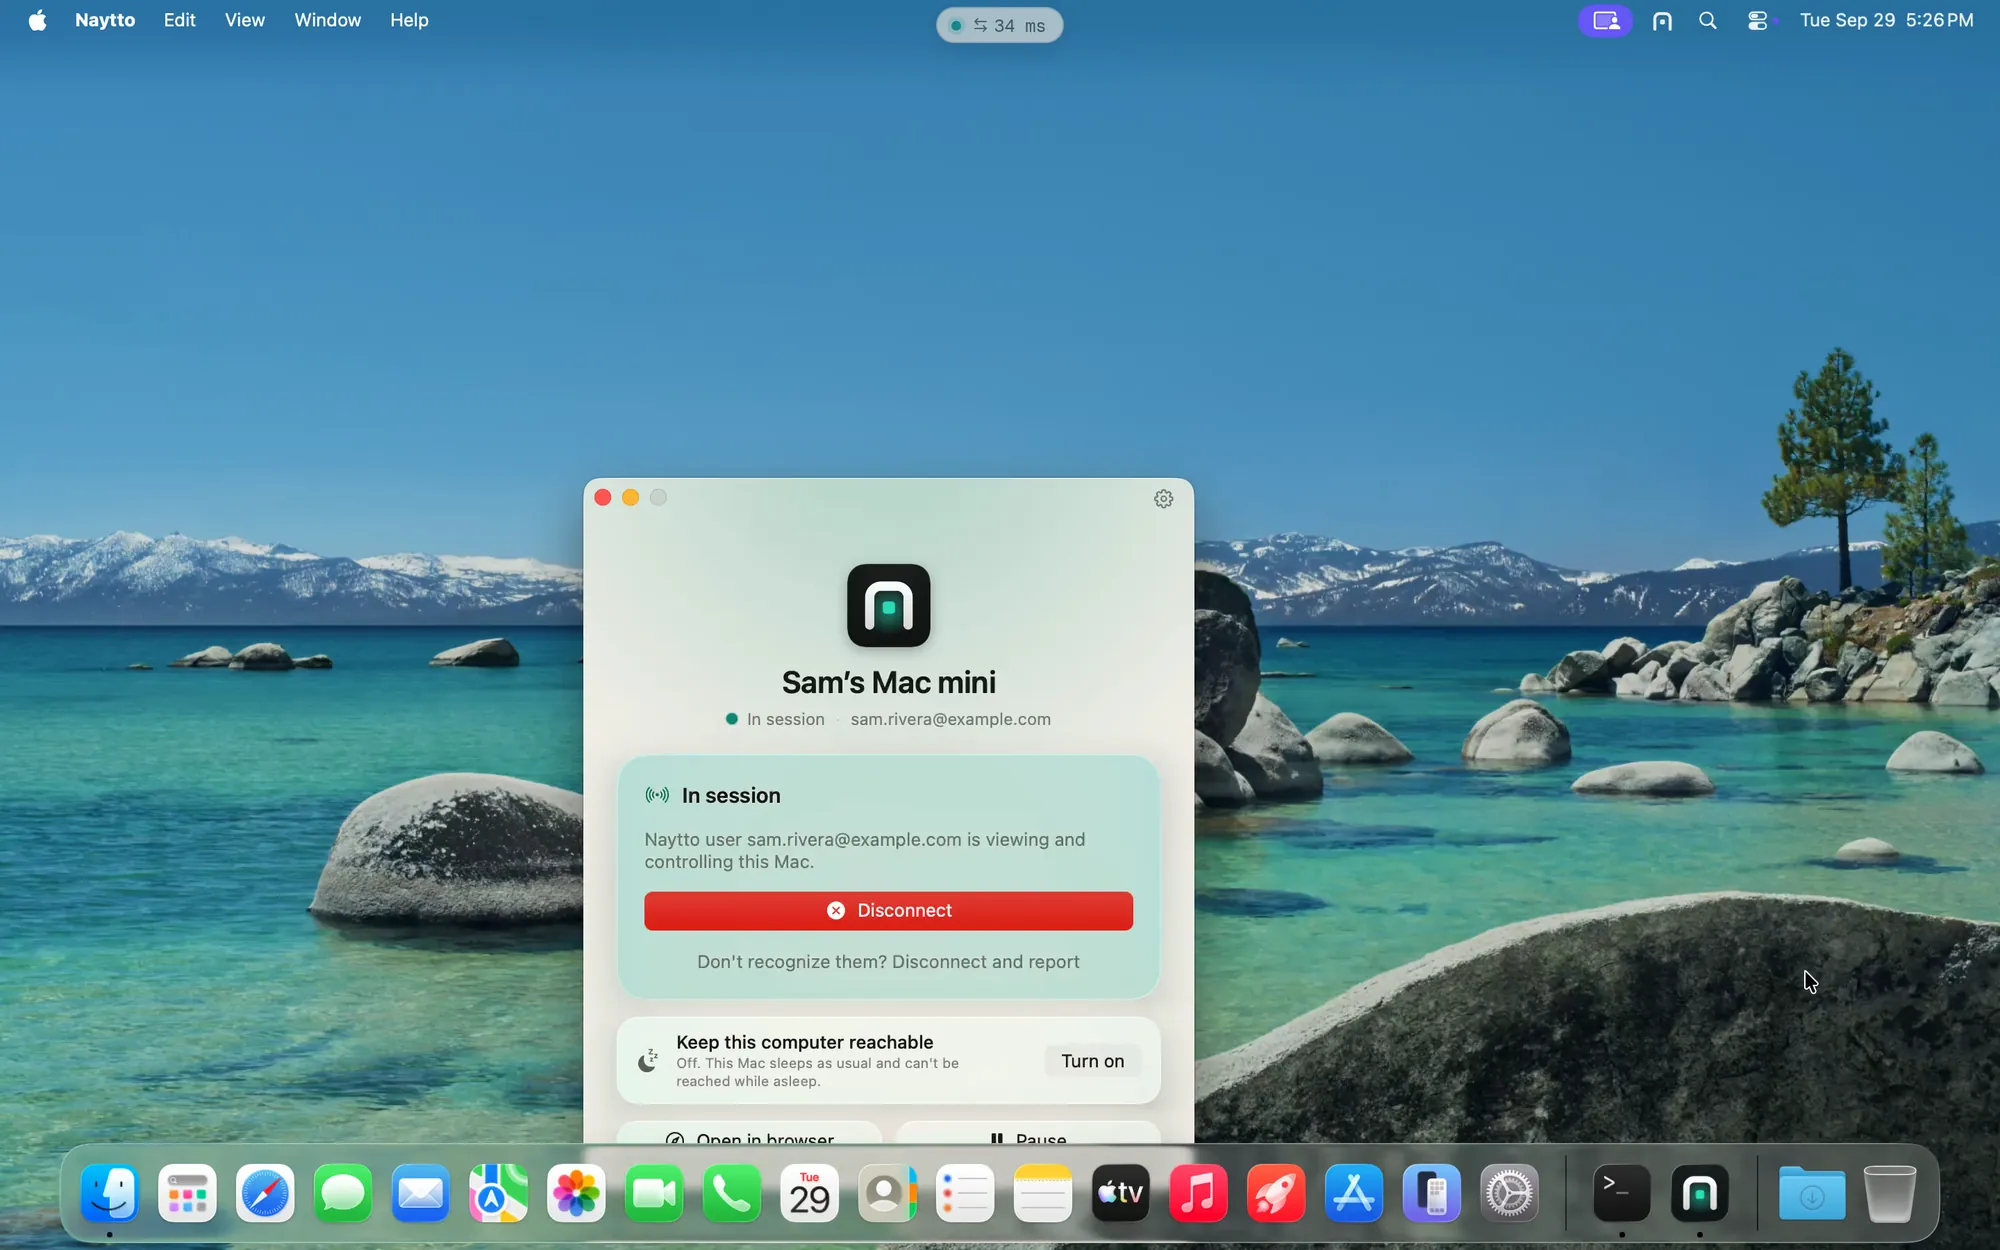
The Mac’s desktop fills the browser tab, and you use it as if you were in front of it. Hold Esc to take the keyboard and pointer back from the Mac. On the Mac, the Naytto window reads In session with your email address. The pill at the top of the tab shows the round trip in milliseconds; click it for the session toolbar and Disconnect.
24Test the connection
Choose Disconnect and wait until the Mac reads Available again. In your computers, select the Mac and choose Test connection, then Start test. A short session checks sign-in, the private relay, the screen and the keyboard and mouse, then ends; nothing is typed or clicked. The Clipboard and File transfer checks are optional. After a few seconds it says Ready to connect from another browser, with a check beside each of its five lines.
25Connect from your phone
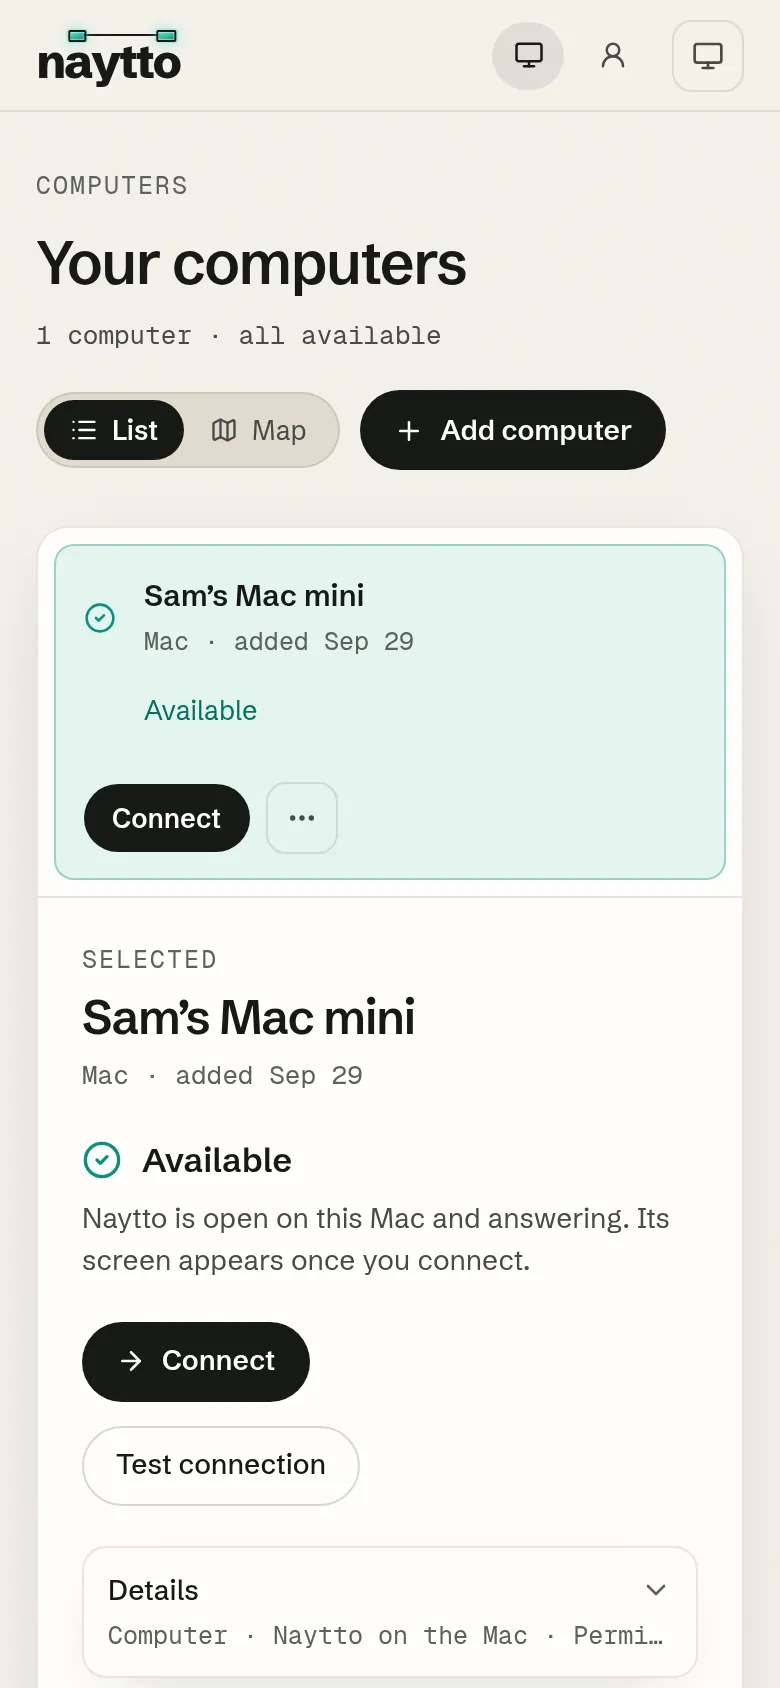
The same page works on a phone or tablet: sign in at app.naytto.com and choose Connect.
Every day
The naytto command does from Terminal, over SSH too, what the Naytto window and its menu bar icon do at the Mac.
26Check its status
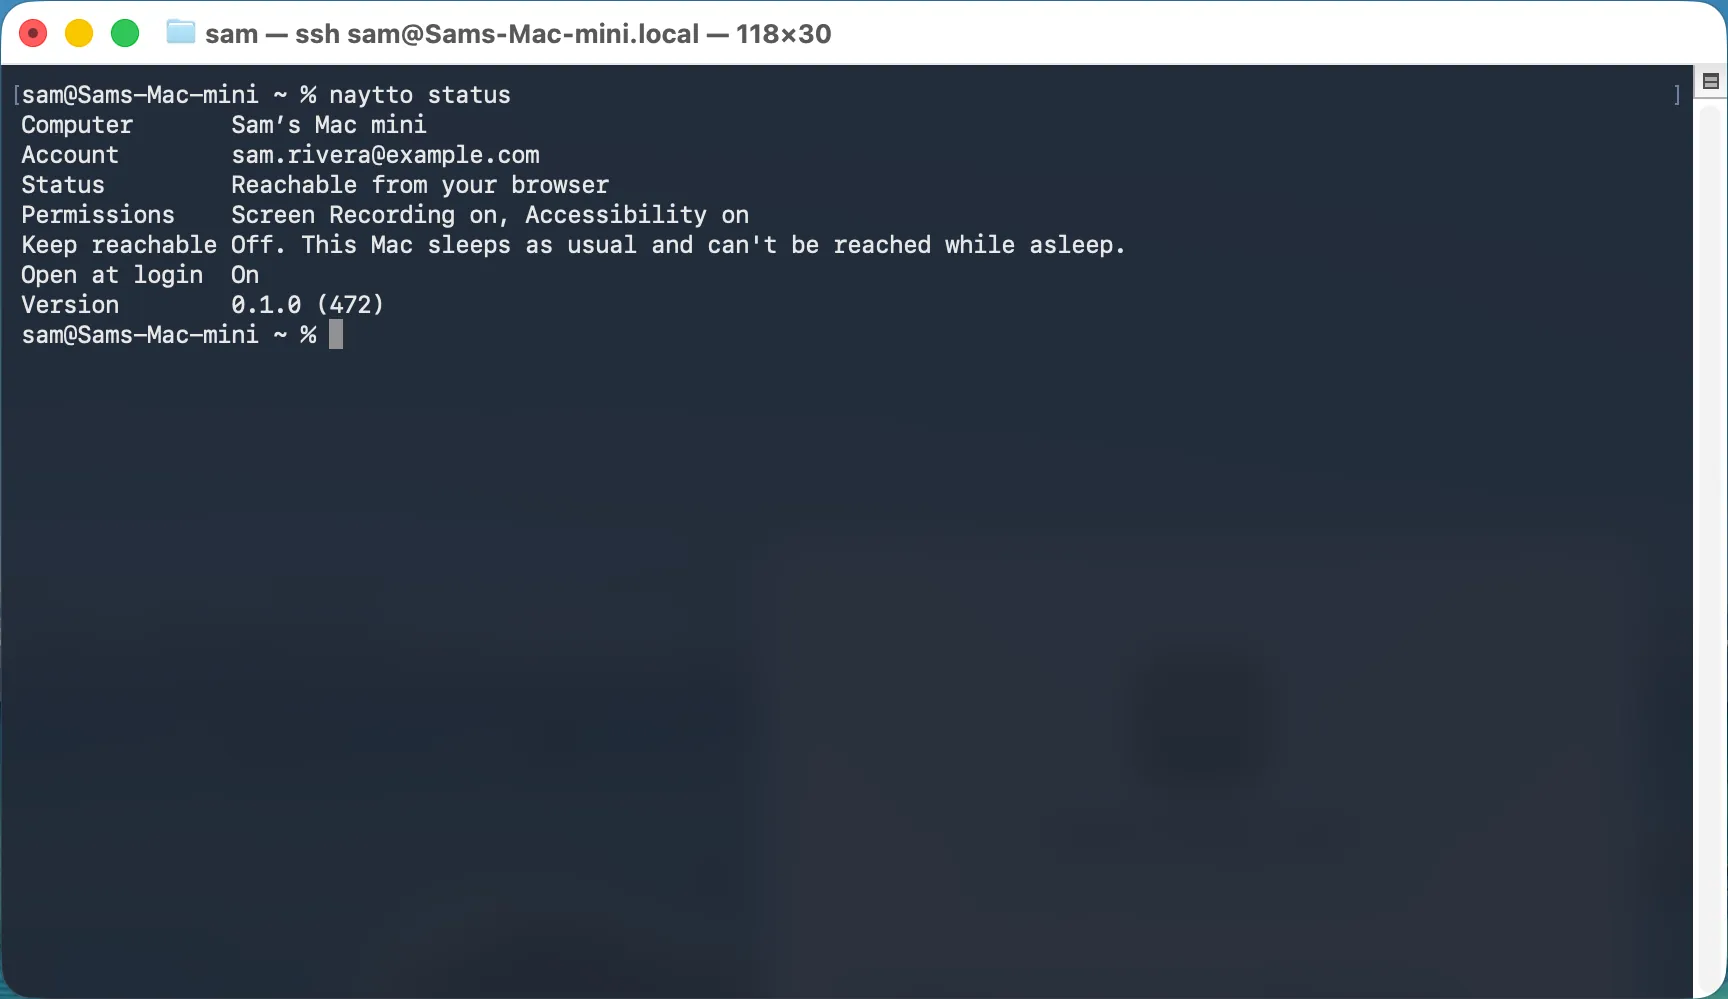
Run this whenever you want to know how Naytto is doing:
naytto status
Status         Reachable from your browser
Keep reachable Off. This Mac sleeps as usual and can't be reached while asleep.
Version        0.1.0 (472)
Status says whether browsers can reach the Mac, and Version which Naytto you have. Naytto updates itself. To update it now, run the install command again: it asks for the Mac’s password again and replaces the Naytto in Applications, and the Mac stays on your account.
27See every command
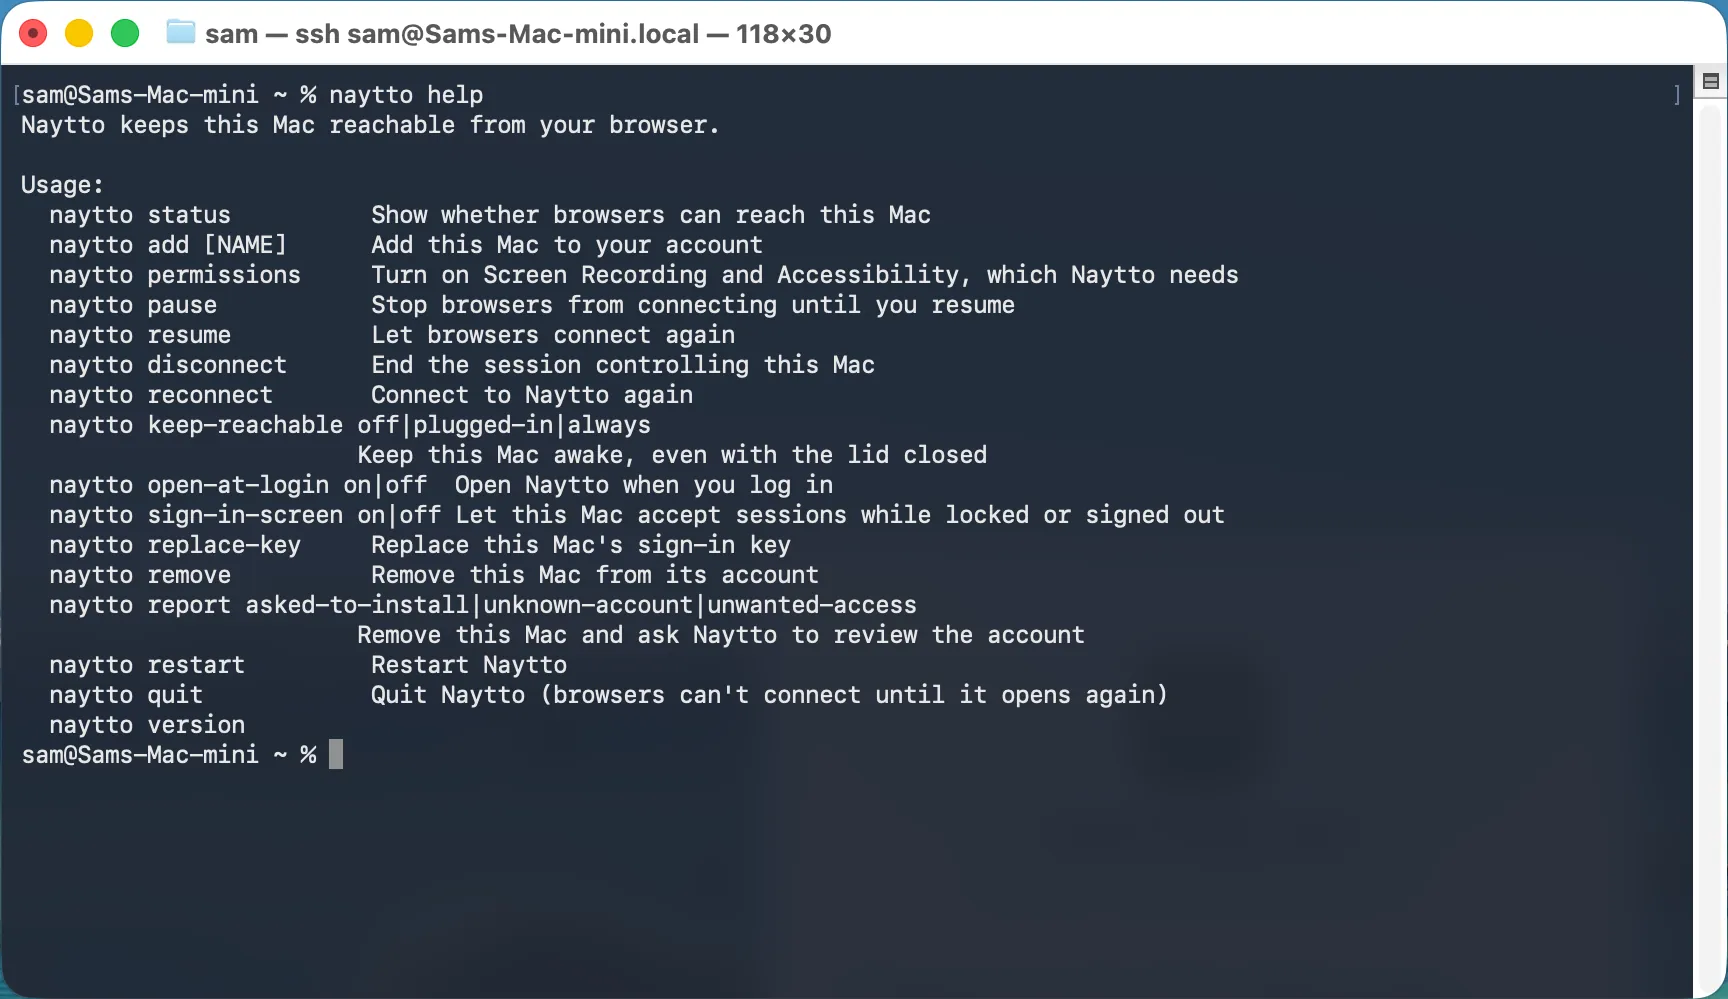
naytto help
It lists each command with a line on what it does. Among them, naytto sign-in-screen on lets the Mac accept sessions while it’s locked or signed out, and naytto open-at-login sets whether Naytto opens when you log in.
28Pause remote access
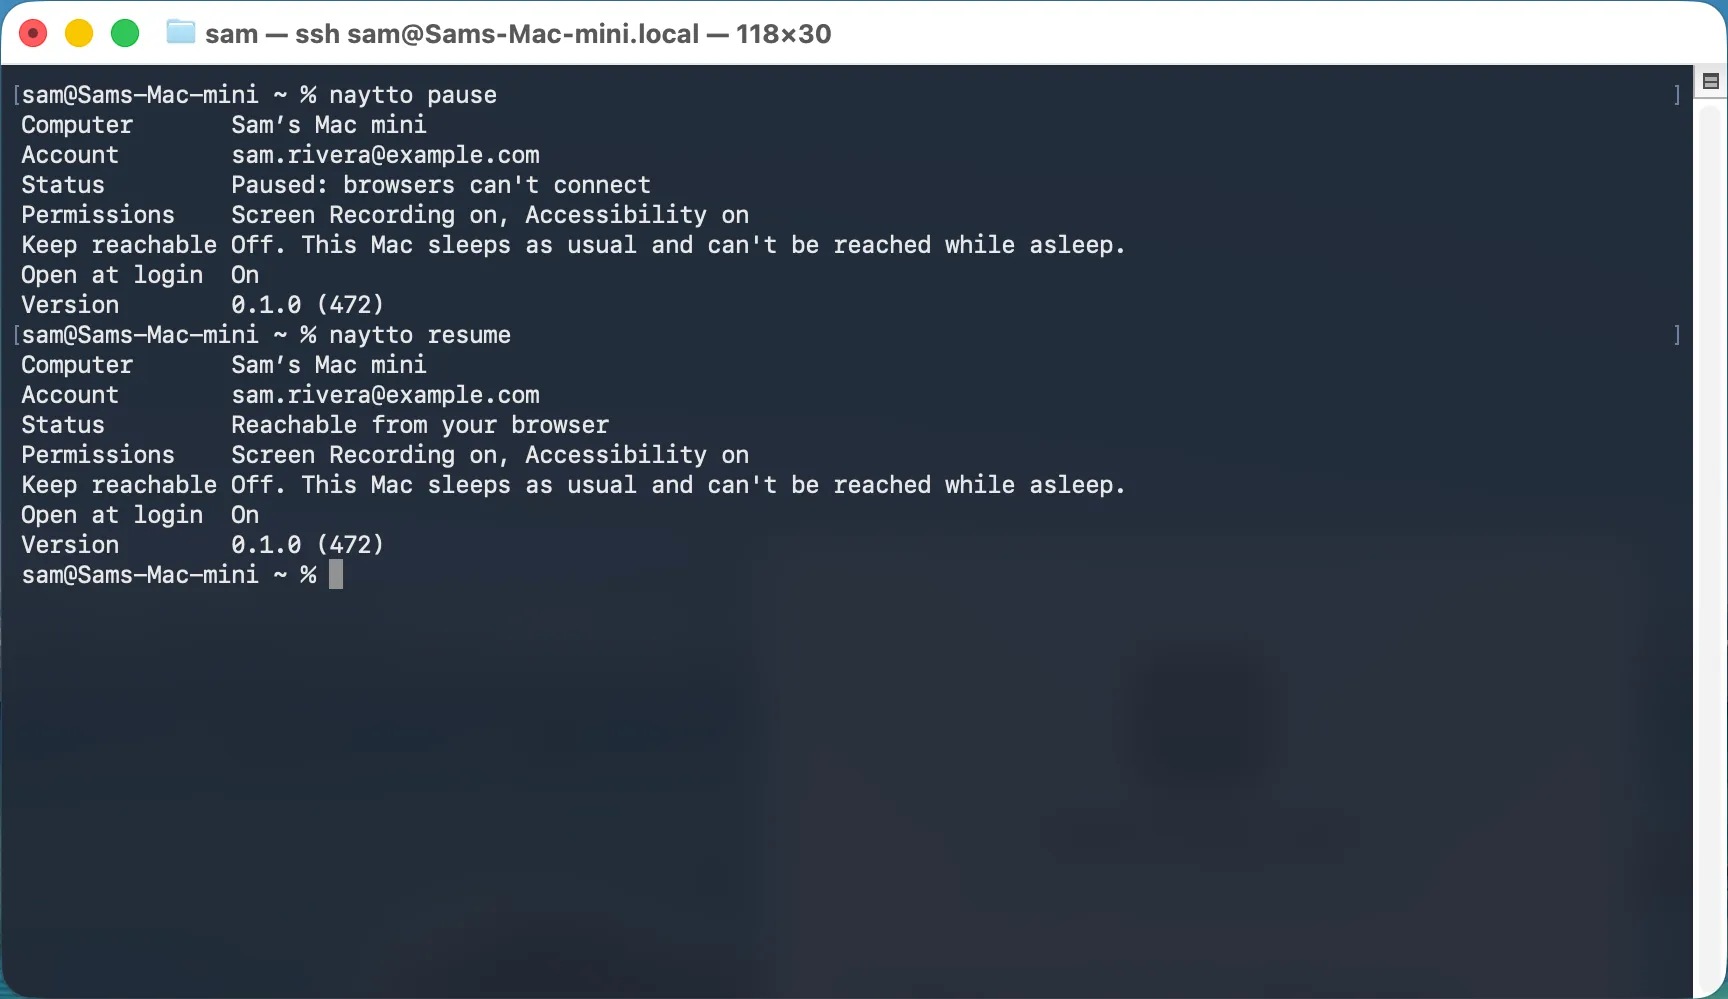
naytto pause
It prints the status, now Paused: browsers can't connect. In your computers, the Mac shows Remote access paused with no Connect button. Only someone on the Mac, at it or over SSH, can pause or resume. To let browsers connect again:
naytto resume
The status goes back to Reachable from your browser. To end a session without pausing, run naytto disconnect.
29Keep the Mac reachable
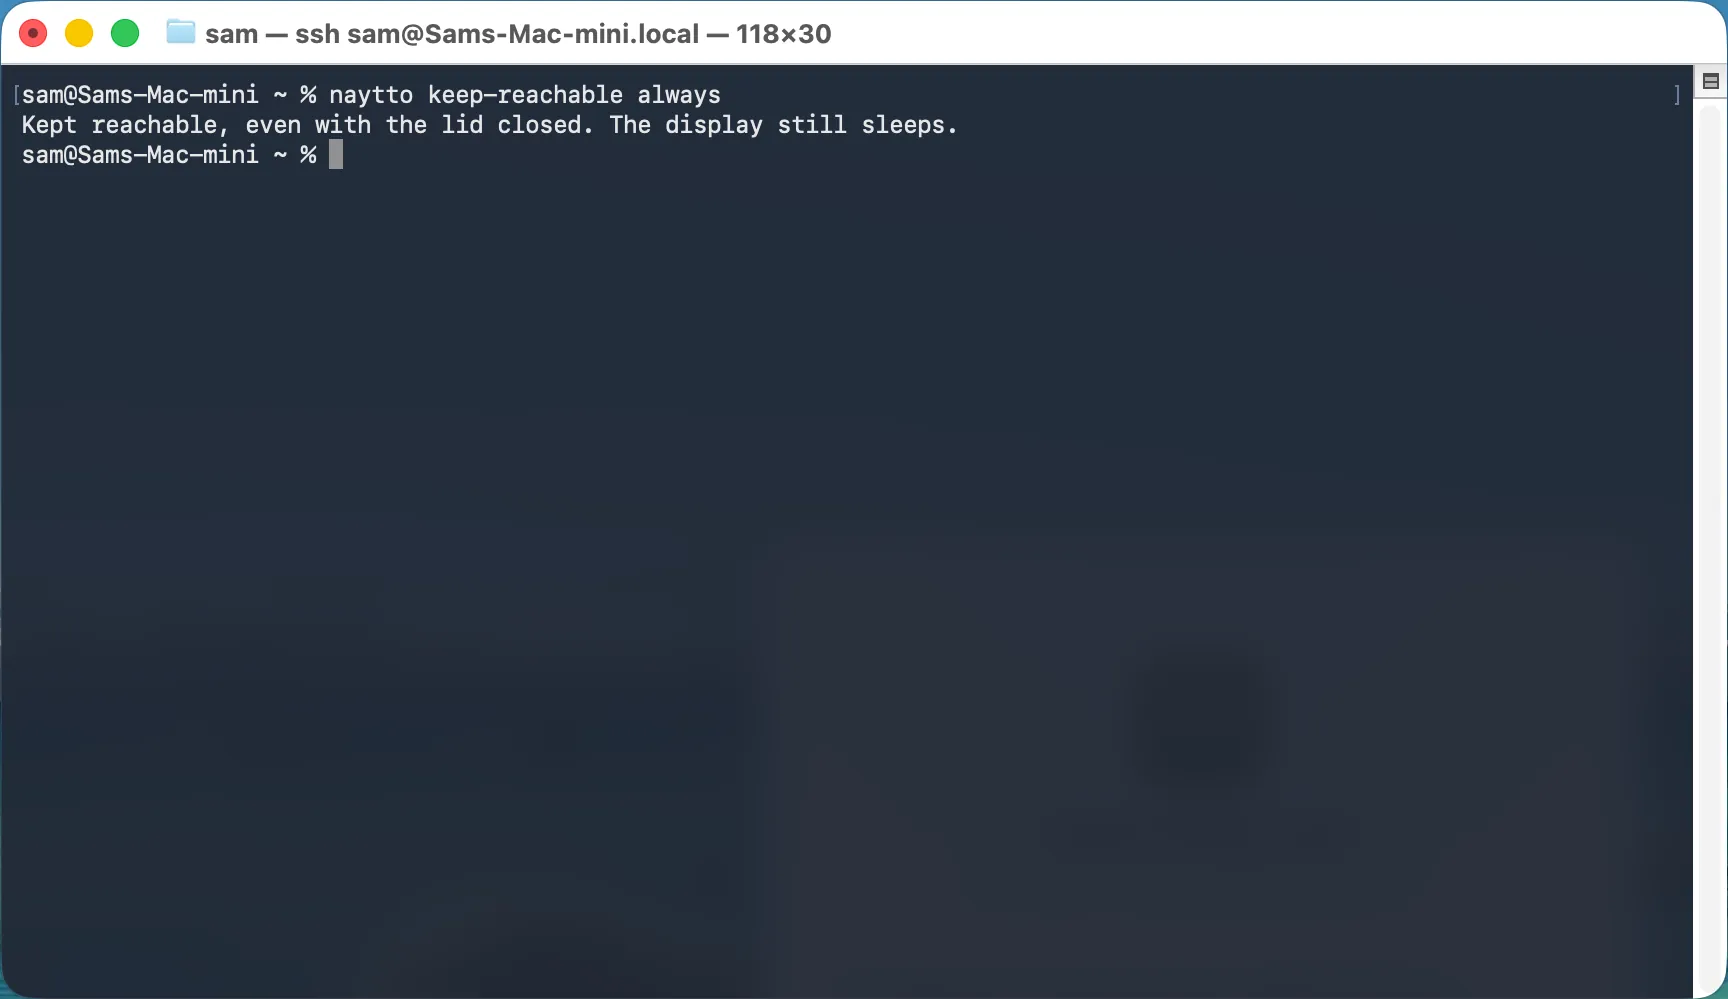
A Mac that’s asleep can’t be reached. Keep it awake, even with the lid closed:
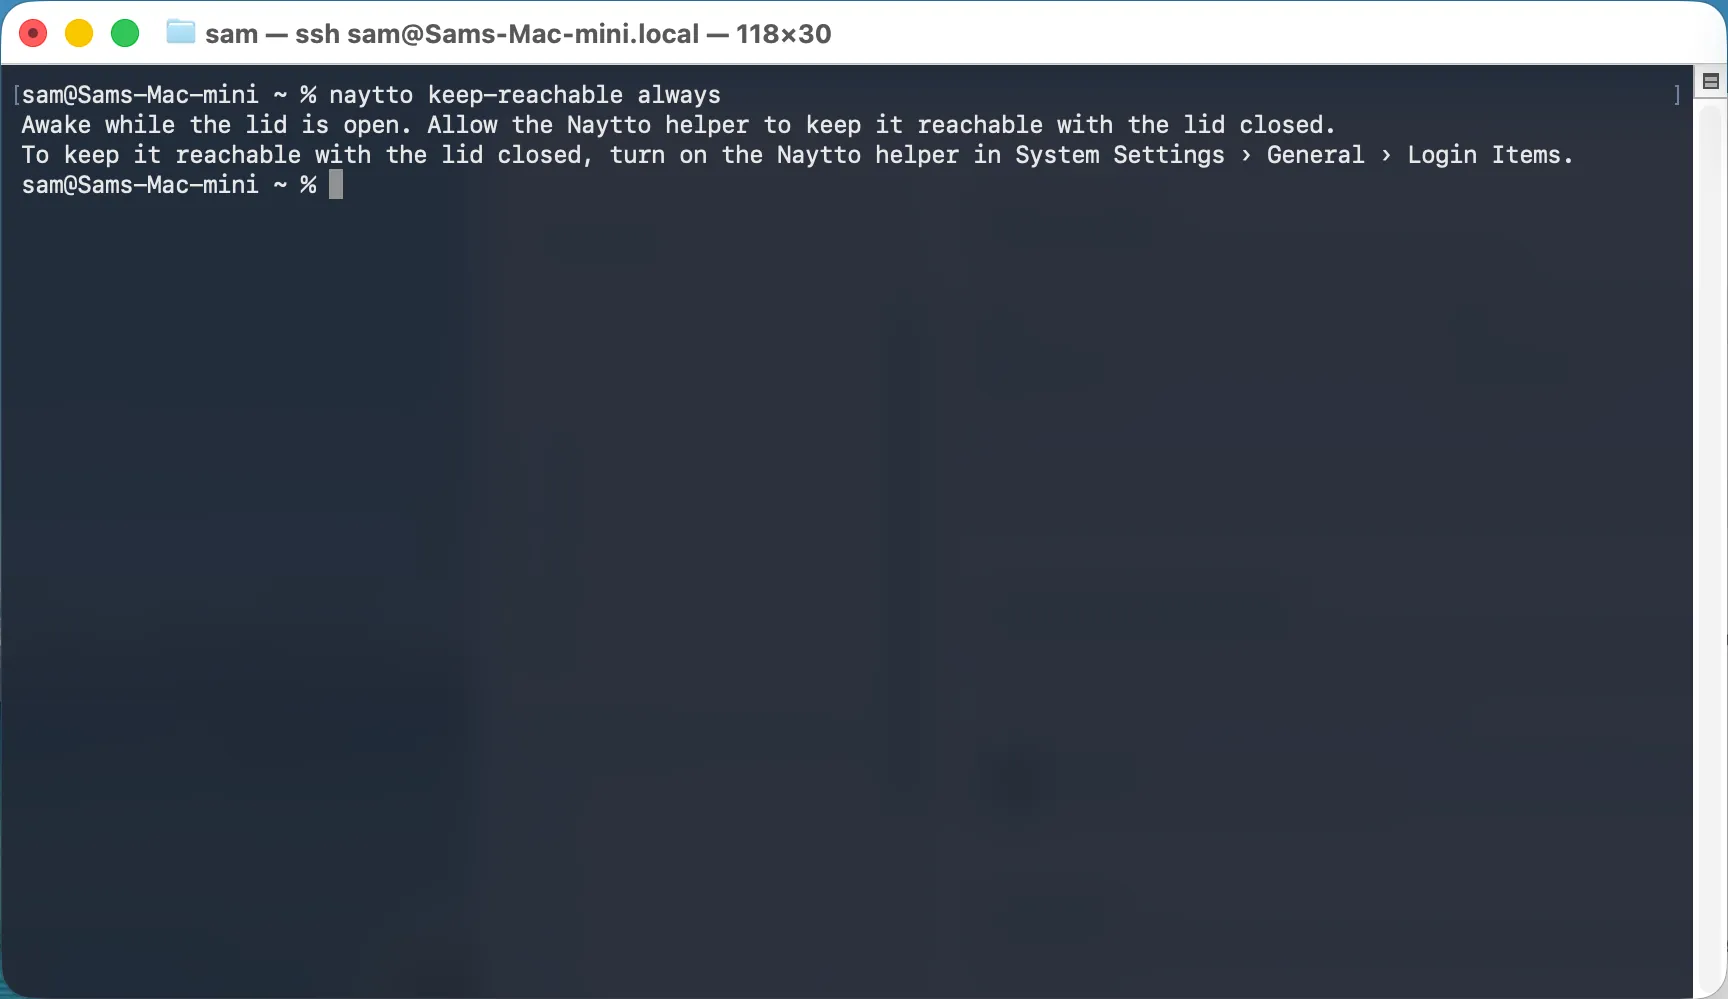
naytto keep-reachable always
Use plugged-in instead of always to keep it reachable only while it’s plugged in. The first time, it says:
Awake while the lid is open. Allow the Naytto helper to keep it reachable with the lid closed.
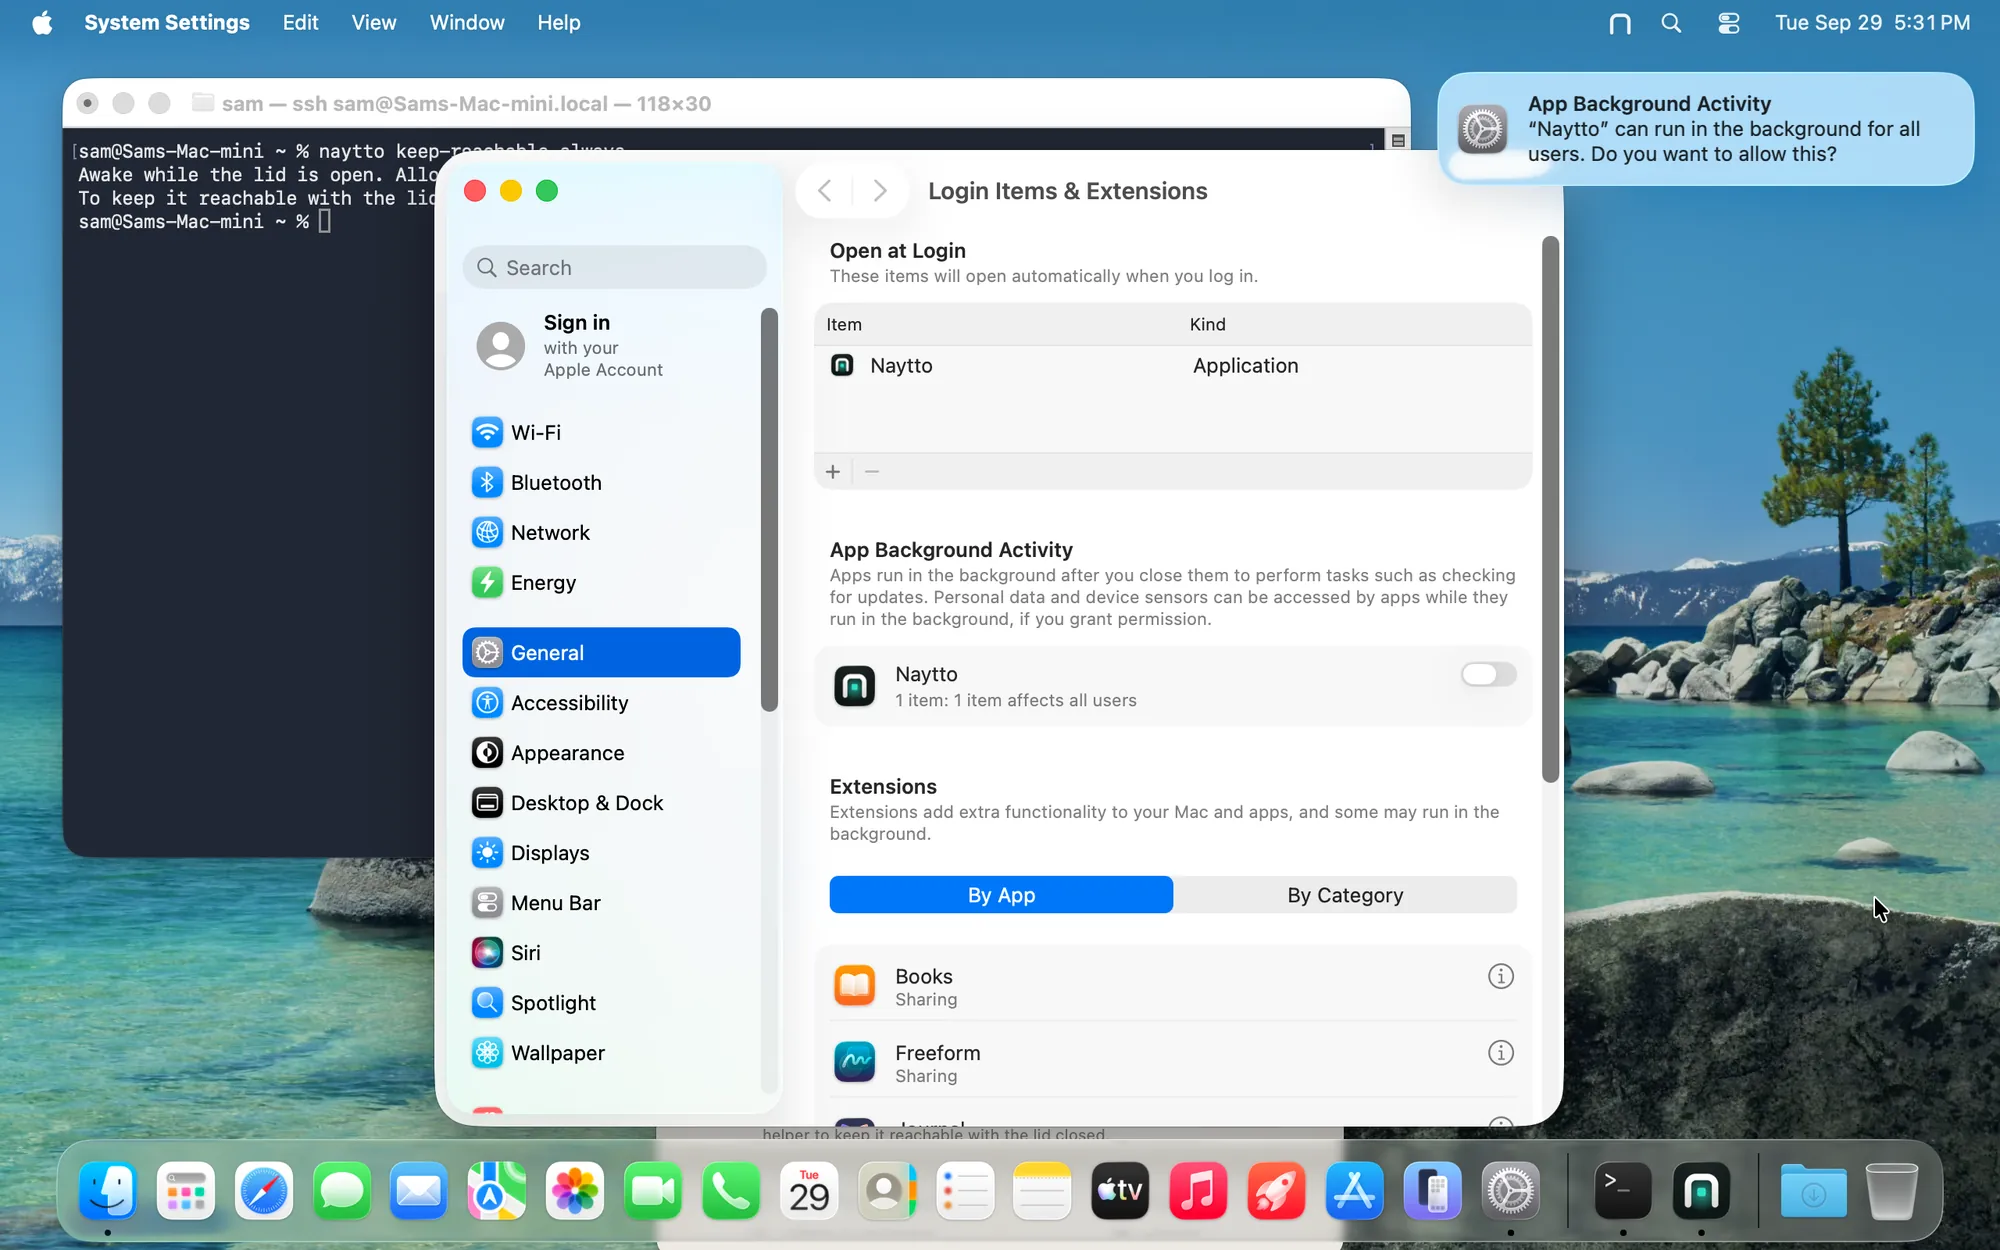
It also opens System Settings at Login Items & Extensions on the Mac’s screen. Click the switch next to Naytto under App Background Activity, then enter the password and click Modify Settings. On a Mac with no display, do this from another Mac through the Mac’s Screen Sharing: open the Screen Sharing app, connect to the Mac by its name, such as Sams-Mac-mini.local, and sign in with its account name and password.
30Run it again
With the helper allowed, run naytto keep-reachable always once more:
Kept reachable, even with the lid closed. The display still sleeps.
naytto keep-reachable off lets the Mac sleep as usual again.
31Remove the Mac from your account
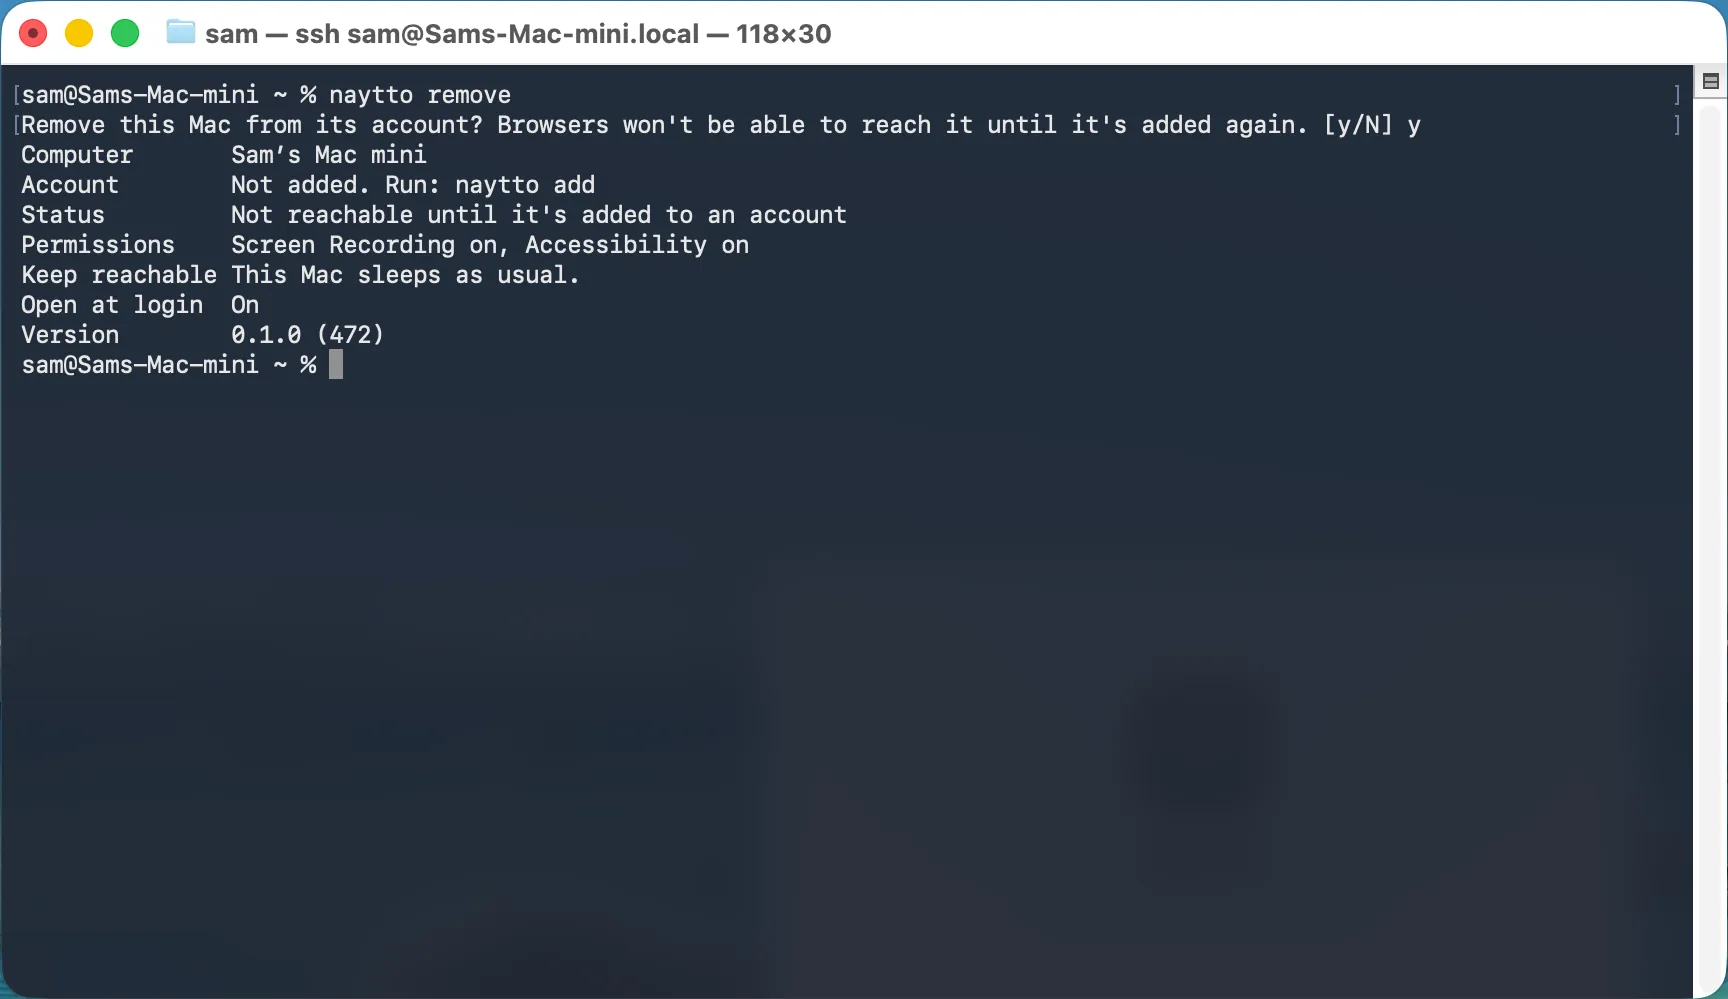
naytto remove
It asks first, and the default is no. Type y and press Return:
Remove this Mac from its account? Browsers won't be able to reach it until it's added again. [y/N] y
The status that follows reads Not added. Run: naytto add next to Account, and your computers no longer lists the Mac. Keep reachable pauses while the Mac isn’t on an account and resumes when you add it again; run naytto keep-reachable off to switch it off. Naytto stays installed: to use the Mac again, run naytto add and approve it as before.
Away from the Mac? In your computers, in any browser, choose … next to it, then Remove from account; any session on it ends at once.
If something isn’t right
- No one is signed in at the Mac. The command stops if nobody is signed in at the Mac’s screen, or someone else is. Sign in at the Mac as yourself once, or set up automatic login in System Settings › Users & Groups, then run
naytto add. With FileVault on, macOS doesn’t offer automatic login, so after every restart someone has to sign in at the Mac first. - Permission needed. One or both permissions are off. Run
naytto permissionsand allow them at the Mac, or turn on Screen Sharing at the Mac so your computers offers Finish setup. If Screen Recording is on and Terminal is still waiting, runnaytto restart. Then choose Check again in your computers. - No Finish setup button, or a black screen. Your computers offers Finish setup only while Screen Sharing is on. Switch it on at the Mac in System Settings › General › Sharing; switched on any other way, it shows a black screen. Or plug in a display, keyboard and mouse for the two permissions. If Screen Sharing is on but Finish setup isn’t offered,
naytto permissionsover SSH prints another way: from another Mac, in the Finder, choose Go › Connect to Server and enter the address it prints. - The code ran out. It works for 10 minutes. Then Terminal says The code expired. Start again. Run
naytto addfor a new code. For a sign-in code that expired, choose Use a different email or send a new code. - Asleep, Not responding or Can’t reach. The Mac is asleep, off or offline, or Naytto isn’t open. Naytto can’t wake a sleeping Mac yet. Wake it, check
naytto status, then set upnaytto keep-reachableso it stays available. - Remote access paused. Someone paused it on the Mac. Run
naytto resume, or choose Resume Remote Access in Naytto’s menu bar icon there.
Still stuck? Get help from a person.